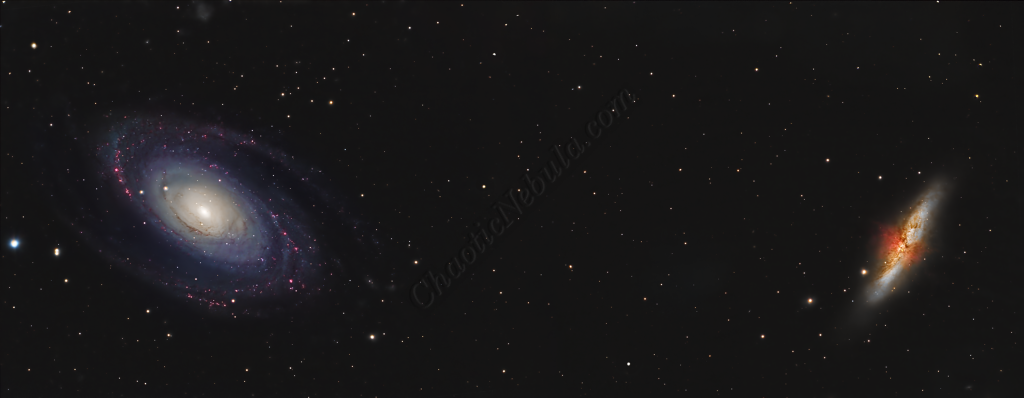
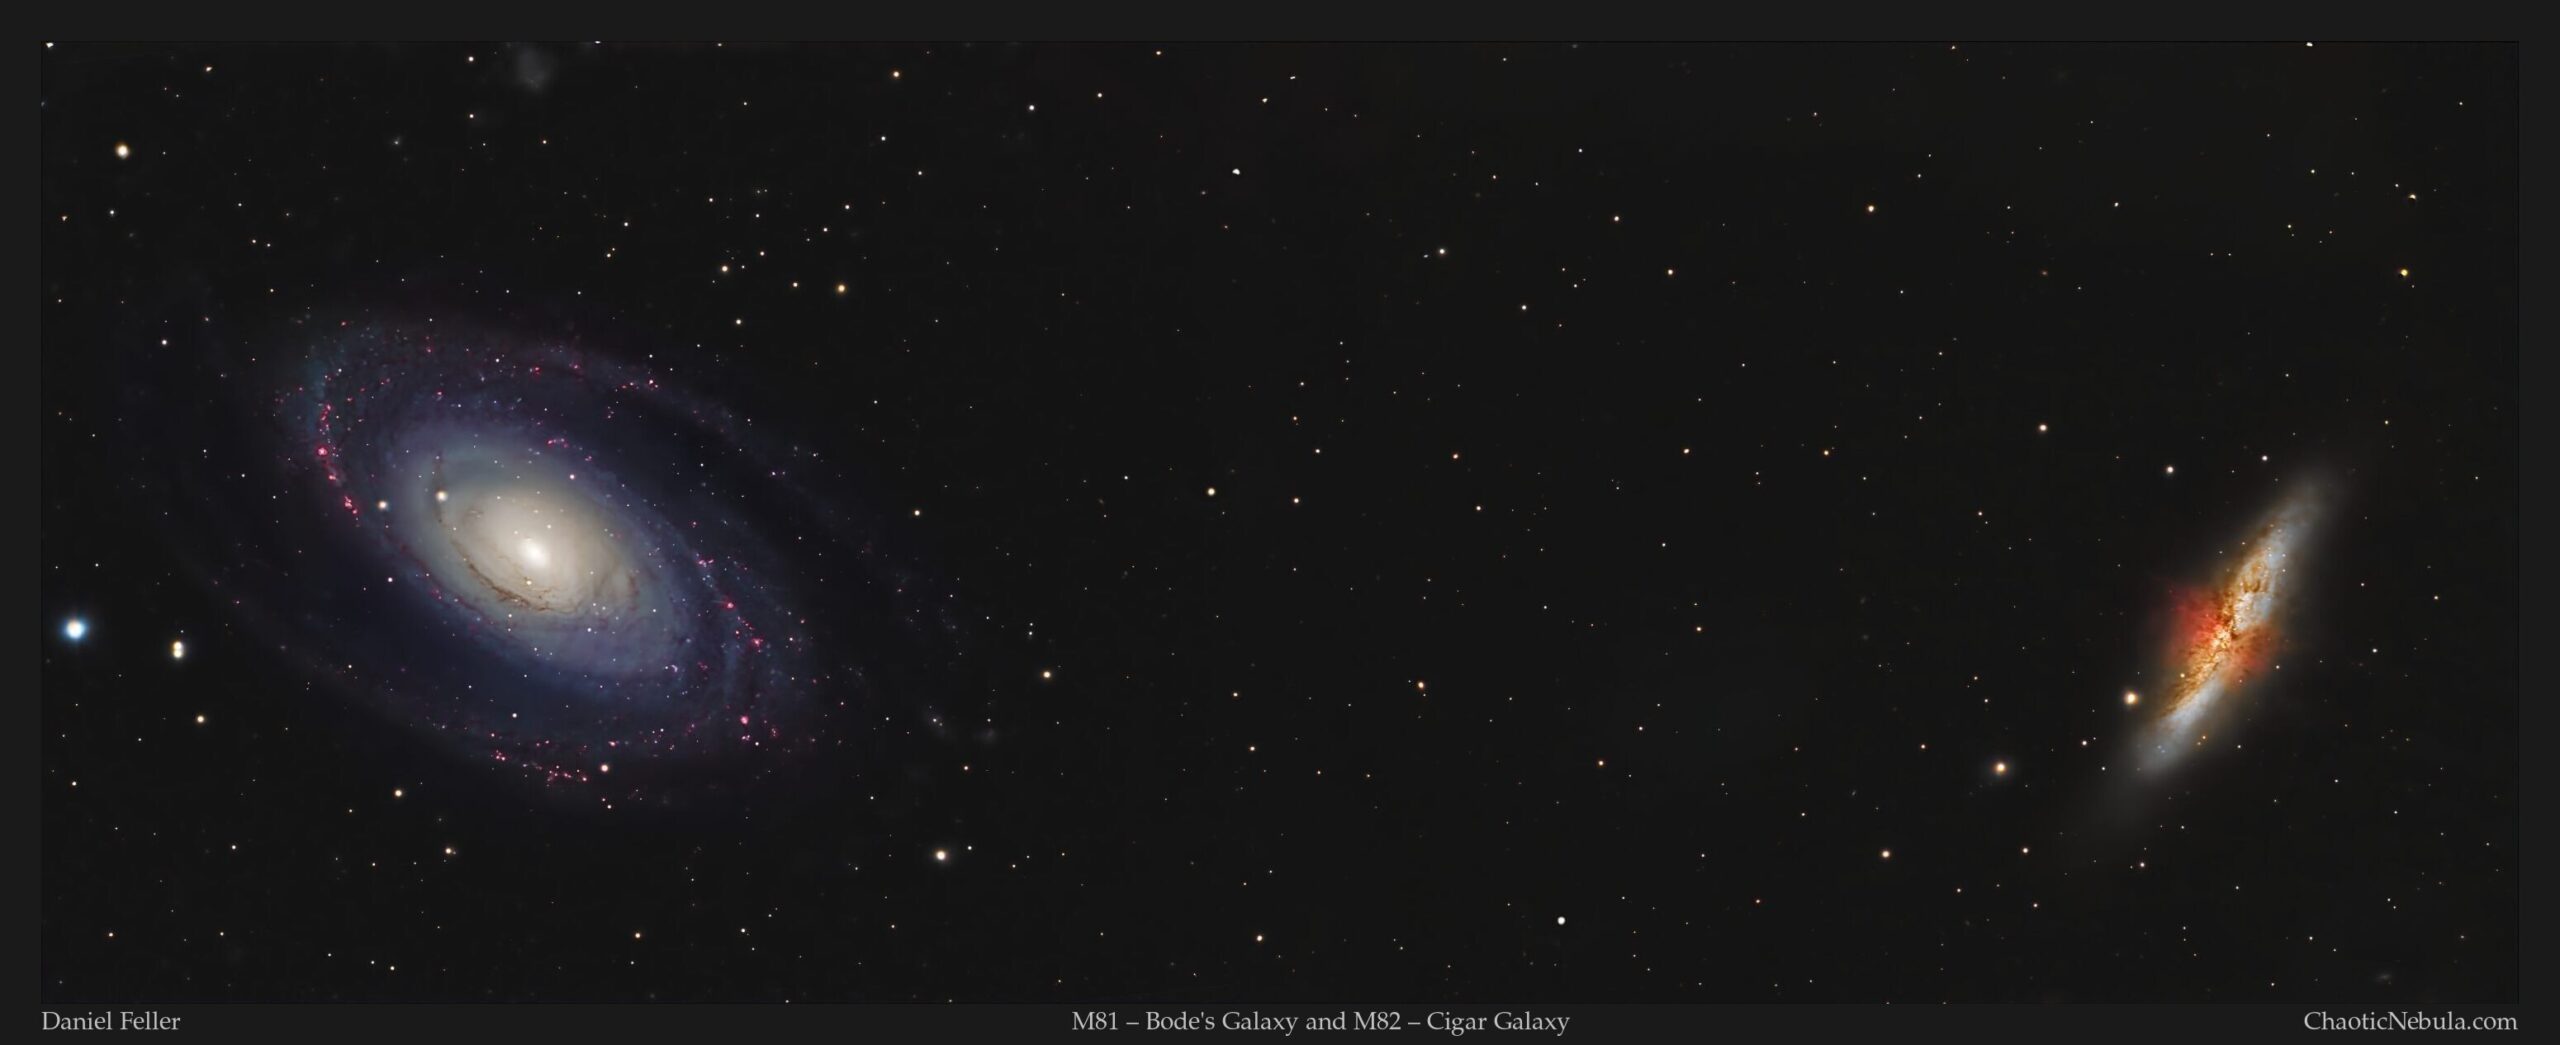
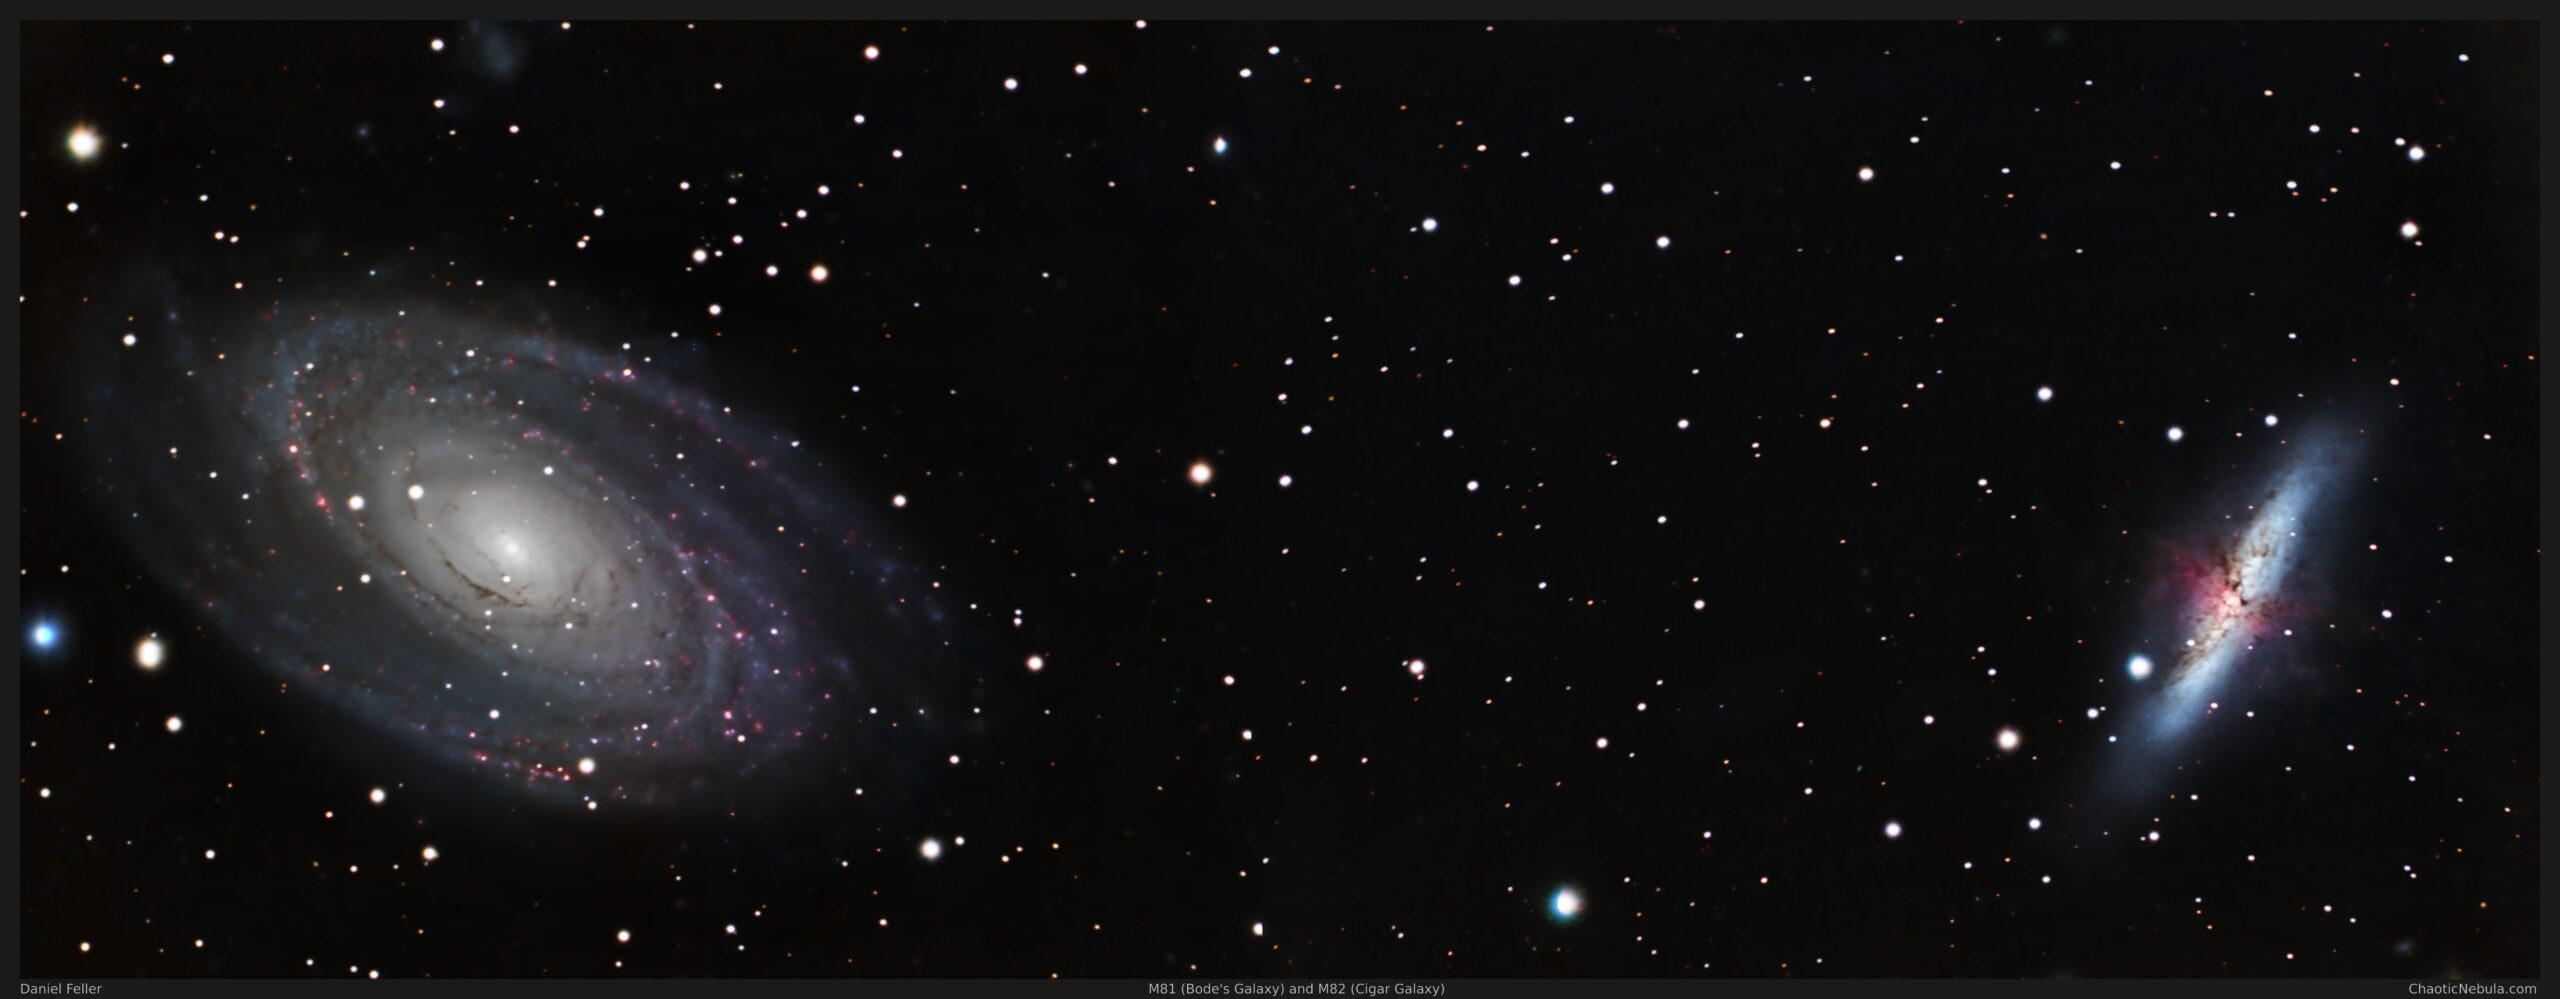
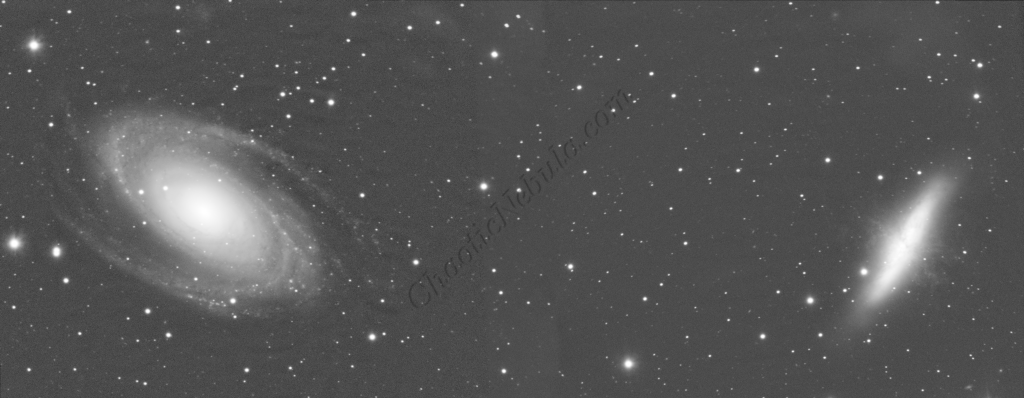
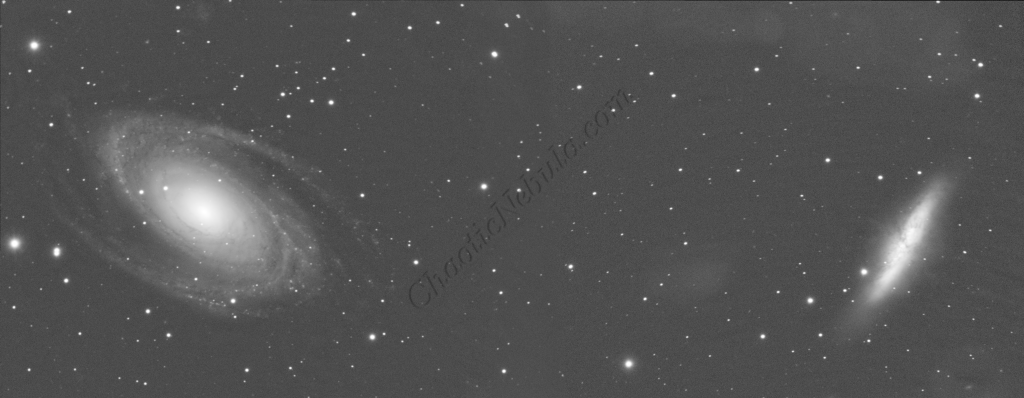
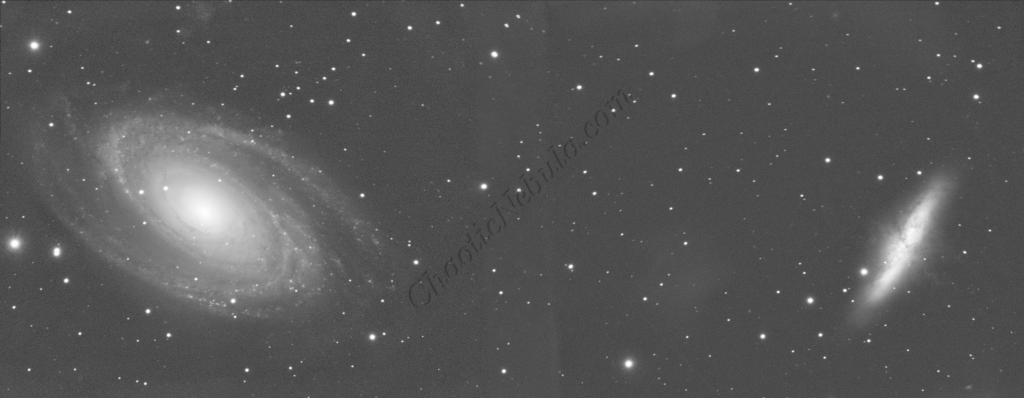
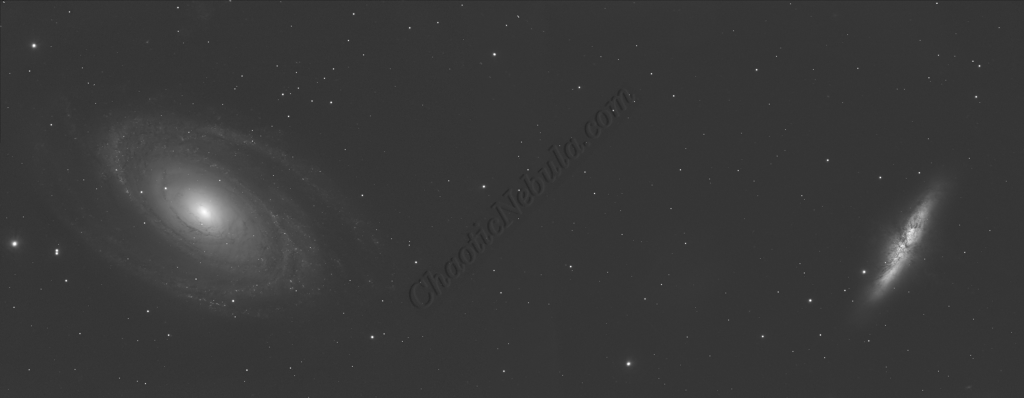
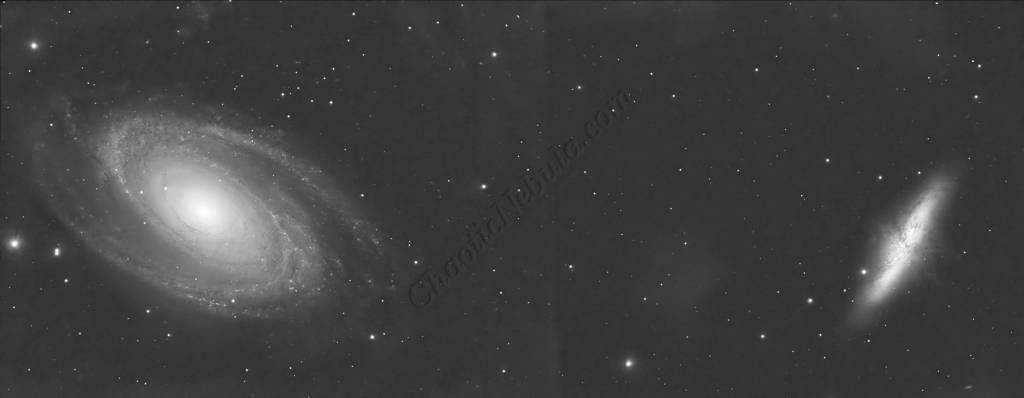
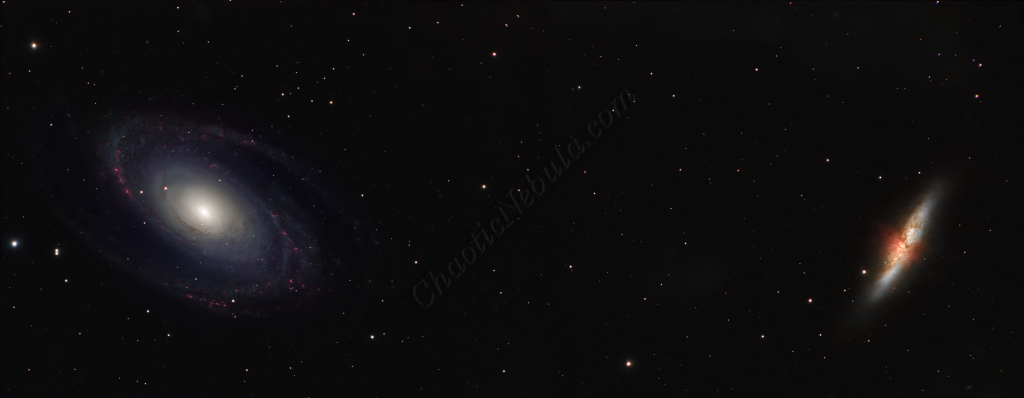
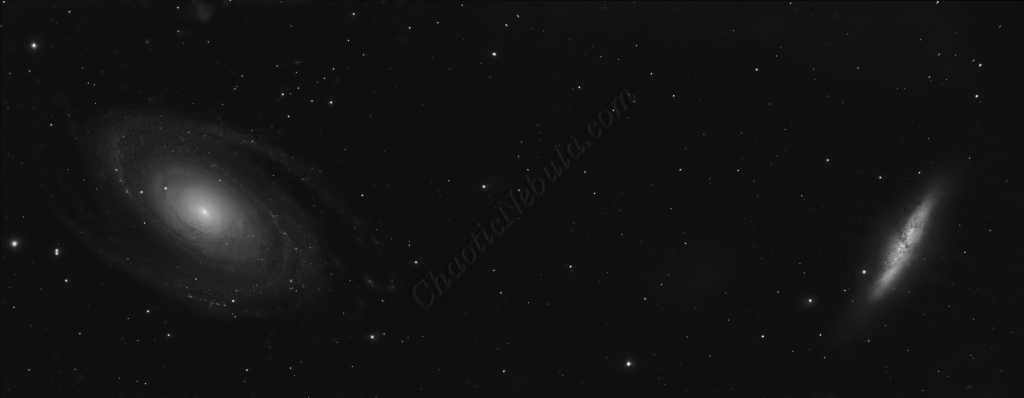
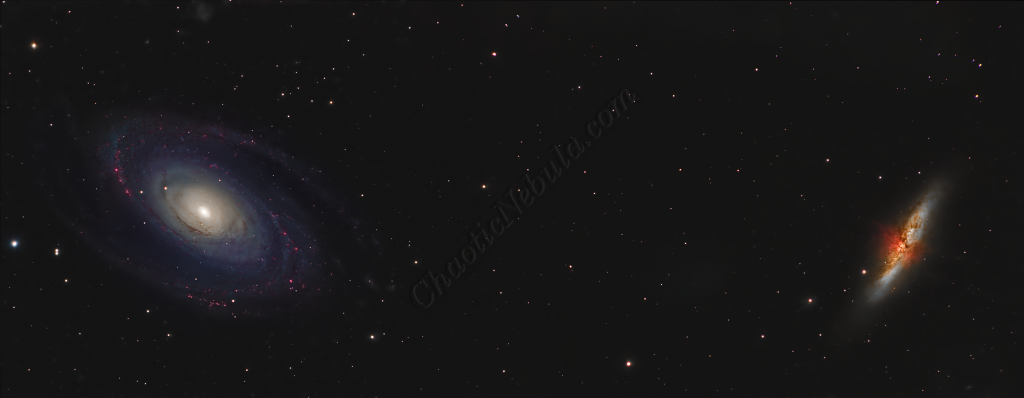
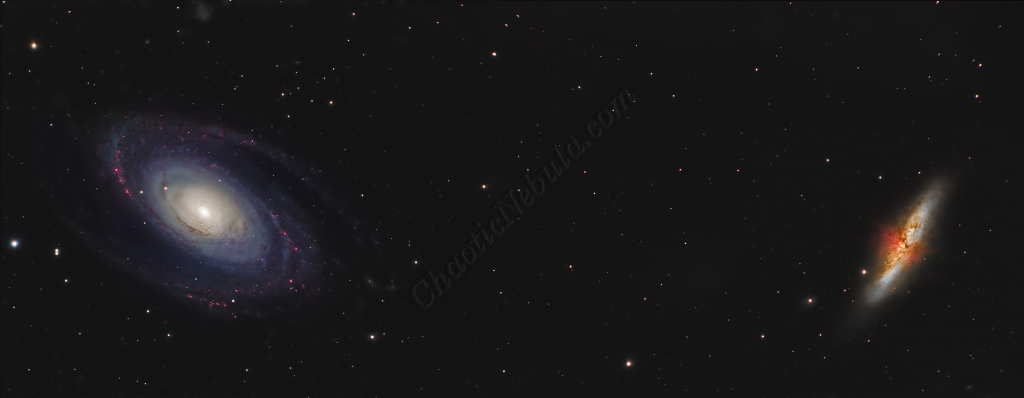
Nestled within the constellation Ursa Major (the Great Bear) lies a notable pair of galaxies: M81 and M82.
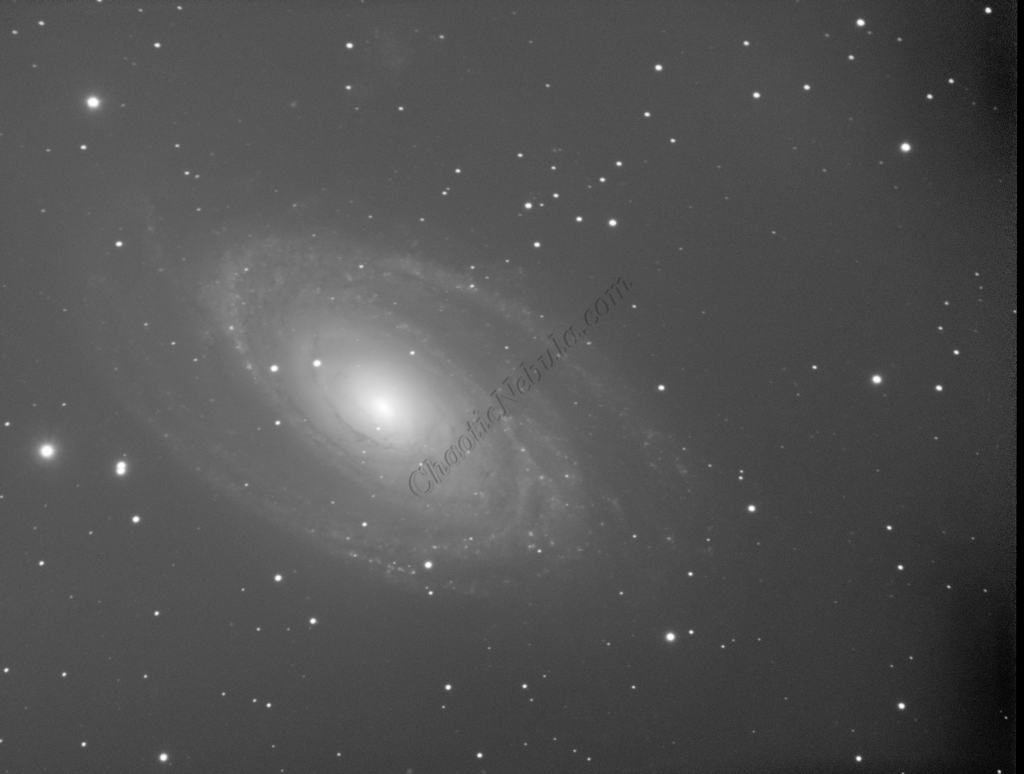
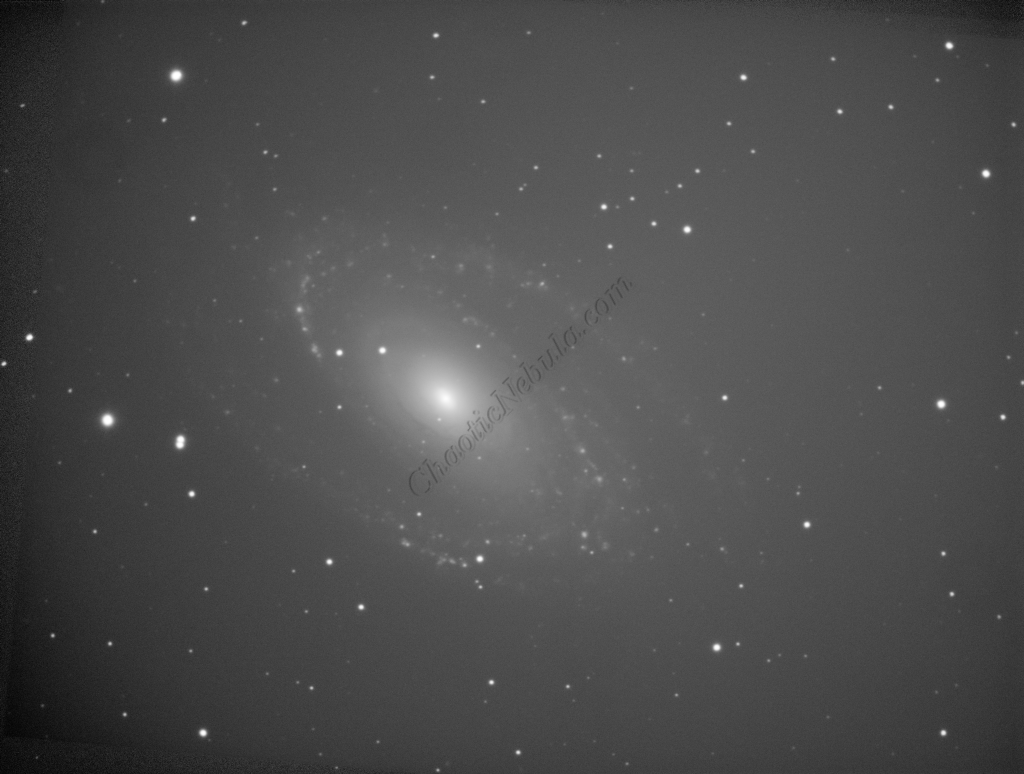
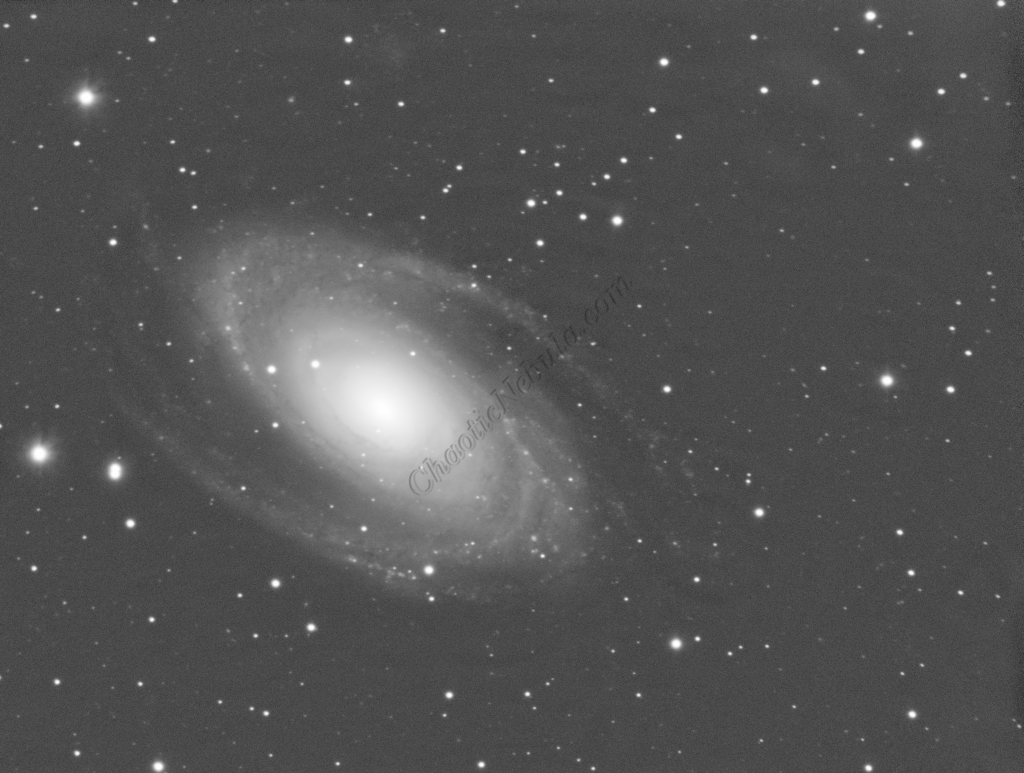
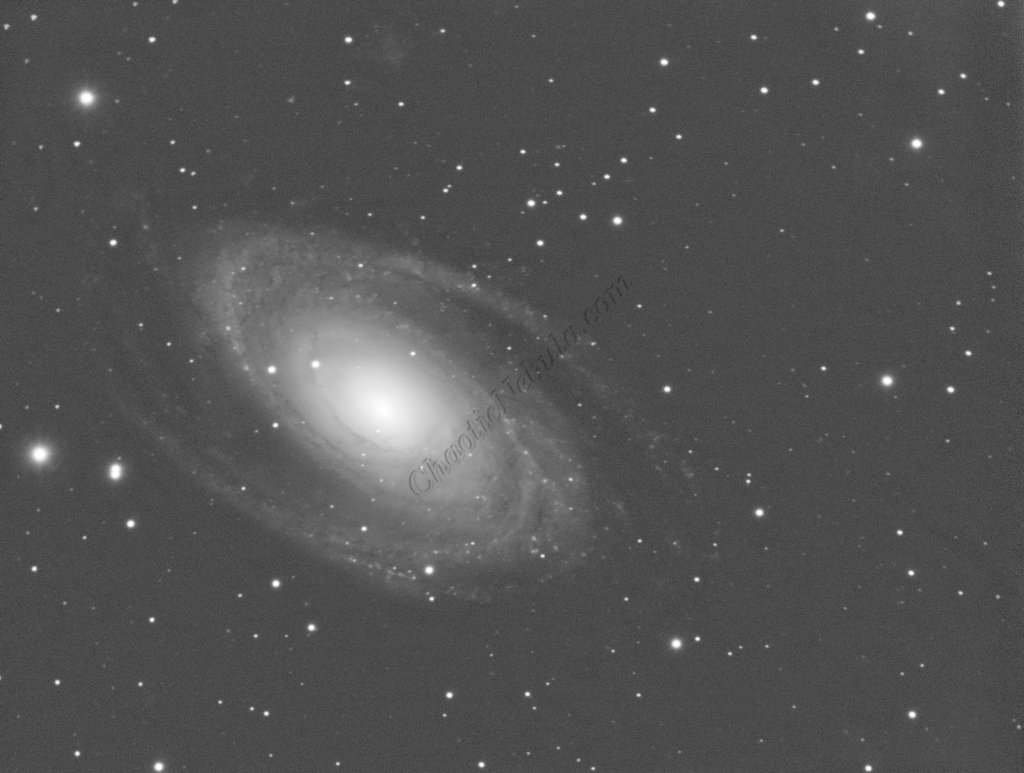
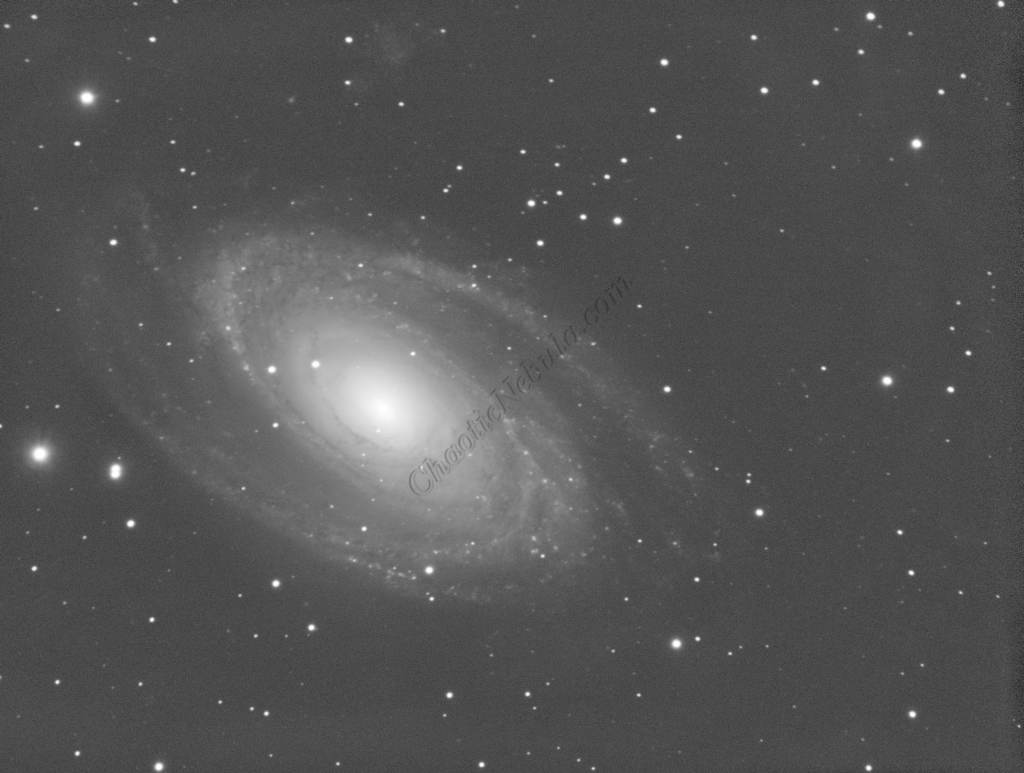
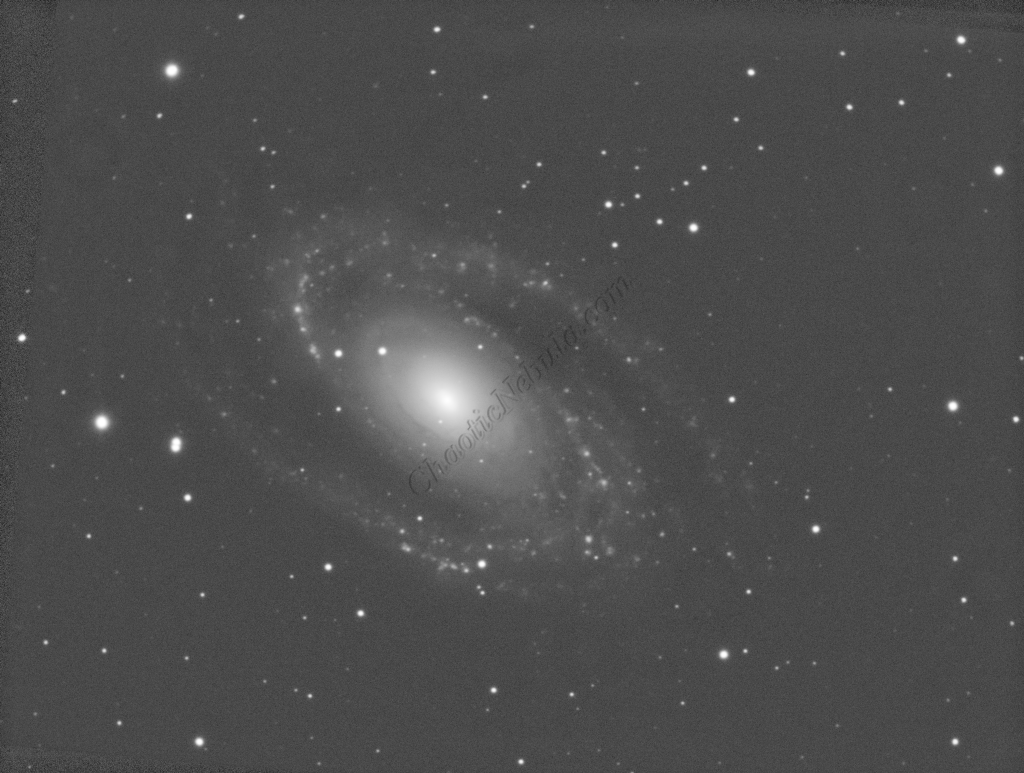
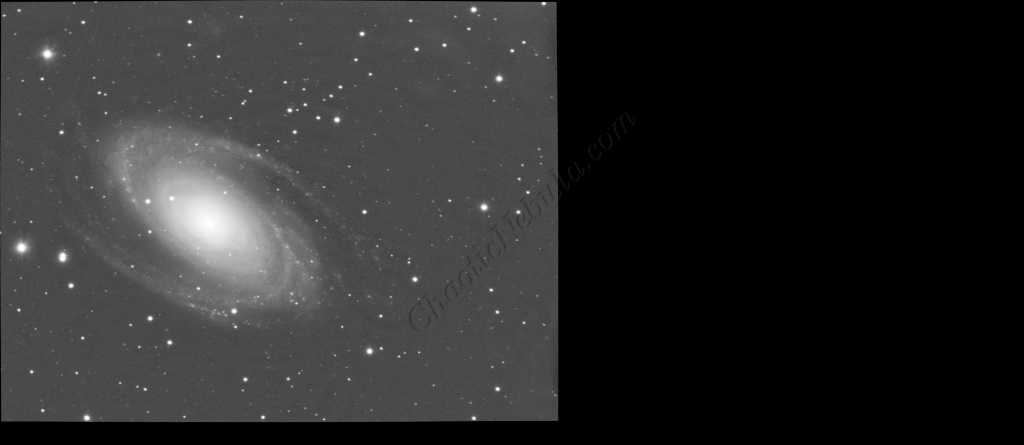
Messier 81 (on the left), also known as M81 or NGC 3031, is a grand design spiral galaxy located about 11.8 million light-years away. It’s one of the brightest galaxies visible from Earth and is characterized by its well-defined spiral arms extending from a bright central nucleus.
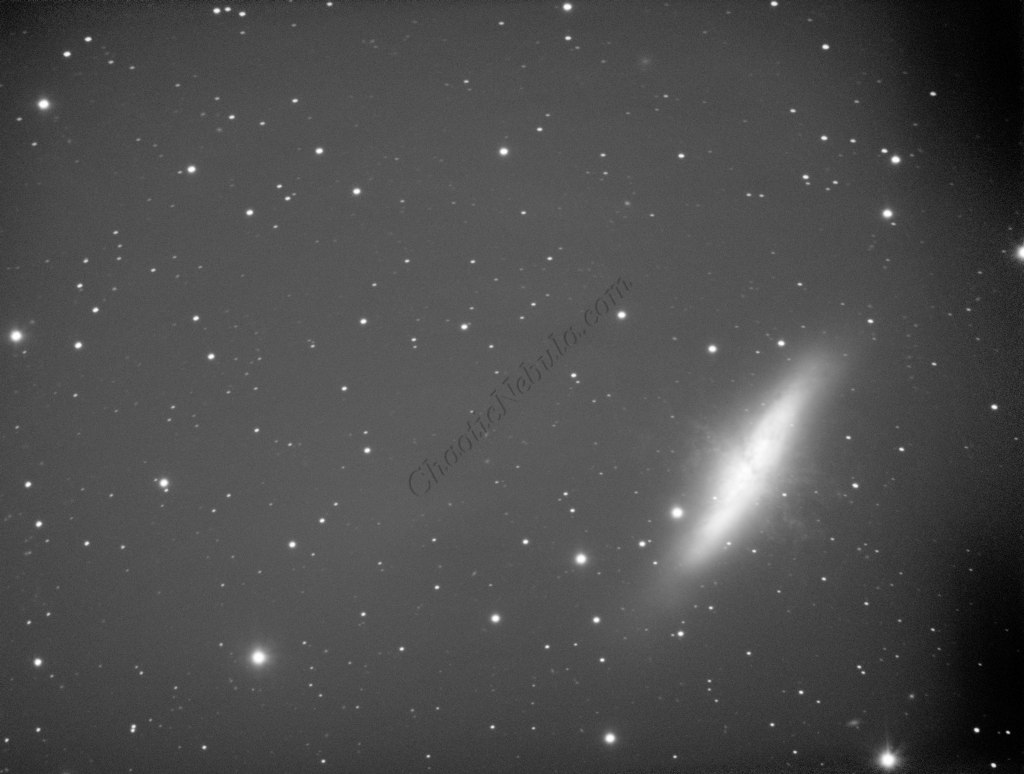
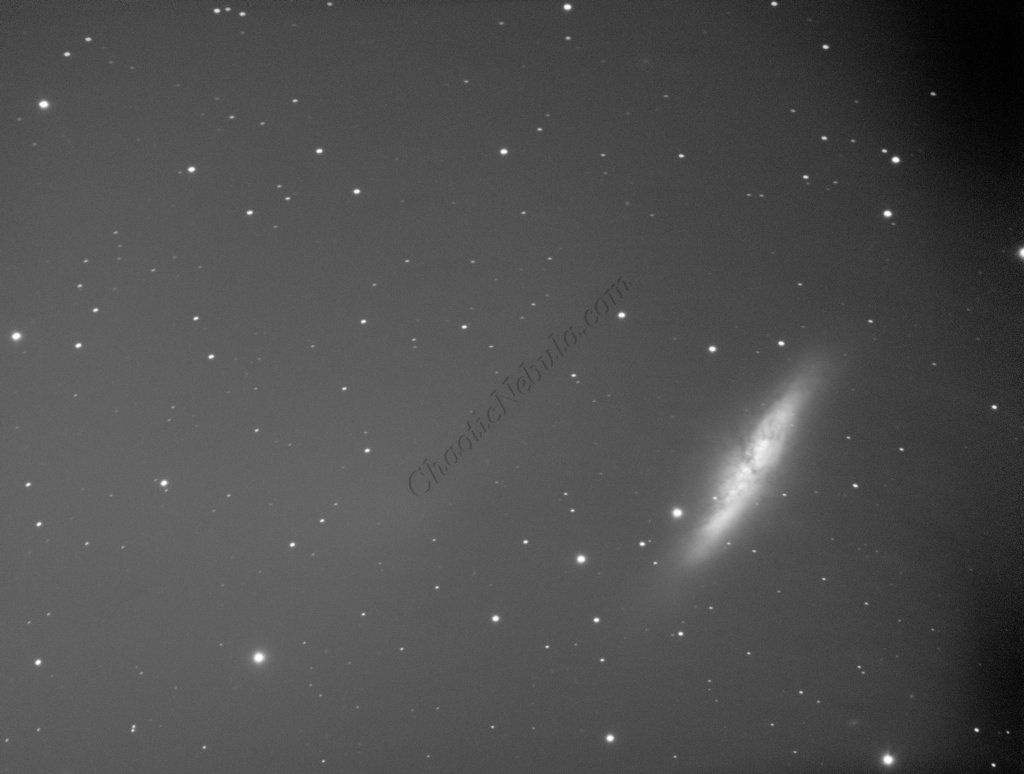
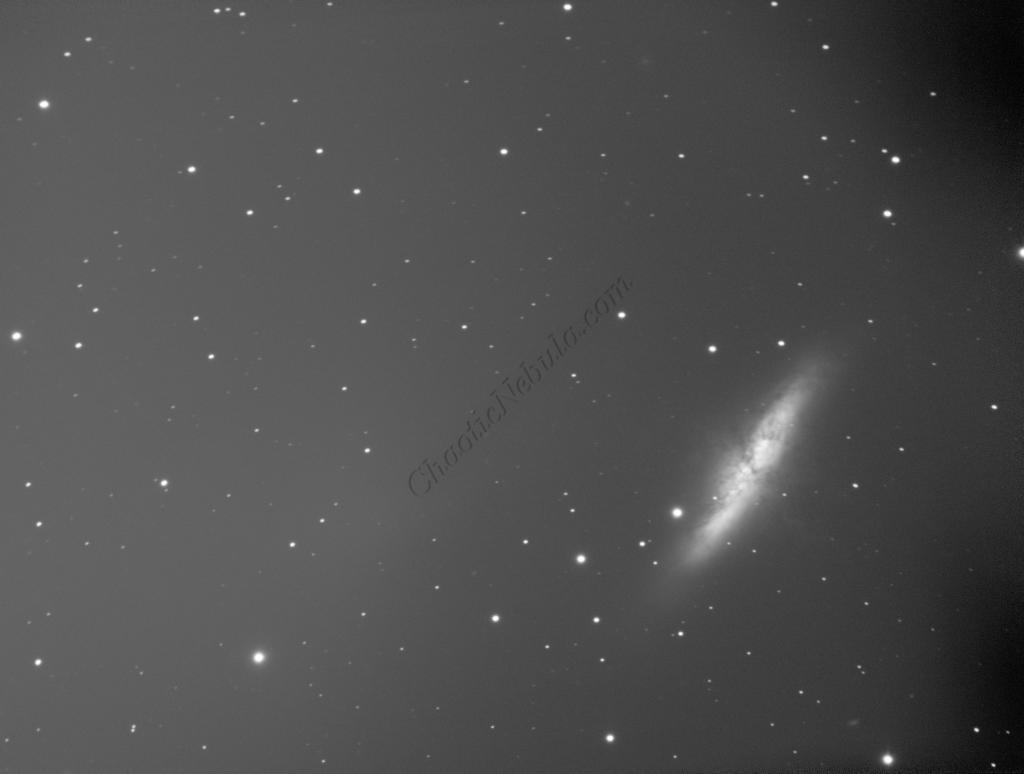
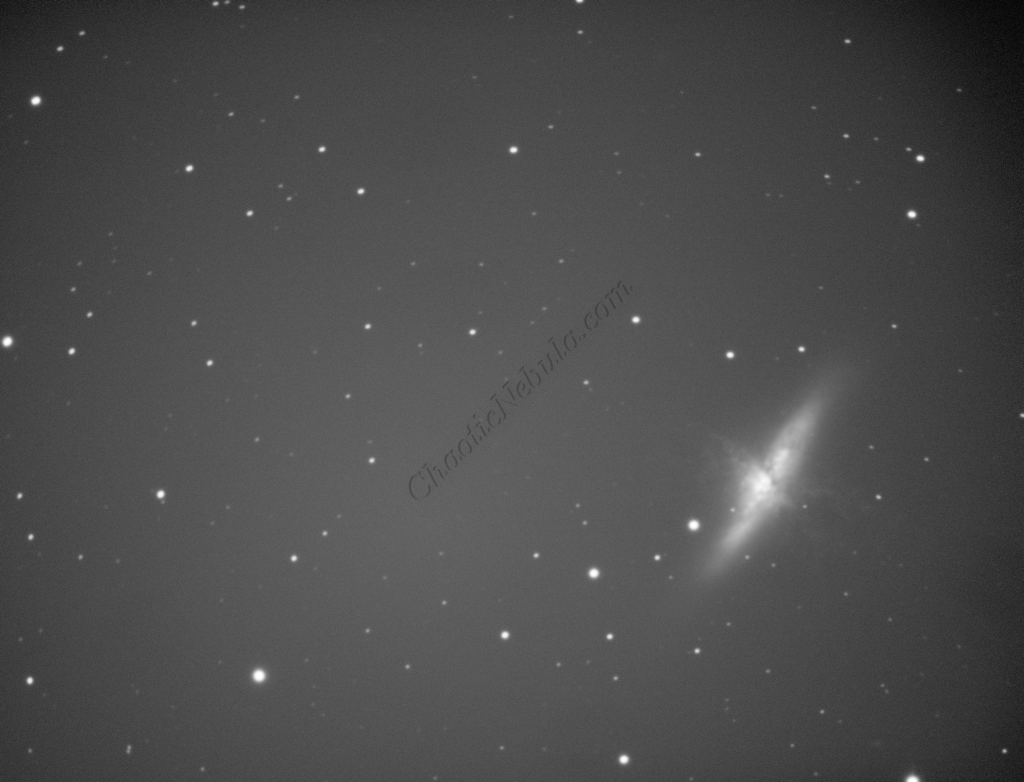
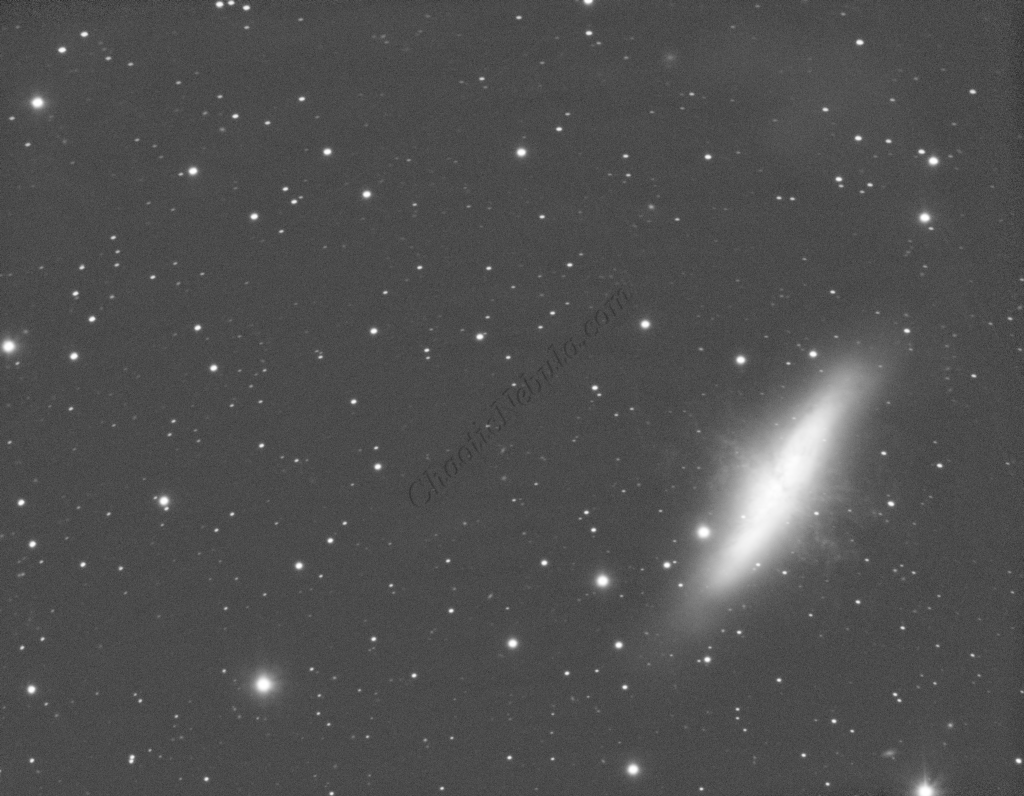
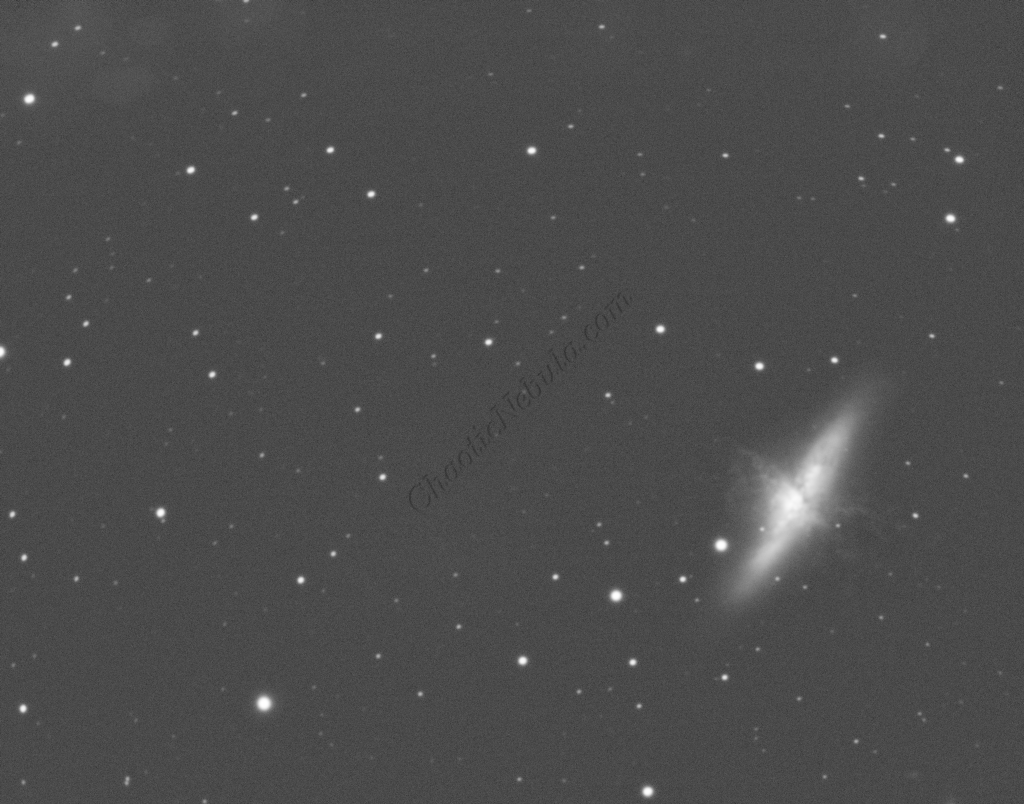
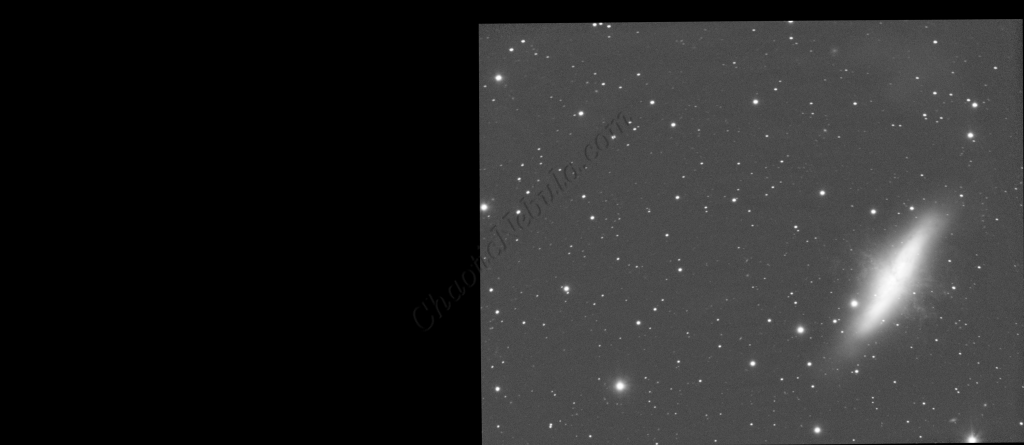
Messier 82 (on the right), also known as M82 or NGC 3034, is a starburst galaxy situated about 12 million light-years away. Unlike M81, M82 exhibits a highly irregular and distorted shape due to intense gravitational interactions with its neighbor, M81. This interaction has triggered vigorous star formation, making M82 one of the brightest infrared sources in the sky.
Both M81 and M82 are members of the M81 Group, a galaxy group that includes approximately 34 other galaxies. This group is gravitationally dominated by M81, which is significantly larger and more massive than M82.
Observing M81 and M82 side by side provides a striking contrast between a grand design spiral galaxy (M81) and a starburst galaxy (M82). M81 displays a classic spiral structure with well-defined arms rich in star-forming regions, similar in some respects to our Milky Way galaxy. In contrast, M82 exhibits chaotic streams of dust and gas, evidence of intense star formation activity fueled by interactions with its larger companion.
While M81 shines at a magnitude of 6.9 and is relatively easy to observe, the fainter M82 at magnitude 8.4 requires longer exposure times to capture its intricate details, especially the extended plumes of gas and dust expelled by ongoing starburst activity.
Imaging Details
M81 – Bode’s Galaxy
- Workflows:
- Red: 30*600 seconds
- Green: 30*600 seconds
- Blue: 30*600 seconds
- HA: 30*600 seconds
- Total Imaging Time: 20 hours
- Imaging Dates (4 nights)
- 2/7/2023
- 2/10/2023
- 2/12/2023
- 2/16/2023
M82 – Cigar Galaxy
- Workflows:
- Red: 60*600 seconds
- Green: 60*600 seconds
- Blue: 60*600 seconds
- HA: 30*600 seconds
- Total Imaging Time: 35 hours
- Imaging Dates (7 nights)
- 2/10/2023
- 2/16/2023
- 2/25/2023
- 3/18/2023
- 3/23/2023
- 3/26/2023
- 4/11/2023
Imaging Notes
This is the second time I tried to create a mosaic with these two galaxies.
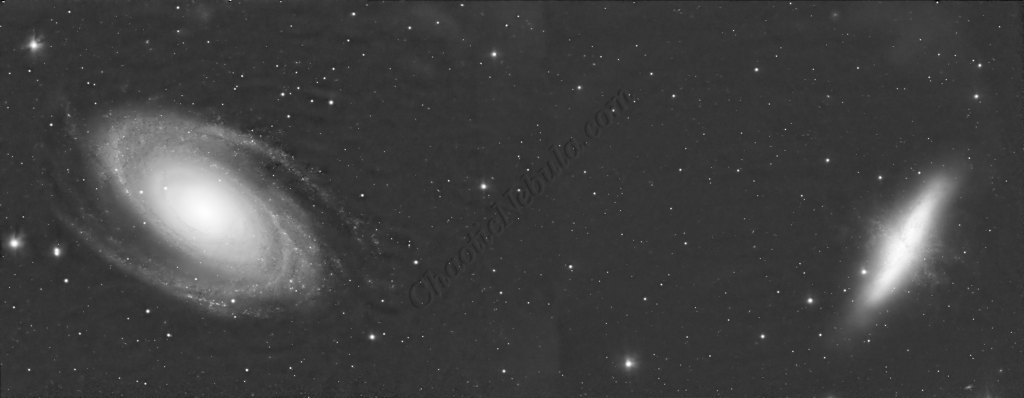
In 2023, the background was significantly darkened as the background gradient was not thoroughly removed by using dynamic background extraction. In 2024, the new Gradient Correction process was included, which did a much better job at removing the background gradients. This created a more natural looking image.
In addition, in 2024, the normal noise reduction (TGV Denoise and Multiscale Linear Transform) processes were replaced with NoiseXTerminator. Deconvolution was also replace with BlurXTerminator.
Imaging Workflow
This image followed the Broadband workflow for Galaxies and Mosaic Workflow
Integrated Image
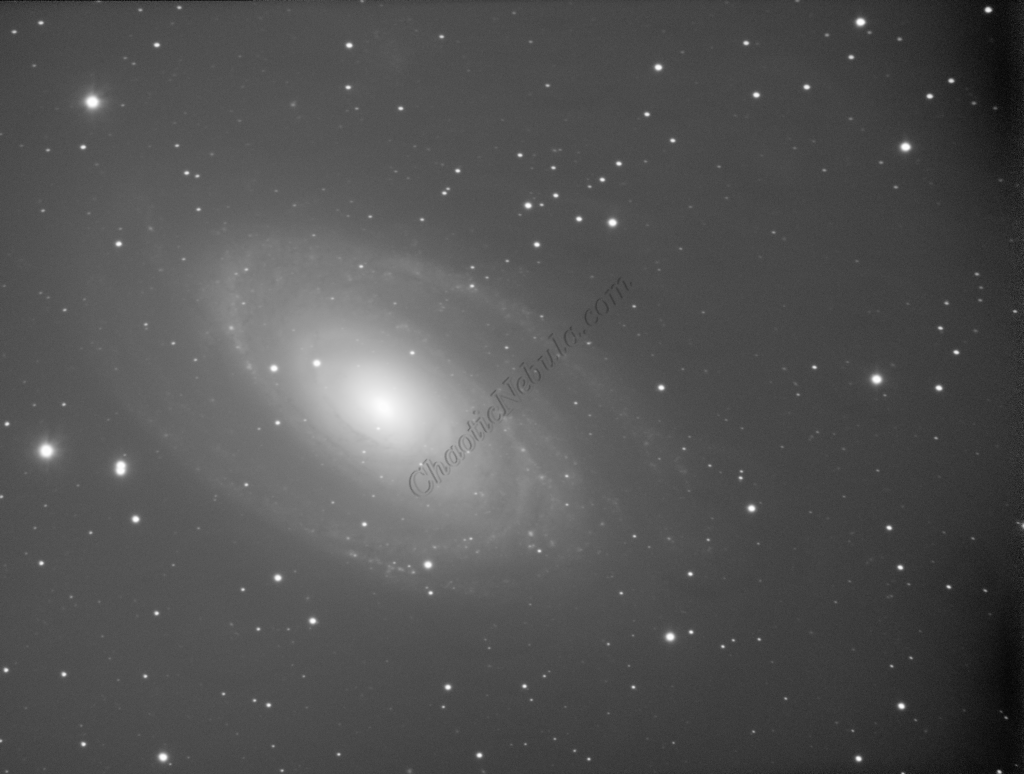
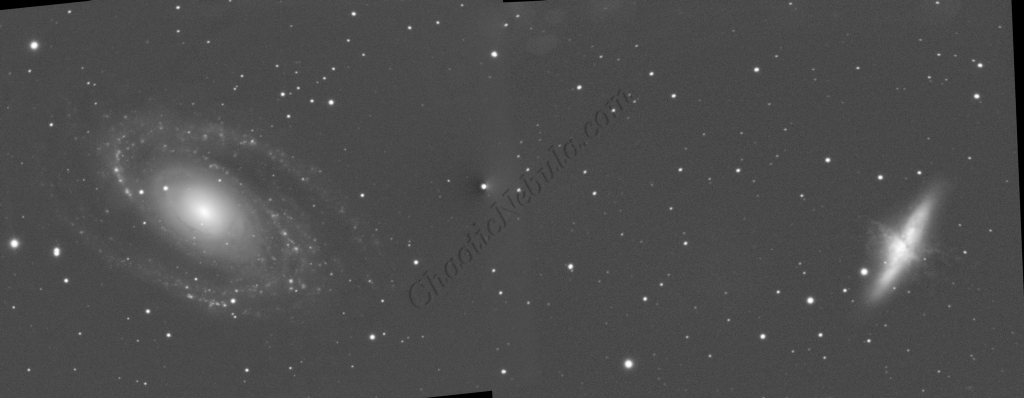
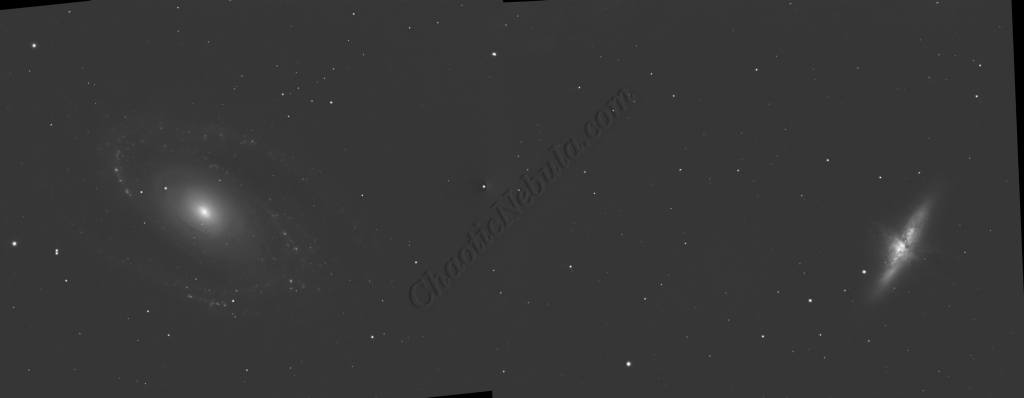
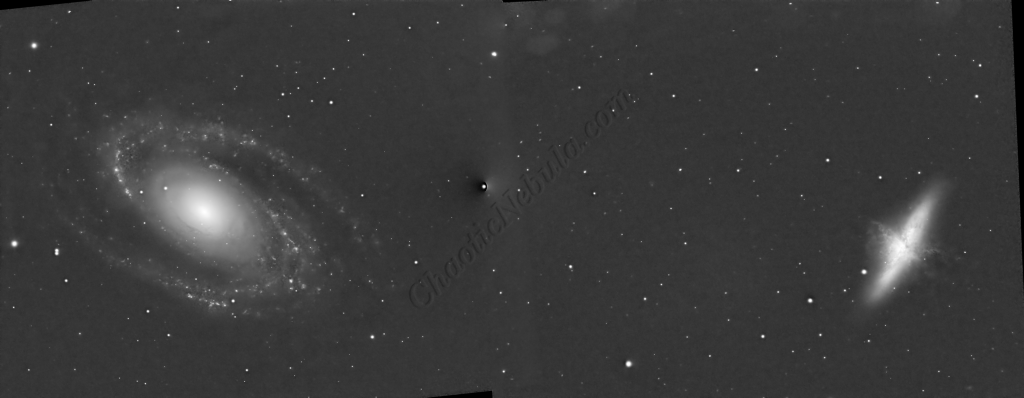
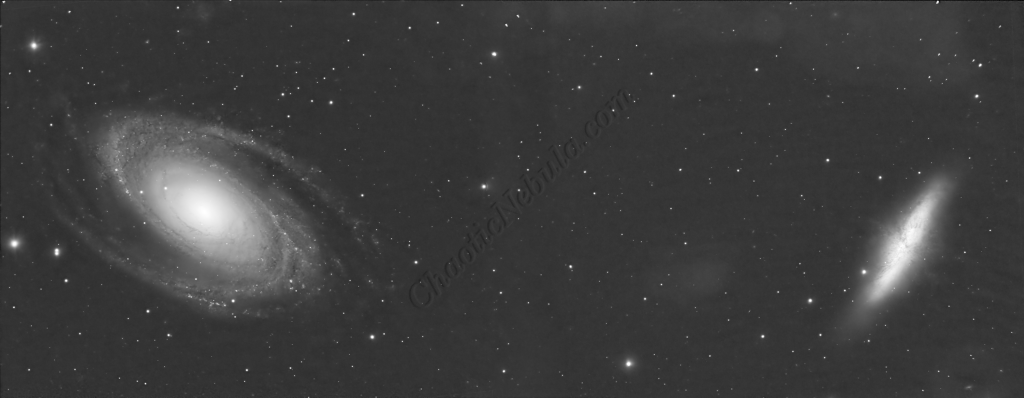
The process begins with 9 images: Red, Green, and Blue images for 3 separate mosaic panels. The normal integration process was used except that drizzle integration was bypassed. Only showing the panels for the blue channel.
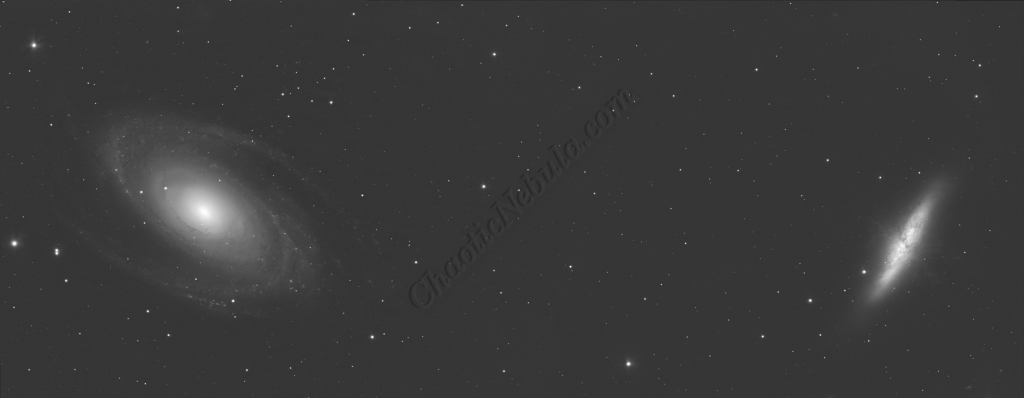
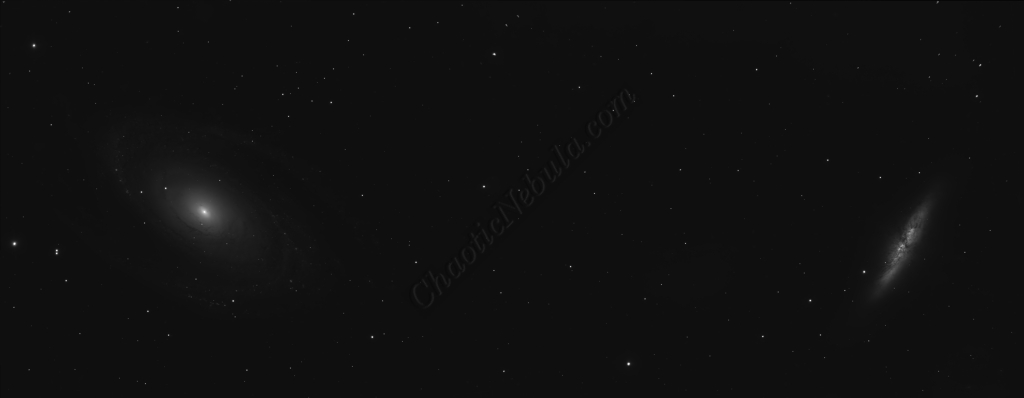
Gradient Correction
The Gradient Correction process made it easy to remove the extreme darkness/brightness around the edges.


Mosaic Alignment
This image followed the Mosaic Workflow for small mosaics that uses the Mosaic by Coordinates process. This approach uses the image’s coordinates (captured with Image Solver) stored within the FITS header to align the panels of the mosaic together.
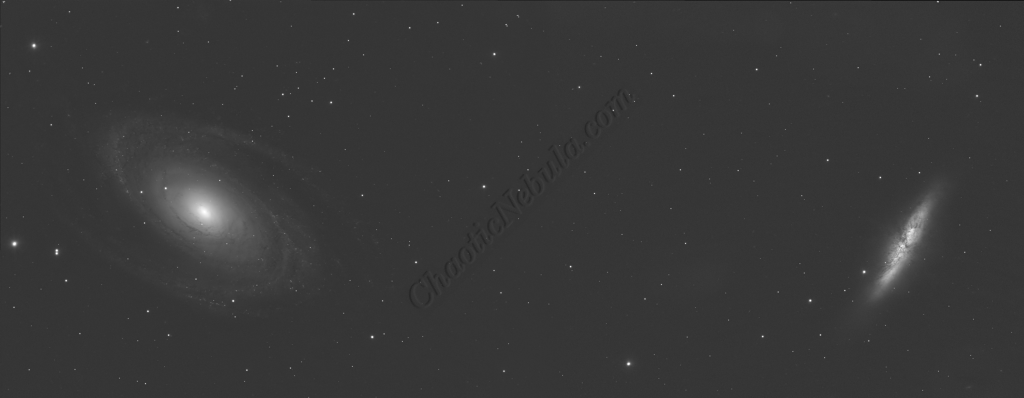
Gradient Merge Mosaic
The DNA Linear Fit script balanced the brightness across the three panels. Once complete, Gradient Merge Mosaic blended the edges together into a single mosaic image for the red, green, and blue filters. The images are all cropped to remove the black edges
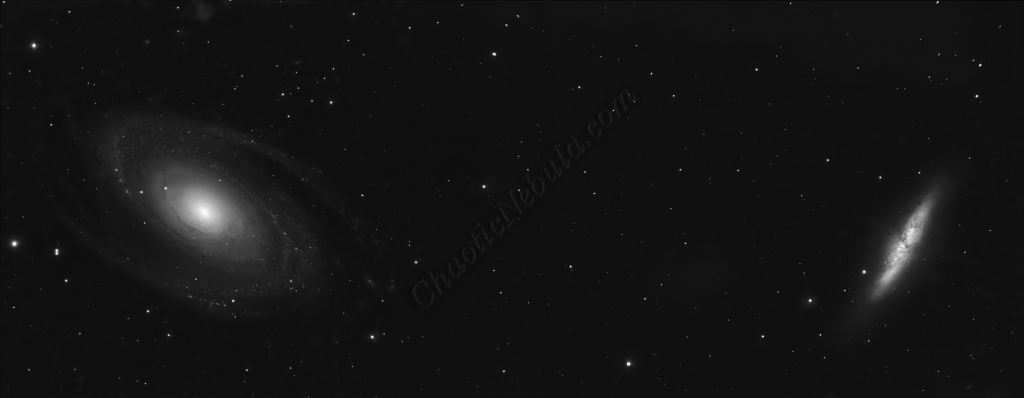
Deconvolution
BlurXTerminator is applied two times. The first time is for Correction only. This takes care of the coma (blurring of stars along the edges).
The second application of BlurXTerminator handles deconvolution, which improves the sharpness and details of the nebula while removing the blur from the image.
Noise Reduction
With the blurring corrected, it is time to do noise reduction. This time I used the new NoiseXTerminator add on.
Channel Combination for RGB+HA
The next step is to do a Linear Fit across all 4 channels.
The hydrogen-alpha image was integrated into the RGB image in order to enhance the red channel. This uses the Narrowband Integration (LRGB+HA) process of Pixel Replacement Multiplier with a strength of 0.35.
In addition, once the color image was created, the luminance channel was extracted to be used for the luminance workflow.
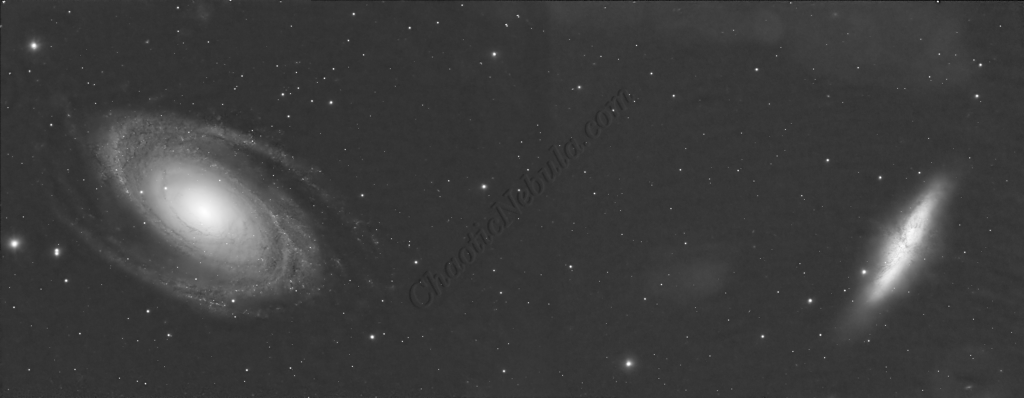
Histogram Stretch
I used histogram transformation to stretch the image. Although the image appears dark, the entire image will get brighter when the synthetic luminance is added.
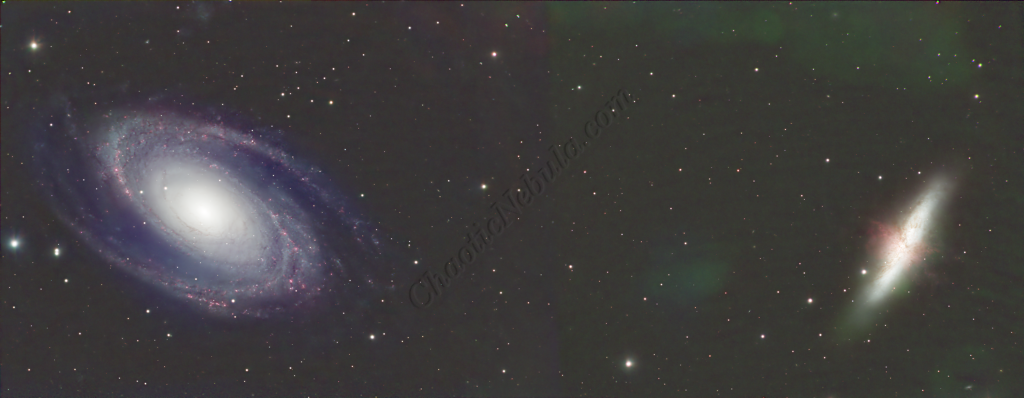
Color Saturation
The green hue was first removed with SCNR. Then, PixInsight Curves Transformation increased the overall color saturation.
Luminance Workflow
Before doing anything more to the color image, it is time to go through the Luminance Workflow.
Deconvolution was skipped as it was done to the RGB image with the use of BlurXTerminator.


Luminance Integration (LRGB)
With the luminance image processed, it can get integrated with the color image with LRGB Combination process. This used 45% for lightness and 35% for saturation.

Color Saturation
I used Curves Transformation to increase the overall color saturation for a second time. Again, I used my enhanced stretch mask from my Luminance worklow to brighten the outer edges.
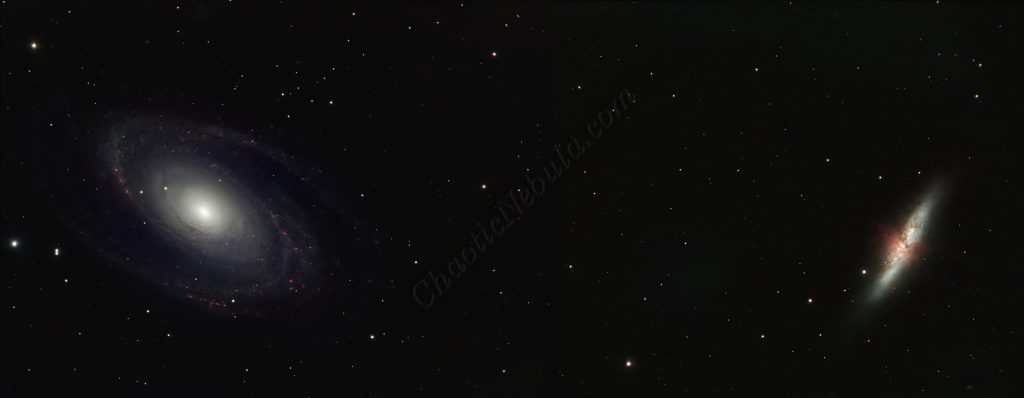
Brightness Adjustments
I used Curves Transformation to increase the overall brightness and colors.
Stars
Curves Transformation was used to enhance the brightness and saturation of the stars. A star mask was used by applying StarNet to the baseline Luminance channel.

ACDNR for Chrominance
Although NoiseXTerminator did a great job in removing the noise from the image early on in the workflow, some of the processing might have added noise in the color. Applying ACDNR for only chrominance helps correct this without losing details.

Final Adjustments
To finish the image, I make a few minor tweaks to the brightness and colors by using Curves Transformation.