Noise reduction is done multiple times throughout the image processing project. Each noise reduction process focuses on one small aspect of noise.
In astrophotography, background noise refers to subtle variations in pixel values at low intensity levels in an image. This type of noise is often characterized by small, random fluctuations in brightness that can be visible in the darker or fainter regions of the image. Background noise is more noticeable in areas with low signal, such as the background sky or shadowed portions of celestial objects.
Reducing background noise is essential for improving the quality of astrophotography images, as it can affect the visibility of faint details and introduce unwanted artifacts. But to use this process properly, you need to create a background noise mask and a local support image. These two helper items are critical for successfully applying TGV Denoise to you images. To learn why, review the following TGV Denoise Masking analysis.
Tip: It is best to have a light touch with noise reduction or else the image will look over processed.
Tip: Install the DeLinear script from Herbert Walter Astrophotography (skypixels.at) In the linear processing stage, we often need to create a clone then apply a permanent histogram stretch. The Delinear script does the stretch automatically.
Background Noise Mask Creation
In order to focus the noise reduction process on background noise (pixel-level), you need to create a mask by doing the following:
- Duplicate the image
- Apply the DeLinear script – this does a permanent stretch to the cloned image
- Launch Curves Transformation and apply the following to the cloned image. Remember, you are only focusing on pixel-by-pixel noise. This process reduces the dynamic range (contrast) of the mask, helping to provide significant protection for the high signal areas as well as the low signal areas.
- Point 1: .25
- Point 2: .50

With the mask created, you need to apply it inverted to our image so you protect the signal portions and focus your noise reduction onto the background noise.
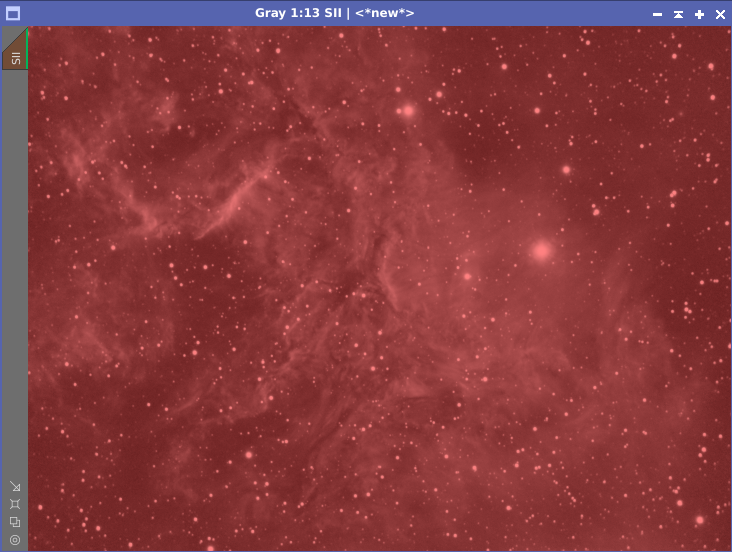
Select Mask -> Show Mask to remove the red coloring
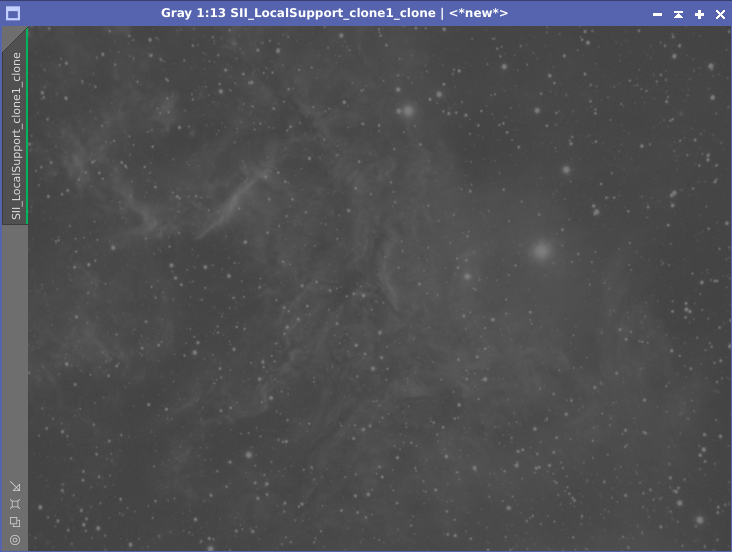
Local Support Image Creation
In the TGV Denoise process, there is an option to provide local support. The local support image provides information and context about the surrounding pixels of a given pixel. This information helps the process determine how much noise to suppress in that pixel based on surrounding information.
This setting is important and should not be skipped. Especially considering the process is extremely simple.
- Duplicate the image
- Apply the DeLinear script – this does a permanent stretch to the cloned image
That is all you need to do.
Determine Edge Protection
TGV Denoise requires you to set a few different parameters
- Strength
- Edge Protection
- Smoothness
- Iterations
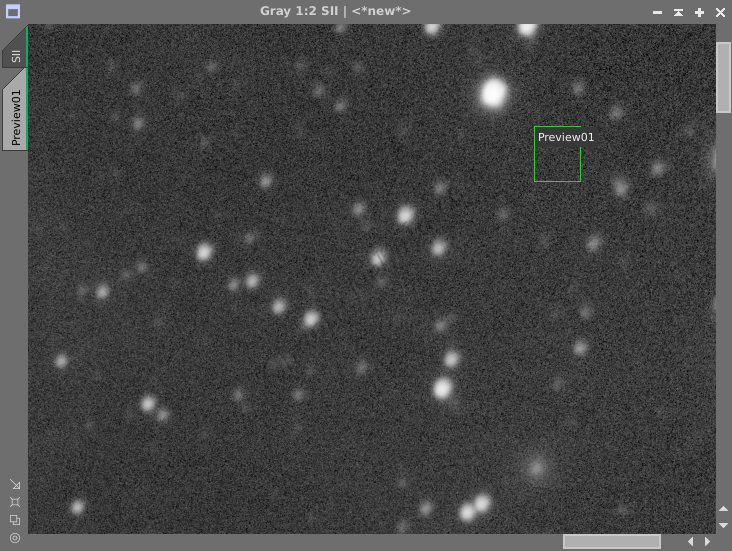
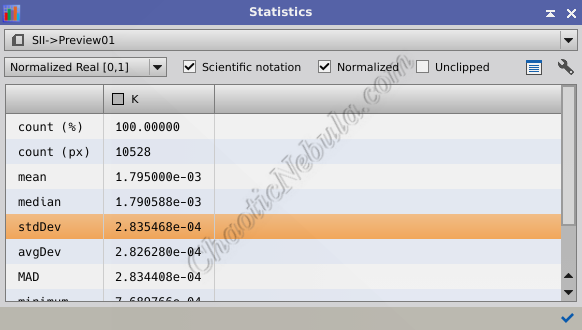
Your recommended value for edge protection is easily identified by assessing the standard deviation of the background noise in your image. To identify this value
- Create a small preview window within your image that does not contain stars or nebulosity
- Launch the statistics process (Process – Image – Statistics)
- Standard Deviation is not a value enabled by default. Select the wrench icon (upper right corner), and enable Standard Deviation
- Find the standard deviation value for your preview window. This is the value you use for Edge Protection in the TGV Denoise Process
TGV Denoise
With the background noise mask created and applied (inverted), you focus on your noise reduction parameters
It is often useful to create preview windows to test settings. Applying to a preview window makes the process occur much faster than if you applied to the full image. It is useful to create the following previews:
- High Contrast: Create previews for areas that have quickly change from bright to dark. You want to preserve these edges
- Background: Create a preview containing mostly background noise. This is the area you are trying to smooth.
For TGV Denoise, start with the following, remembering to use your edge protection value you derived from the background standard deviation result:
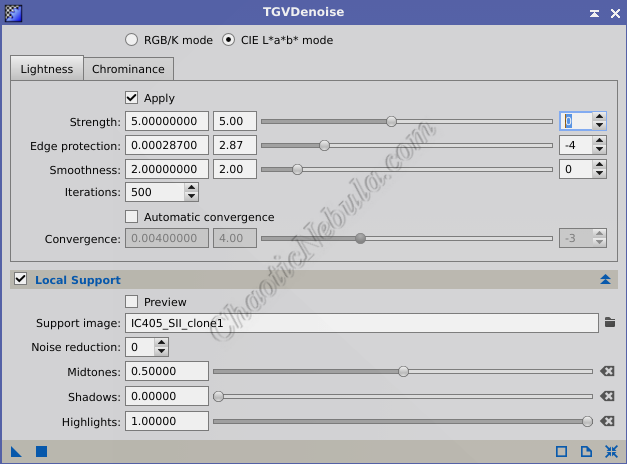
If you are dealing with monochrome, you want to use the CIE L*a*B* mode and focus on the lightness. With edge protection set, you will mostly focus on the strength value by trial and error. These values mean the following:
- Strength:
- Overview: The “Strength” parameter in TGVDenoise controls the overall strength or aggressiveness of the denoising process.
- Effect: Increasing the Strength value results in more pronounced noise reduction, potentially smoothing out details in the image. Lower values preserve more details but may not remove as much noise.
- Guidance: Adjust the Strength parameter based on the level of noise in your image and the desired balance between noise reduction and detail preservation.
- Edge Protection:
- Overview: The “Edge Protection” parameter determines the extent to which edges and details in the image are protected from the denoising process.
- Effect: Higher values of Edge Protection protect fine details and edges, preventing them from being overly smoothed. Lower values allow more aggressive denoising across all areas of the image, including details.
- Guidance: Use Edge Protection to control the impact of denoising on important details. Increase this value if you want to preserve more fine details while reducing noise.
- Smoothness:
- Overview: The “Smoothness” parameter controls the smoothness of the denoising process.
- Effect: Higher Smoothness values result in a smoother overall denoising effect, potentially reducing the appearance of graininess. Lower values may retain more texture and grain in the image.
- Guidance: Adjust the Smoothness parameter based on your aesthetic preferences and the desired visual characteristics of the denoised image.
To see the impact these settings have, run a test on a small preview window. When complete, verify your results.
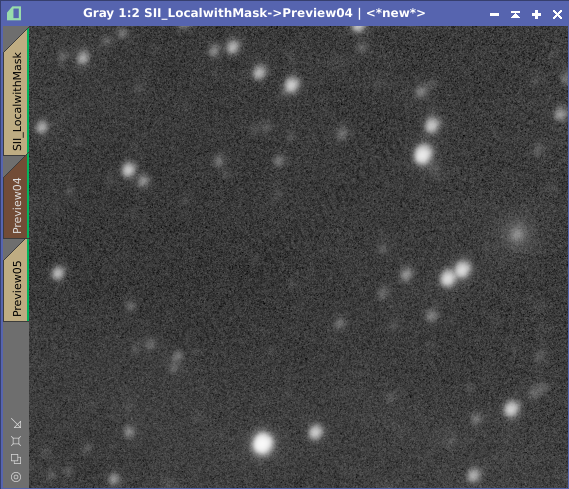
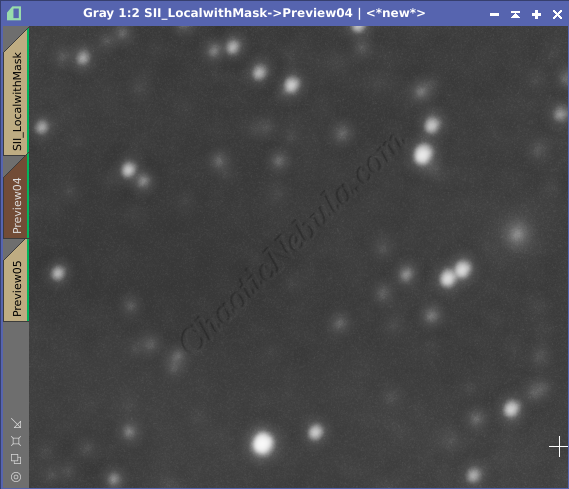

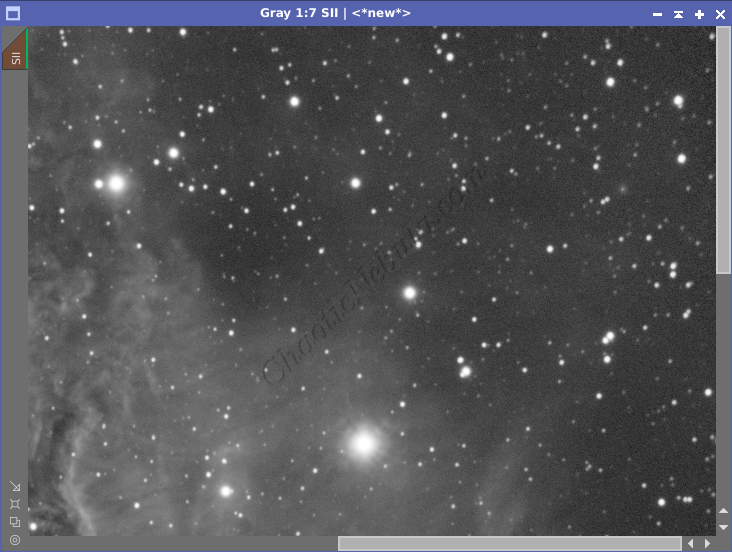
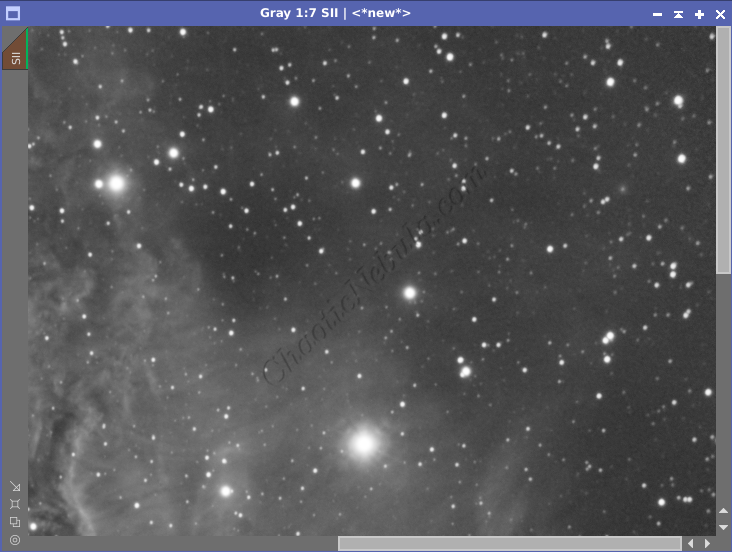
Although the default strength/smoothness settings did improve the preview, you can see halos around the stars. By lowering the Strength value, those halos are removed and the background is still fairly smooth.
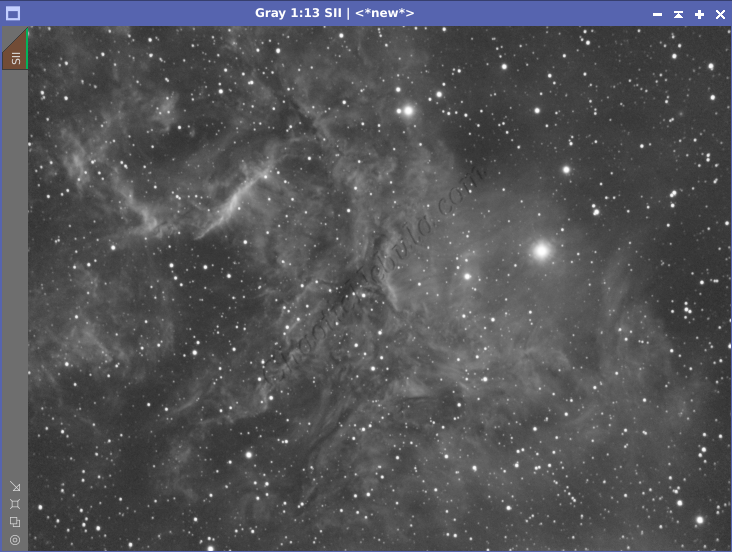
Before applying to the entire image, it is a good idea to apply the optimized setting on an area containing details


Just like the star test, the optimized settings are valid for the test containing nebula. The detail of the nebula wasn’t lost, there are no halos around the stars, and the little bit of background noise in the darker regions are smoothed out.
It is now time to apply this to the entire image, which will take a few minutes. Review the results

Follow this process for all images. Each image will have different settings for
- Background Noise Mask
- Local Support Image
- Edge Protection derived from the standard deviation of the background noise
What’s Next
The next step is to do another round noise reduction focusing on medium-level noise with the PixInsight Multiscale Linear Transform tool.