One of the challenges you will notice early on in your astrophotography image processing workflow are background gradients. These background gradients are often caused by light pollution and residual amp glow from the camera. The challenge is how to remove apply gradient correction without removing the detail of the image?

First, properly applying the image calibration and the local normalization process should have helped out significantly with these items, but gradients will still exist. PixInsight now has three options for dealing with background gradients:
- Automatic background extraction
- Dynamic background extraction
- Gradient Correction
Gradient Correction is the latest, easiest, and best option. Just remember to use linear images that have had dark edges removed with dynamic crop.
Gradient Correction
The Gradient Correction tool is a simple to use process, that is extremely powerful. It is faster to setup and apply when compared to dynamic background extraction.
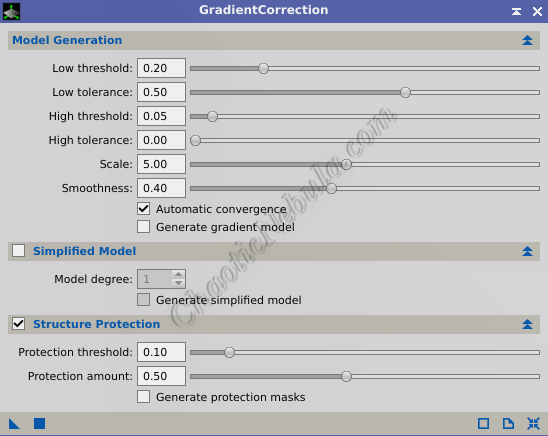
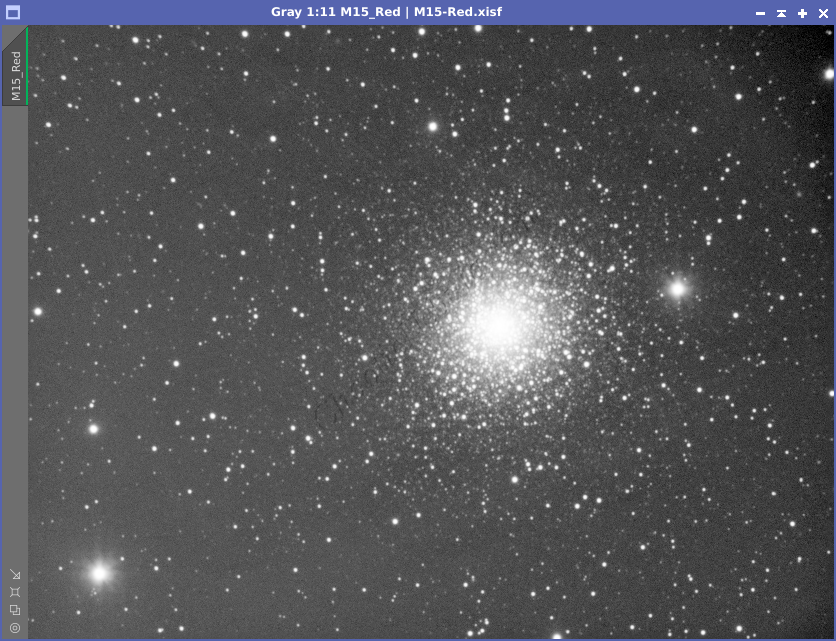
Simply apply this process with defaults to your image.

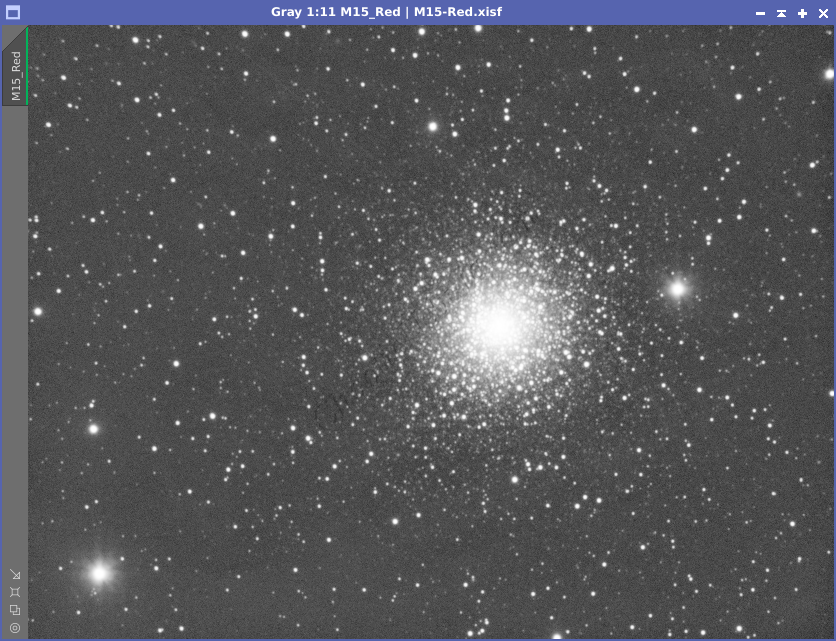
From these examples, it is easy to see why Gradient Correction is the best approach.
Configuration
Just because the default settings work well, it is worthwhile to better understand what the settings do so you can handle many different imaging scenarios.
Model Generation: All the settings within this section determine how the gradient model is created. The goal is to adjust the brightness, but it needs to be careful not to make the dark areas too bright, especially for the faint details.
- Low Threshold: This setting decides how much attention PixInsight pays to dark areas when adjusting the brightness.
- Higher value: PixInsight pays more attention to the dark areas, making sure they don’t get too bright.
- Lower value: PixInsight pays less attention to the dark areas, focusing more on fixing the overall brightness.
- Low Tolerance: After choosing the dark areas to pay attention to, this setting controls how much PixInsight actually changes those areas.
- Higher value: PixInsight makes smaller changes to the dark areas, keeping them darker. If you notice bright areas appearing around the dark structures, increase the low threshold value.
- Lower value: PixInsight makes bigger changes to the dark areas, making them brighter.
- High Threshold: This setting works like the Low Threshold but for bright areas, like the light in your picture.
- Higher value: PixInsight pays more attention to the bright areas, making sure they don’t get too dark. If your gradient is really bright, this value might need increase.
- Lower value: PixInsight pays less attention to the bright areas, focusing more on fixing the overall brightness.
- High Tolerance: Similar to the Low Tolerance, this setting controls how much PixInsight actually changes the bright areas.
- Higher value: PixInsight makes smaller changes to the bright areas, keeping them brighter.
- Lower value: PixInsight makes bigger changes to the bright areas, making them darker.
- Scale: This tells PixInsight how much of the picture to consider at once when fixing the brightness.
- Higher value: PixInsight looks at larger areas at once, making the fix smoother but might miss smaller details.
- Lower value: PixInsight looks at smaller areas at once, allowing for more detailed fixing but might make the fix look a bit bumpy.
- Smoothness: This tells PixInsight how smooth to make the brightness fix.
- Higher value: PixInsight makes the fix very smooth, which might be good for large areas but could blur small details.
- Lower value: PixInsight makes the fix less smooth, which might preserve small details but could look bumpy in large areas.
- Automatic Convergence: This lets PixInsight try fixing the picture again and again until it’s happy with the result.
- Generate Gradient Model: Creates a new image with the generated gradient model. Helpful to determine what parts of the gradient are too strong/weak.
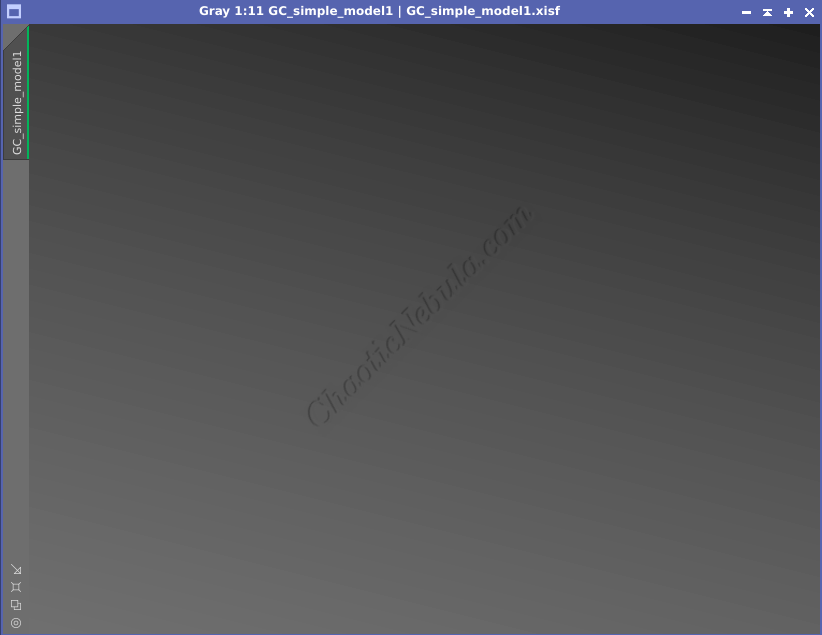
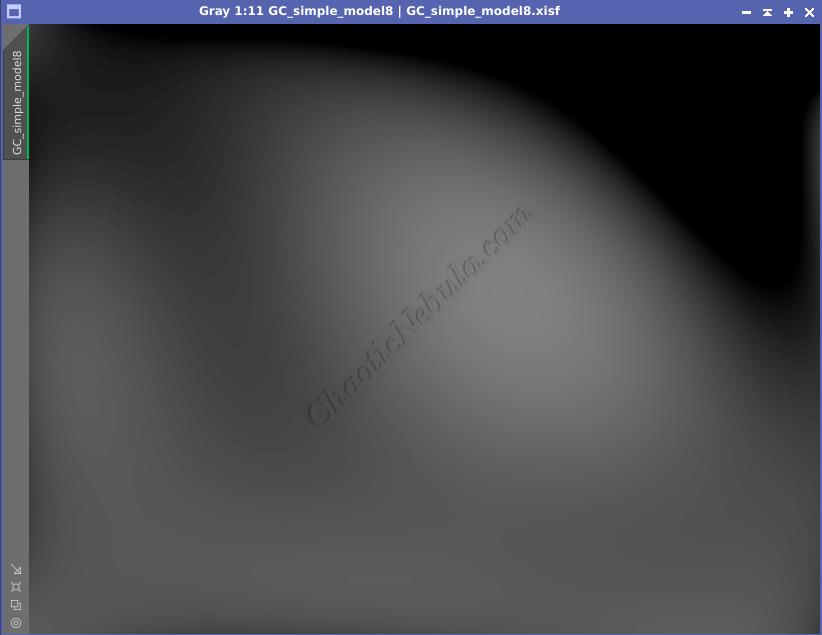
Simplified Model: This is essentially a pre-processing gradient removal to be used in situations where there is a very strong and well-defined gradient, often caused by a missing flat or a flat over-correction. Simplified gradients are often smooth and extremely bright. The simplified model creates a basic gradient model, ignoring the small details.
- Model Degree: Determines how brightness fluctuations in the image will impact the simplified gradient model. Lower numbers create a fairly uniform gradient model for the entire image while higher numbers are impacted by local gradient changes.
- Generate Simplified Model: Creates a new image with the generated simplified model. Helpful to see if the simplified model matches the most intense part of the gradient.
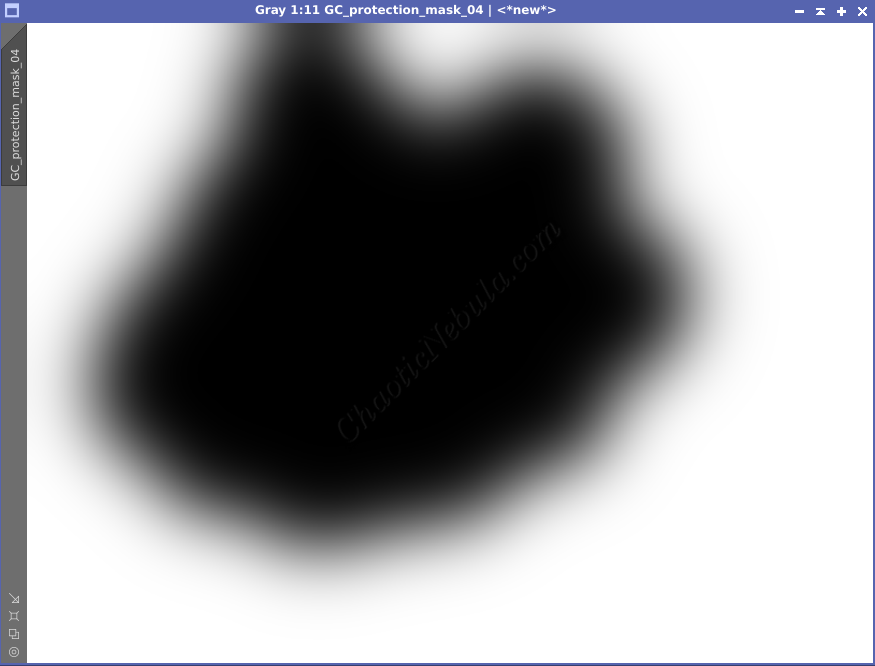
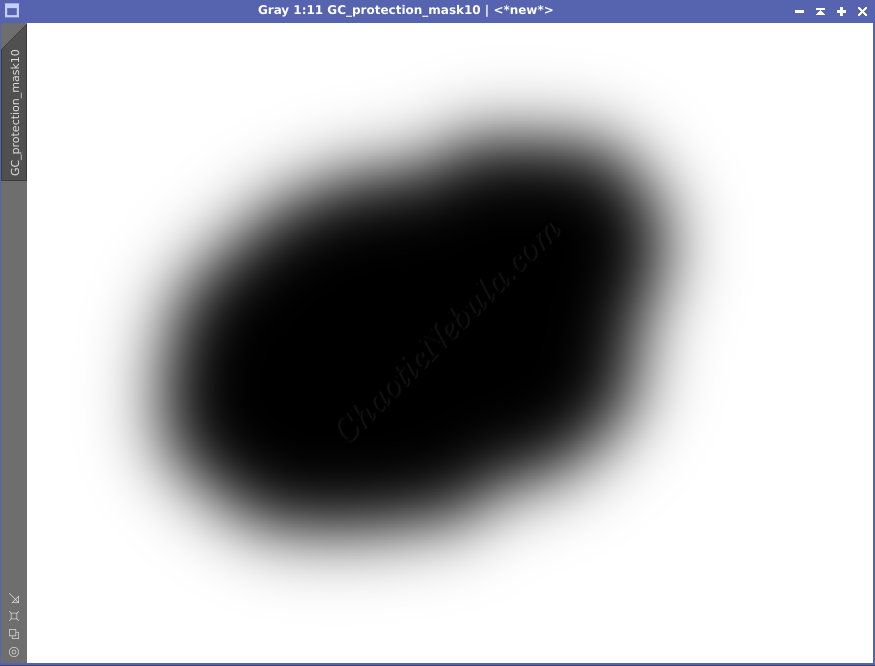
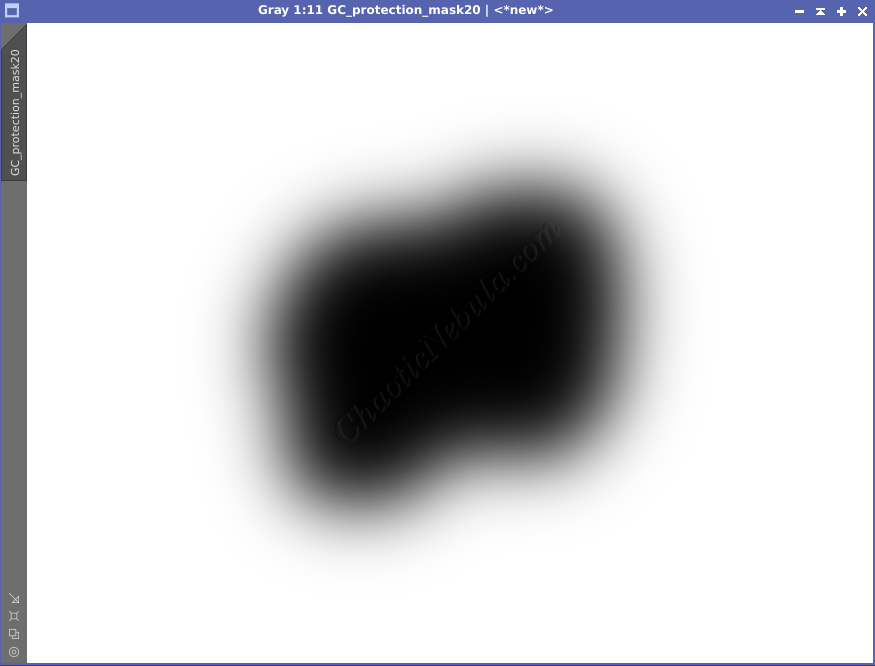
Structure Protection: Helps identify and avoid over-correction areas within the image that contains structure (nebula and galaxies)
- Protection from Threshold: This sets how bright an area needs to be to be considered “protected.”
- Lower value: Protects fainter bright areas from getting too dark.
- Higher value: Protects only very bright areas from getting too dark.
- Protection Amount: This controls how much PixInsight protects the bright areas.
- Higher value: PixInsight tries harder to protect the bright areas, which might make the fix less smooth.
- Lower value: PixInsight protects the bright areas less, which might make the fix smoother but could create halos around them.
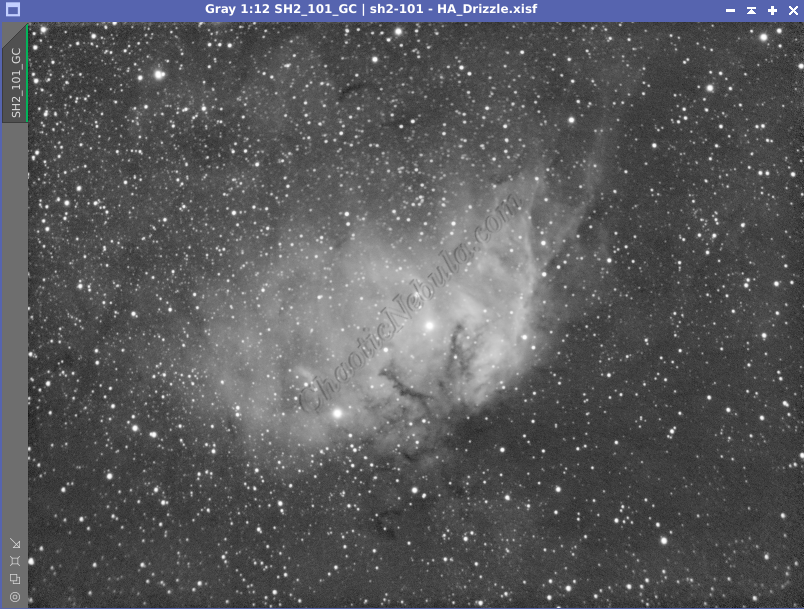
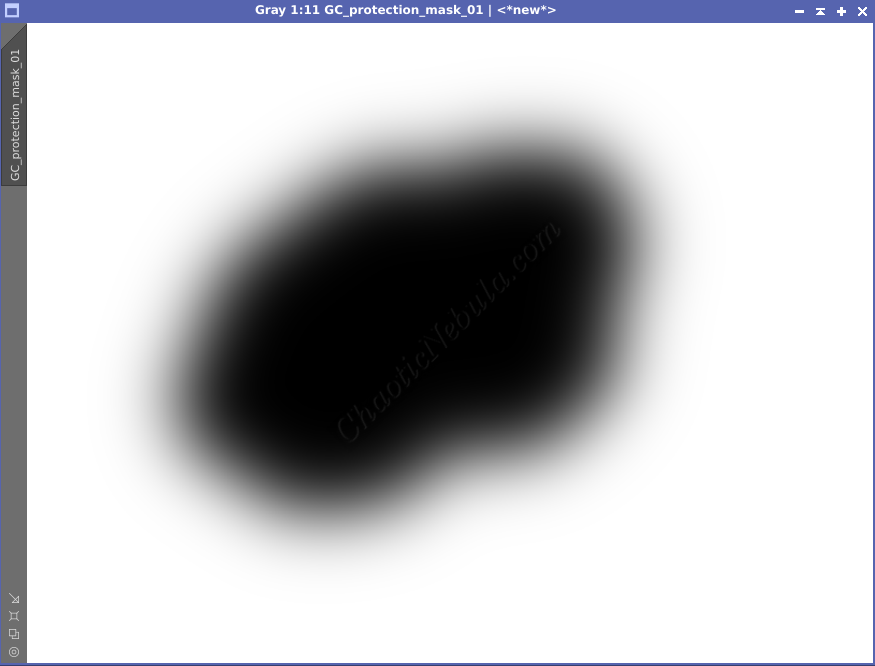
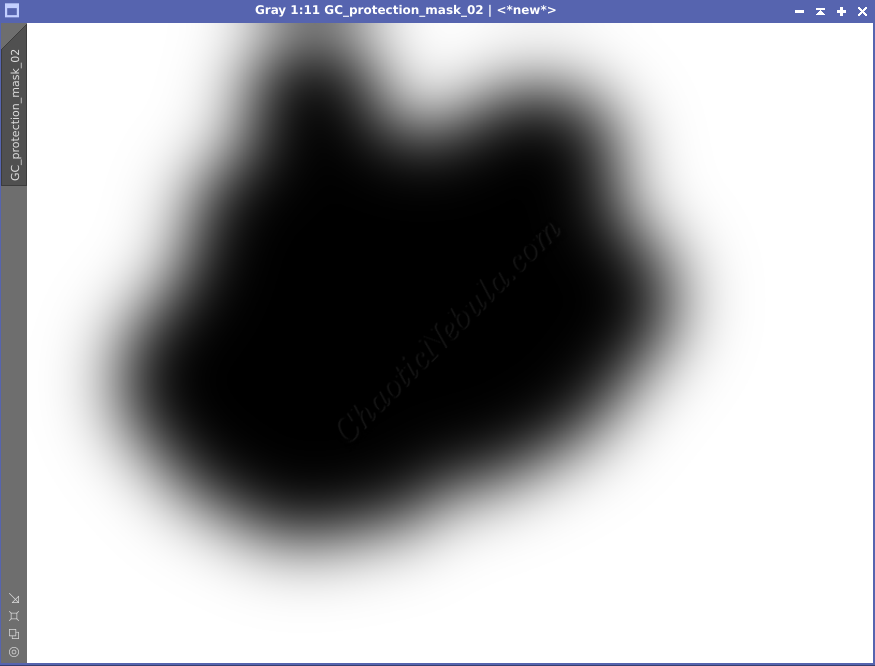
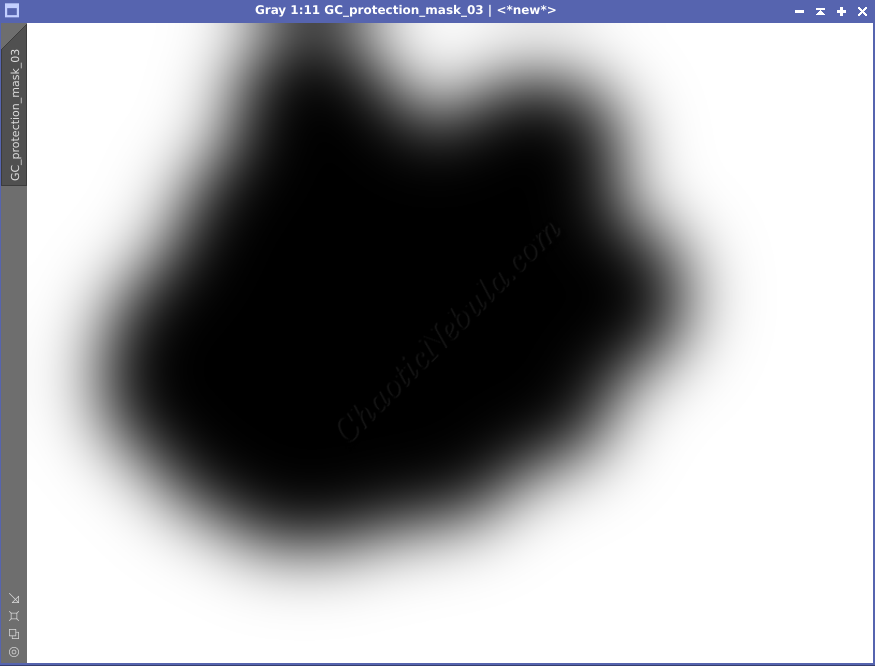
- Generate Protection Masks: This lets you see exactly which parts of the image PixInsight is protecting. If you have Automatic Convergence enabled, PixInsight generates mask for each process iteration. With each iteration, the mask will protect more of the image.
Simplified Model
You can think of the simplified gradient model as a pre-processing for gradient correction. It removes the very strong gradient resulting from light pollution, vignetting, or incorrect flat frame correction. Simplified model handles the large-scale gradient while the other settings handles the small-scale gradients.
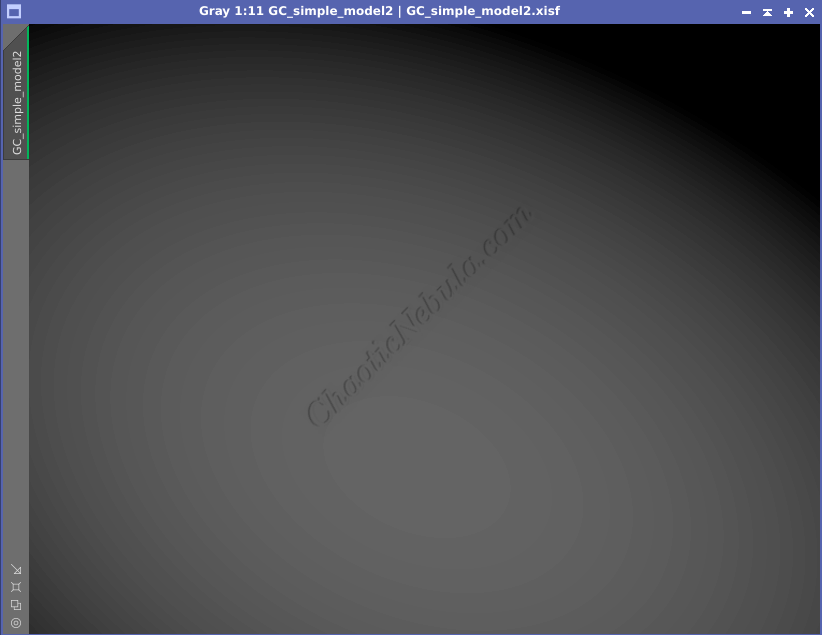
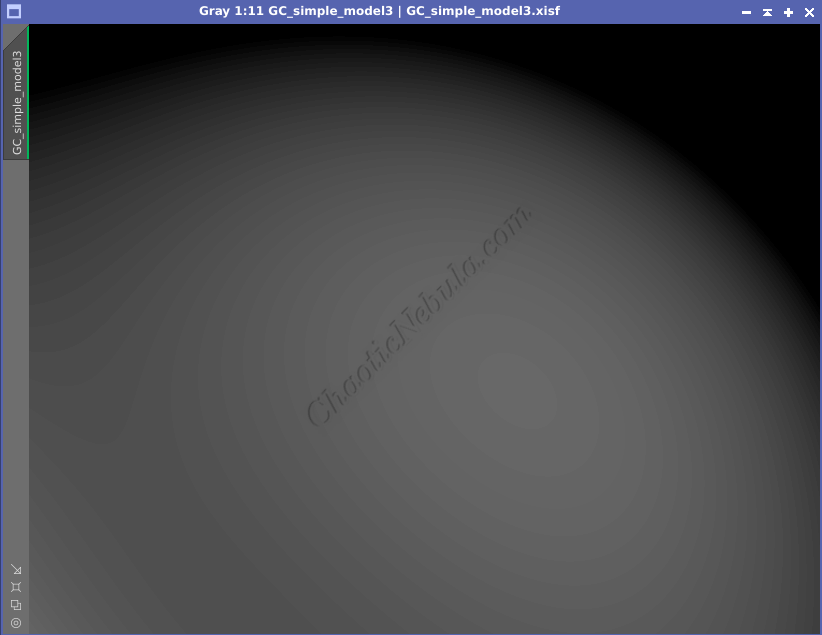
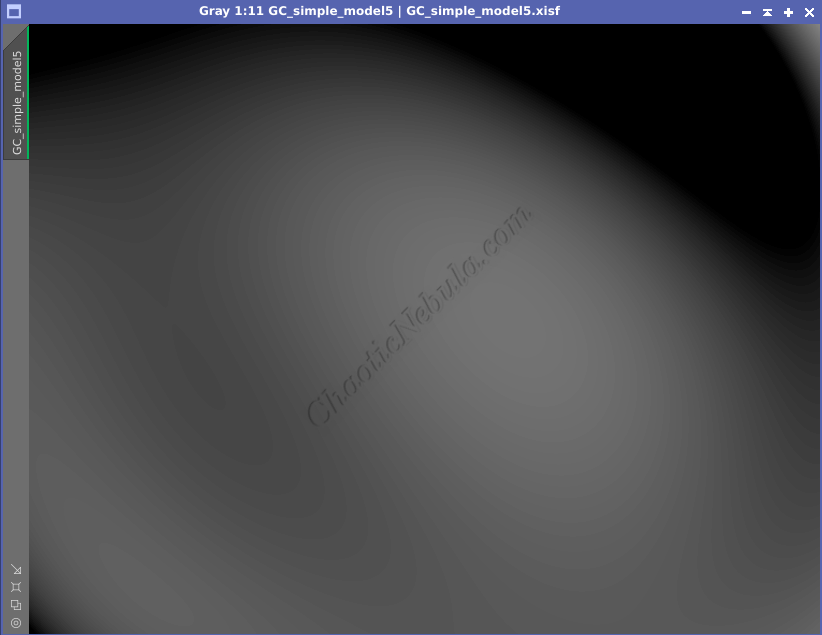
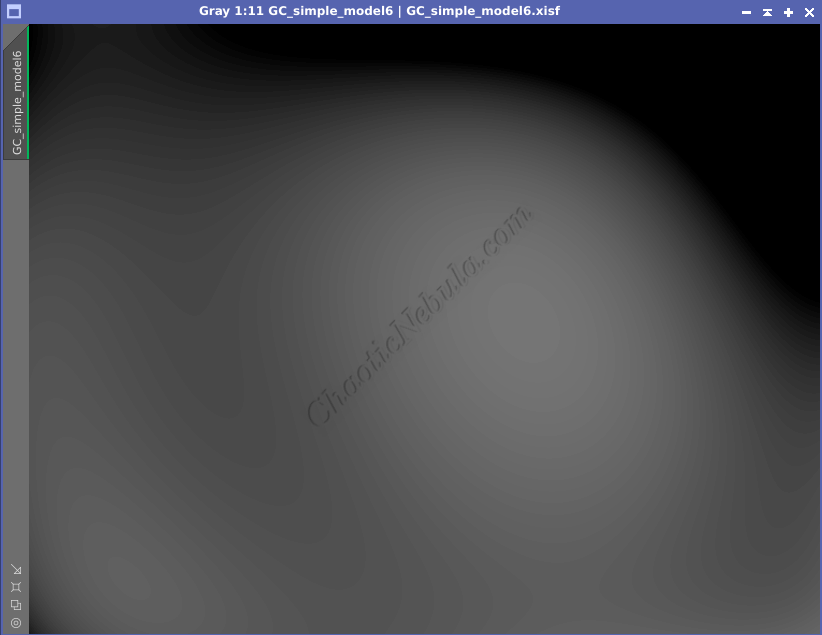
To use the simplified gradient model, start with the lowest number and slowly increase until the results cause issues. Take a look at the following example. There is a very well-defined gradient where the gradient moves from bottom-left to the top right.


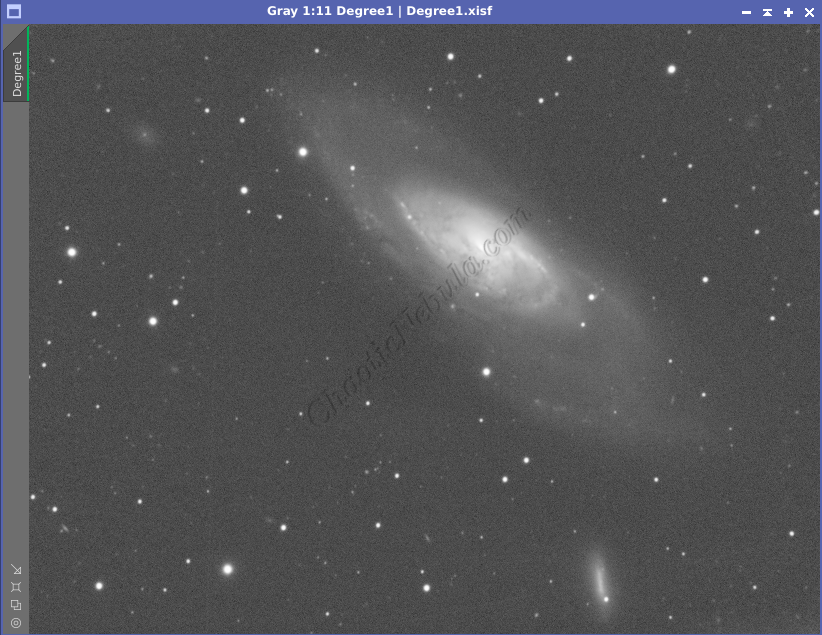
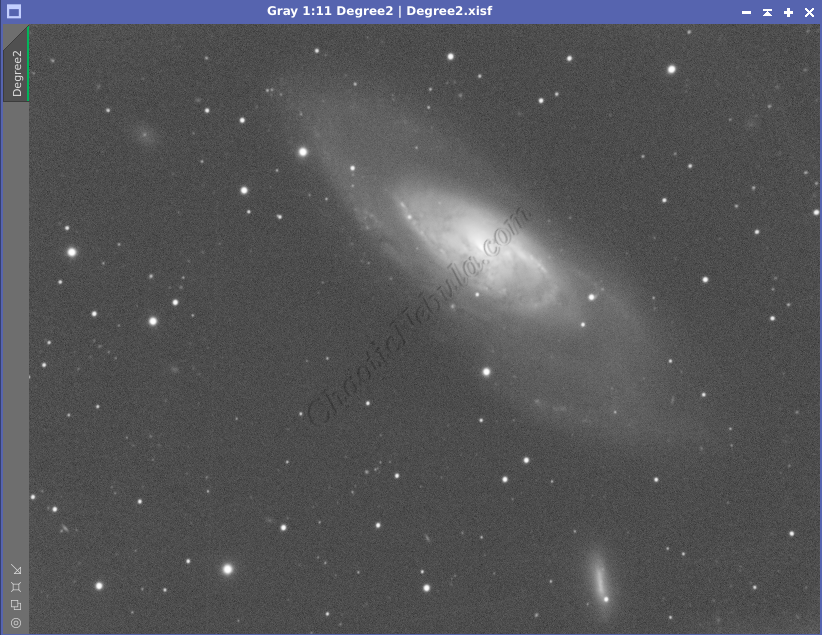


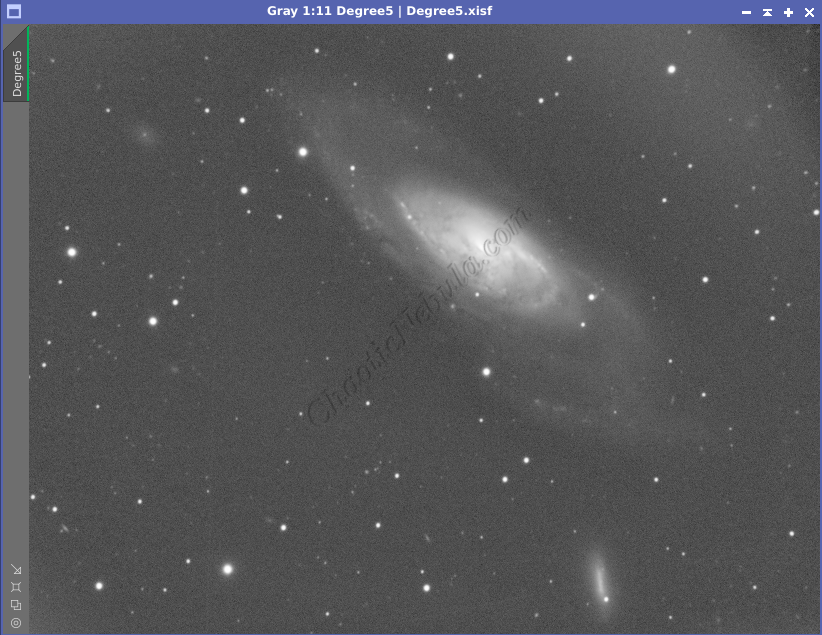
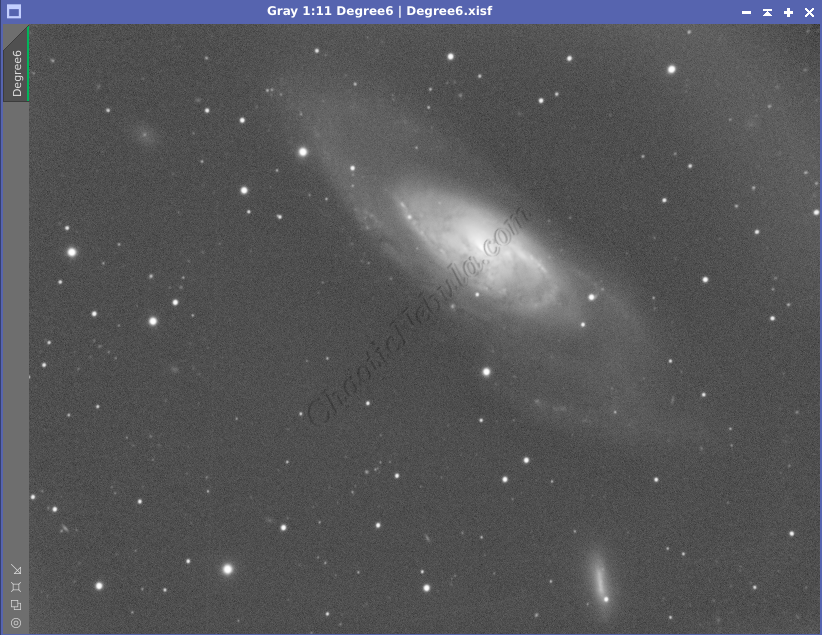
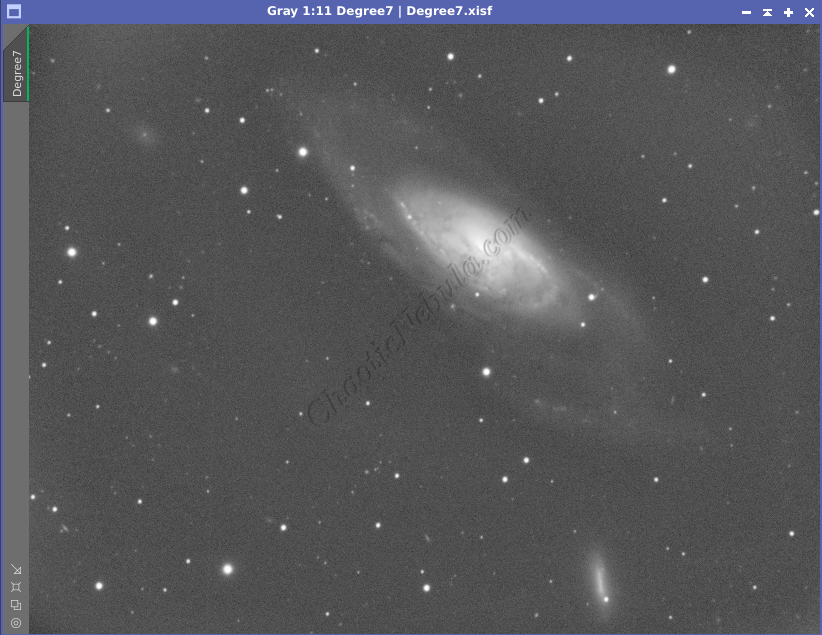
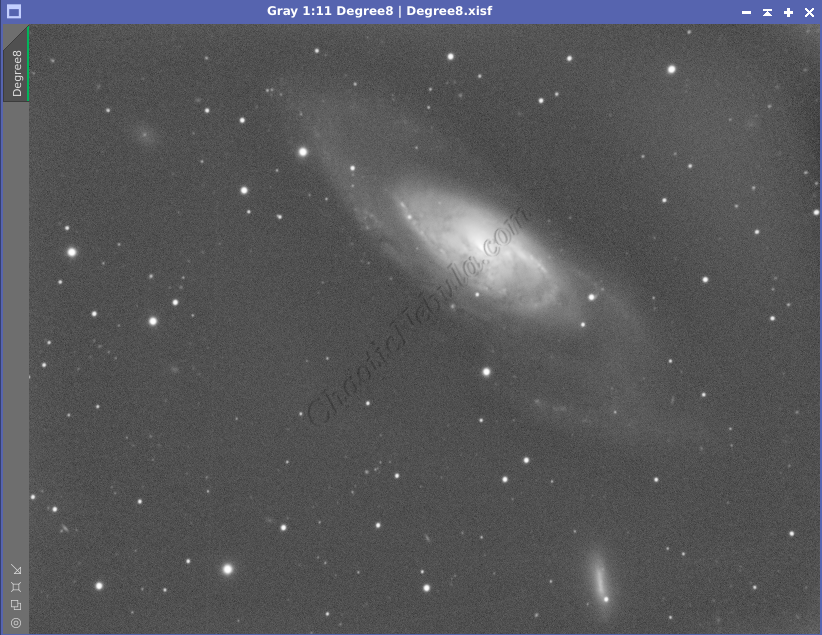
The default gradient correction settings, with the simplified model disabled, does a great job at eliminating the gradient. However, simply enabling the simplified model the following is seen
- Model Degree 1: The outer arms on the top of the galaxy appear slightly brighter.
- Model Degree 2: Adds brightness in the corners of the image
- Model Degree 3: Upper right corner is too bright.
The decisions comes down to either using level 1 or level 2 for the simplified model as all models above level 2 are not viable.
It is also useful to have Gradient Correction create the simplified model mask, to see how it is handling the large-scale gradient.


Gradient Correction Tips
If the default parameters don’t work, which most likely means you are dealing with a complex gradient, use the following as some helpful hints. Just know that you will need to do some trial and error
- Start with default settings. Only use the simplified gradient model at level 1 if you have a well-defined gradient across your image. If you use the simplified model, determine the correct level before making other adjustments. Use the simplified gradient correction mask to understand how the processing is removing the simplified gradient. Once the simplified gradient model is identified, apply it to the image and then rerun gradient correction without the simplified model.
- If the gradient isn’t being removed from the bright areas, increase the high threshold. To find the right level for the high threshold, have structure protection disabled. You will enable it again once you figure out the high threshold value.
- When using structure protection, make sure you generate protection masks. This lets you make sure the mask is focused on the bright structure. To make the mask less strong, increase the protection threshold.
- If you still see sharp edges from the gradient, temporarily disable structure protection. Try lowering Scale and Smoothness until the sharp edges disappear. This makes the model more adaptive to smaller structures. Once you found the settings, re-enable structure protection.
- If you see bright halos around dark structures, increase the low tolerance to prevent this from happening. To maintain contrast, you will want to lower the Low Threshold as well.
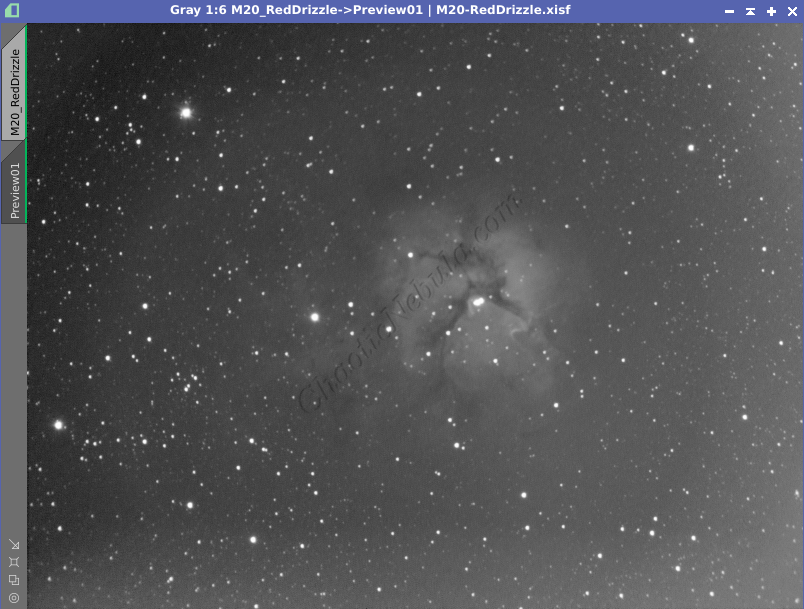
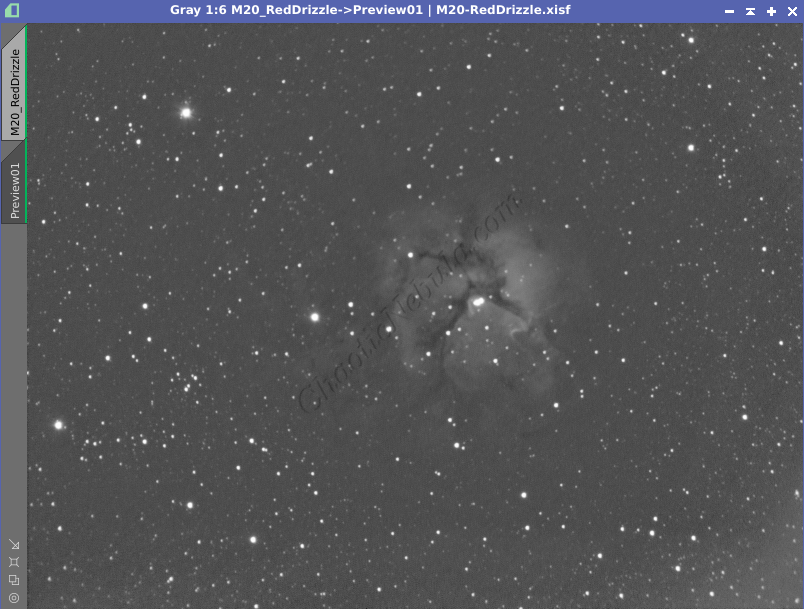
The following example shows a very complex gradient of the M20 – Trifid Nebula through a red filter. This required the high tolerance/threshold values to be increased to handle the bright gradient. The scale/smoothness had to be decreased to handle the sharp edges. And finally, the structure threshold was increased slightly. This was all figured out in less than 10 minutes.

When to Use
The PixInsight Gradient Correction process is used very early in the following image processing workflows: