Capturing stunning images of deep sky objects takes many hours of imaging time, oftentimes over many nights. This leads to the challenge of changing atmospheric conditions and changing light pollution gradients across different parts of the sky. Subframes taking at home hour will have a different background intensity and gradient than another subframe taken a few hours later. The PixInsight Local Normalization process by equalizing brightness variations across the image and across the subframes.
At a high level, the Local Normalization process breaks the image up into small pieces. Within each piece, Local Normalization calculates a normalization factor based on the median or mean brightness of the pixels. This ensures that each tile has consistent brightness levels relative to its local surroundings.
By applying normalization to small, local pieces, the Local Normalization process adapts to the specific characteristics of each region in the image. This adaptive correction effectively compensates for variations in brightness across the image caused by factors like light pollution gradients, sensor response, and optical vignetting
By equalizing brightness variations, the Local Normalization process also ensures that faint details within nebulae and galaxies remain visible without being overwhelmed by background gradients or variations in brightness
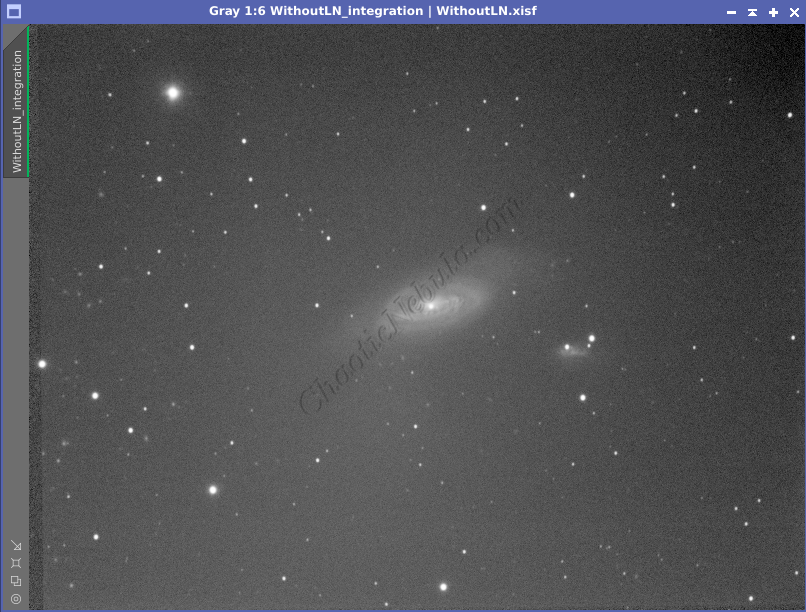
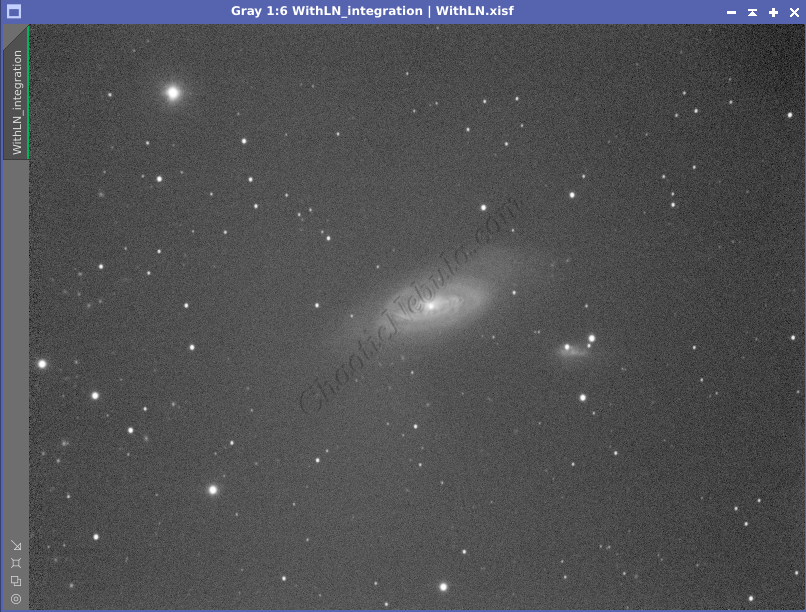
The example shows the same set of subframes integrated with and without using the local normalization process. The improvement in gradient removal is quite dramatic. Not only is the background move equal across the entire frame, but the galaxy also appears brighter.
Local Normalization: Prerequisites
Before starting the Local Normalization process, a reference image is required. When using PixInsight Subframe Selector, it was important to identify the top 5-10% of the images for each filter group. These top subframes will become the reference image.
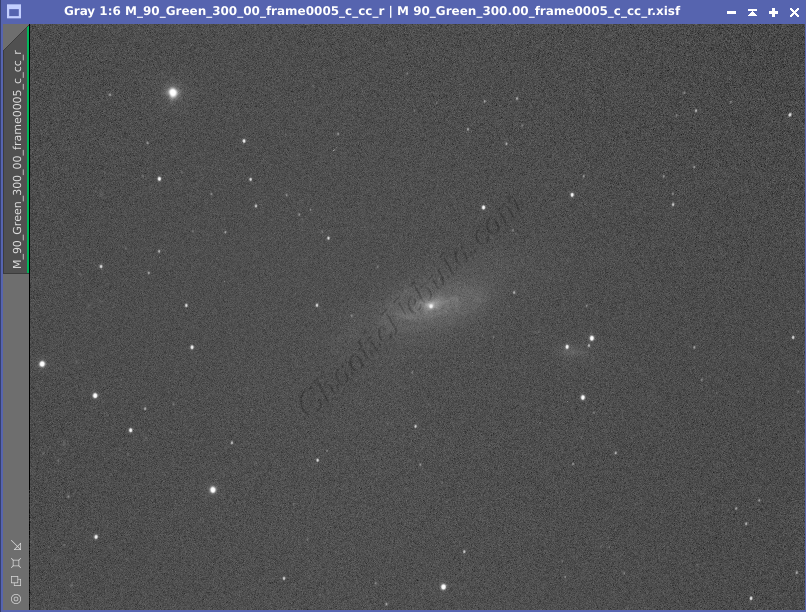
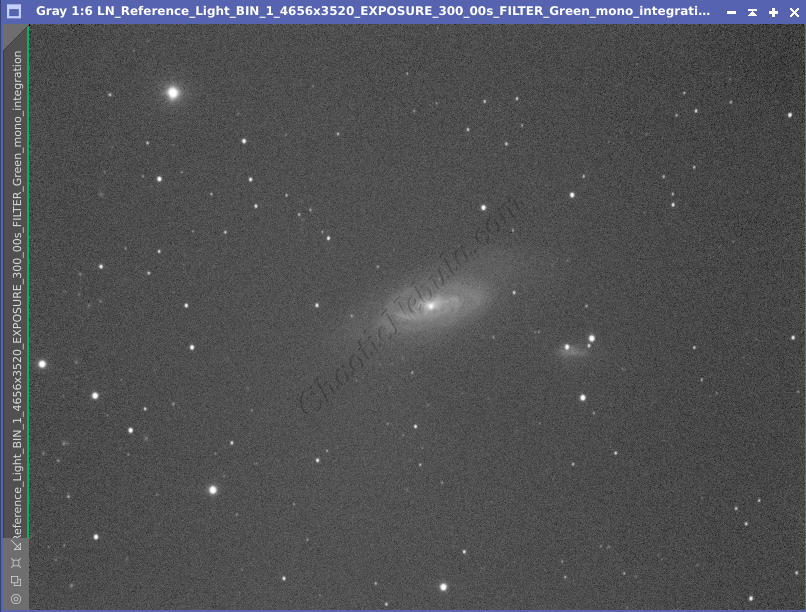
The integrated reference frame has a much stronger signal, which helps the local normalization process preserve the dim structure of the subframes.
To integrate these subframes into a reference image for Local Normalization, do the following:
- Blink: Use the PixInsight Blink process (Process – Image Inspection – Blink) to quickly review the top subframes identified by the Subframe Selector process. Very that these images have minimal gradients and are of high quality.
- Image Integration: Use the PixInsight Image Integration process (Process – Image Integration – Image Integration) to combine the best subframes into a single image that will be used as the reference image.
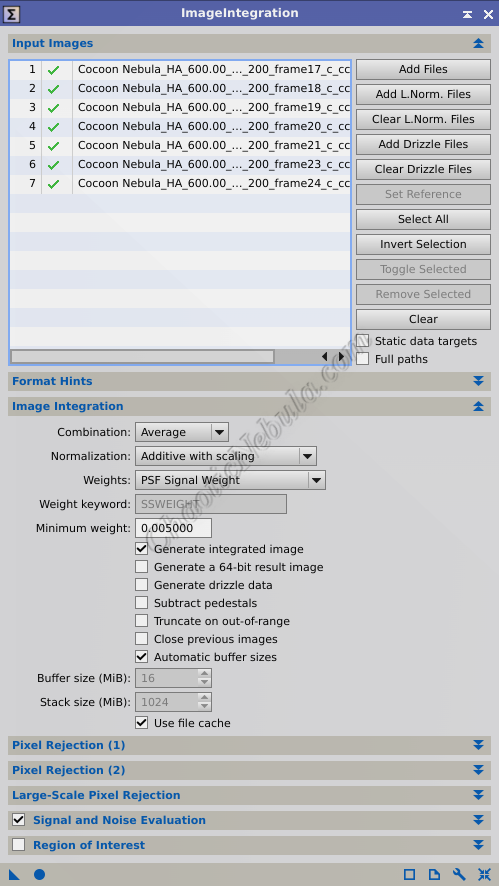
The Image Integration process settings are as follows:
- Target Images: This should be the top 5-10% of subframes as identified by the Subframe Selector process
- Image Integration
- Normalization: Additive with Scaling. This algorithm matches the medians in the target image to help establish a consistent noise level across all target images. The pixels are then scaled so that the brightest pixels remain the brightest after the additive process. It helps prevent the process from accidentally clipping or dimming the signal in the images.
- Weights: This is based on the weighting definition from the Subframe Selector process. If using one of the available options, like PSF Signal Weight or PSF SNR, simply select the options. However, if using a custom calculated value, select FITS Keyword and add the keyword.
- Generate Integrated Image: Enabled
- Generate Drizzle Data: Disabled
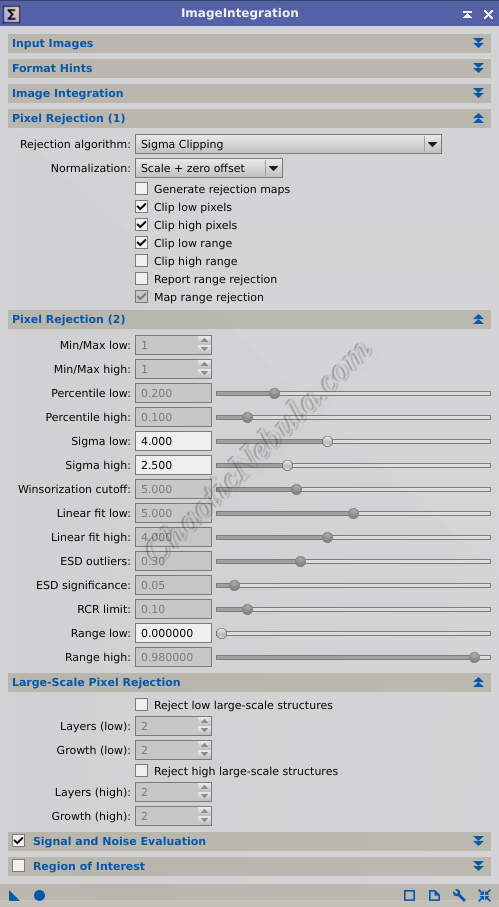
- Pixel Rejection (1)
- Rejection Algorithm: Averaged Sigma Clipping. Working with a small number of frames, it rejects pixels that deviate significantly from the average by a certain number of standard deviations. Averaging across multiple passes helps to refine the rejection process. Many other pixel rejection algorithms require a larger number of subframes
- Normalization: Scale + Zero Offset. It ensures that the overall brightness and background levels of the images are consistent, which is beneficial when creating a reference frame for the local normalization process.
- Clip low pixels: Enabled. Helps mitigate the influence of extreme values in the darker pixels.
- Clip high pixels: Enabled. Helps mitigate the influence of extreme values in the brighter pixels.
- Pixel Rejection (2)
- Sigma low: 4.00. Any pixel value more than 4 standard deviations below the mean will be considered outliers and potentially clipped
- Sigma high: 2.50. Any pixel value more than 3 standard deviations above the mean will be considered outliers and potentially clipped
Once configured, run the process and save the integrated image. This is the reference frame for the location normalization process.
Basic Settings
The Local Normalization process divides the image into smaller sections or tiles. Within each tile, it computes a normalization factor based on the median or mean brightness of the pixels. This guarantees that every tile maintains consistent brightness levels in relation to its immediate surroundings. Most settings within the Local Normalization process can be left in the default state:
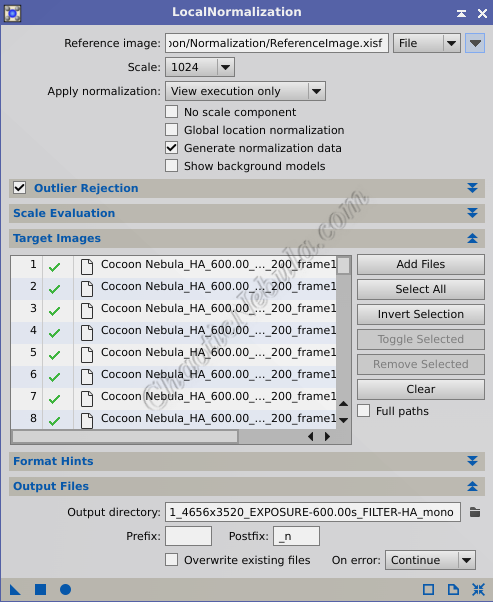
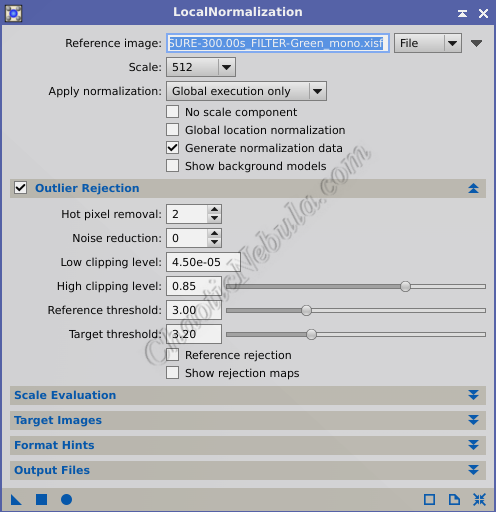
The basic settings include
- Reference Image: This should be the integrated image created earlier from the best 5-10% subframes identified by the Subframe Selector process.
- Scale: This is the pixel size of the tiles used for local normalization (default 1024). If the image contains fine details or intricate patterns, a smaller scale is useful to ensure that local variations are adequately captured and preserved
- Apply Normalization: View execution only. This process saves the normalization data in a separate .XNML file. These files can then be used during the final Image Integration process.
- Generate Normalization Data: Enabled. This tells the process to create the .XNML files
- Outlier Rejection: Enable section. Pixels that deviate significantly from the established normal level from the reference frame are flagged as outliers. This can happen due to hot pixels, cosmic ray hits, or other transient events. The flagged outliers are then excluded from the normalization process. Modifying the specifics within this section is discussed in the advanced topics.
- Target Images: Choose the aligned and accepted subframes for generating normalization data.
- Output Files: Select the directory to store the .XNML files. It is often useful to store them in the same directory containing the aligned subframes
In order to determine the Scale value,
- Apply Normalization. Set to Global Execution Only. This will apply the local normalization adjustments to the target images to allow for inspection
- Target Images: Select a single file to speed up the process for testing
For example, modifying the scale settings had no noticeable impact on the following test image as there was little gradient.
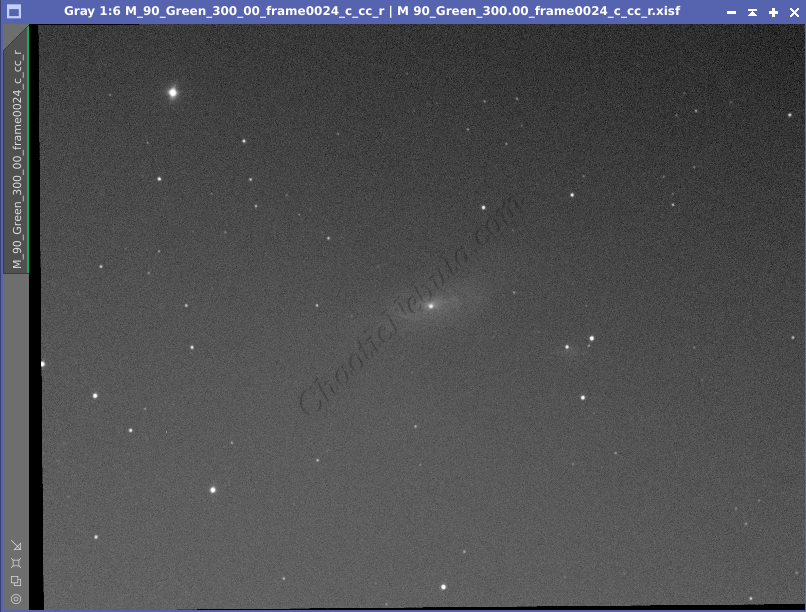
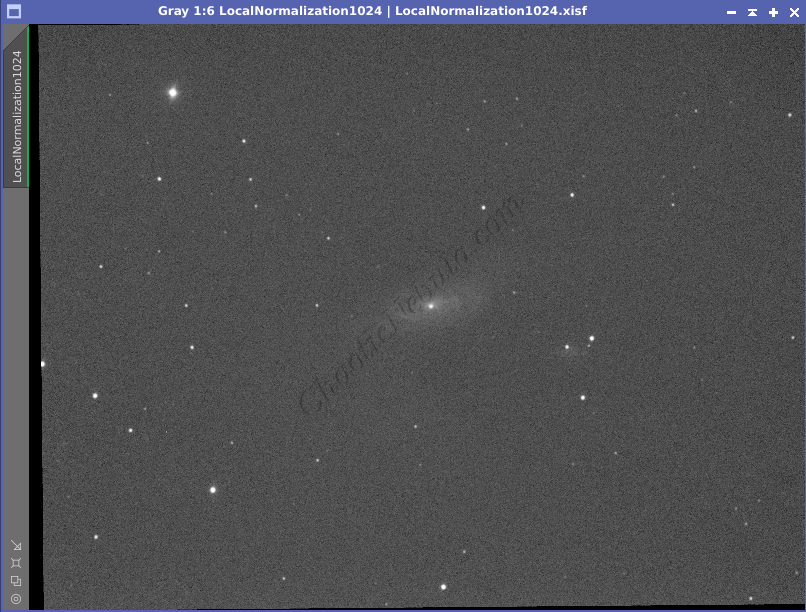
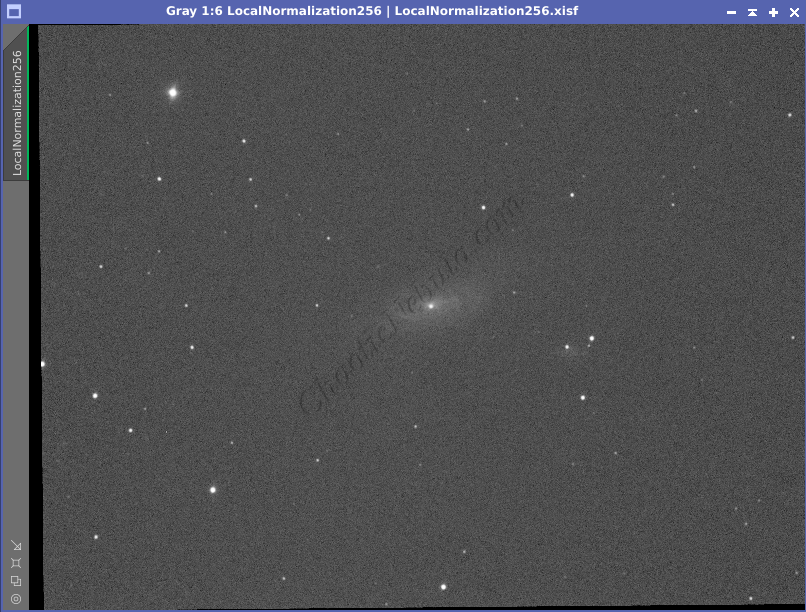
The baseline frame has a fairly strong diagonal gradient moving from brighter in the lower-left and dark in the upper right. Using the default scale of 1024 removed a large portion of the gradient, but some artifacts are still present. The upper right corner is still darker than the rest of the frame. The lower half appears slightly brighter than the rest of the frame. However, when using a scale of 256, these artifacts disappear.
Once these settings are identified and configured, start the local normalization process.
Advanced Settings
In most cases, leveraging the default settings results in an improvement to an image after applying the Local Normalization process. However, there are some scenarios where it might be useful to modify some of the specific configuration items.
Outlier Rejection
The Outlier Rejection section handles pixels that deviate significantly from the established normal level from the reference frame. These outliers can happen due to hot pixels, cosmic ray hits, or other transient events. The flagged outliers are then excluded from the normalization process.
- Hot Pixel Removal: Radius size in pixels to look for hot and cold pixels. Hot pixels are pixels on a camera sensor that register a higher than normal signal, appearing as white dots in the image. Cold pixels are the opposite, registering lower than normal and appearing as black dots. Hot pixels should have been mostly removed through the image calibration with bias, dark, and flat frames as well as the Cosmetic Correction process.
- Noise Reduction: This should only be used in cases where the images have severe noise, strange artifacts, or histogram is showing clipped pixels. If image calibration was done correctly with bias, dark, and flat frames, this setting should not be needed.
- Low Clipping Level: Any pixels registering lower than the defined value will be replaced with estimates from nearby pixels. This is helpful when black borders appear on images due to the star alignment process. However, increasing this value can help preserve shadow detail and prevent them from being artificially brightened during the local normalization process.
- High Clipping Level: Any pixels registering higher than the defined value will be replaced with estimates from nearby pixels. This would be applicable to overly saturated objects, like bright stars. Lowering this value might be required if artifacts appear around bright objects.
- Reference Threshold: Within each region of the reference image, Local Normalization analyzes the histogram of pixel values. Based on the histogram, Local Normalization calculates a reference level that represents the most common brightness value (often the peak of the histogram). Local Normalization then compares each pixel value in the region to the reference level.
- Increasing: Requires a larger portion of pixel values within a region to be very close to the reference level for normalization to occur effectively. Can lead to a more pronounced normalization effect, potentially resulting in a smoother background, especially in areas with significant variations
- Decreasing: This allows for a wider range of pixel values to be considered “normal” within a region. Can ensure normalization happens in more regions, potentially leading to a more consistent background overall or potentially a higher variability in the background.
- Target Threshold: Provides the same capabilities as Reference Threshold except it applies to target images.
Tips
To get the most out of local normalization, one image is needed with a minimal background gradient. Ideally, the subframe should be taken with following circumstances
- High transparency – less sky glow
- Near meridian – less gradient
- New moon
What’s Next
With local normalization files created, the image processing can continue based on the respective workflow: