Note: BlurXTerminator is a paid add-on for PixInsight.
When light travels from a distant celestial object to your telescope and camera, it can be affected by several things. Imperfections in your telescope optics, atmospheric turbulence, and even slight issues with your telescope’s tracking (guiding errors) can all cause the light to spread out slightly. This spreading leads to the stars appearing bloated and fine details becoming blurred.
The traditional approach to reduce the blurring in images is to use the PixInsight Deconvolution process. This manual approach works but requires the creation of a Point Spread Function (PSF) to determine how a single point of light (star) is spread across the camera pixels. An alternative approach is to use an add-on to PixInsight called BlurXTerminator.
How It Works
BlurXTerminator is uses artificial intelligence to apply deconvolution to astrophotos. In brief, it works as follows:
- Large Language Model: NoiseXTerminator utilizes a neural network specifically trained on a massive dataset of astrophotographic images. The training allows it to learn what true astronomical details should look like.
- Targeted Sharpening: Traditional deconvolution requires numerous trials to adjust the settings to sharpen stars without introducing dark halos. This process is applied even across the entire image not protected by mask. BlurXTerminator applies different levels of deconvolution to different aspects of the image. Dark objects, bright objects, and structure are all treated differently. This often results in a more natural looking and a more detailed final image.
- Aberrations: Many astrophotos are victims of coma and chromatic aberrations. Coma appears as blurry stars towards the edges of the image versus the center. Chromatic aberrations appear as fringes of color on the edges of stars. BlurXTerminator identifies these types of aberrations and applies corrective actions. To correct for chromatic aberrations, BlurXTerminator needs to be applied to a color image.
When you look at an astro image, you can tell that the stars are puffy. You can tell that the stars along the corners are elongated. This is what BlurXTerminator is identifying and fixing.
Let’s compare a baseline image, vs the Deconvolution, vs BlurXTerminator.
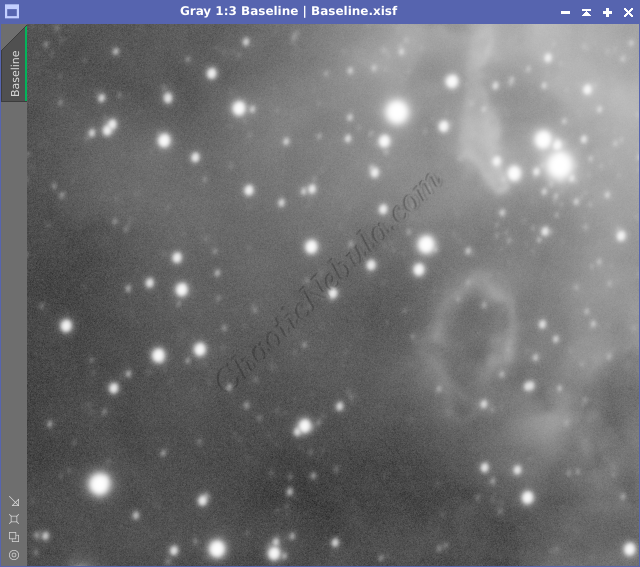
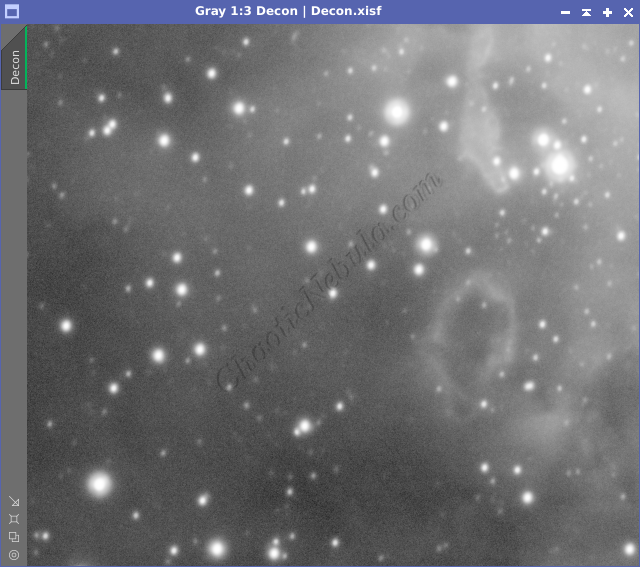
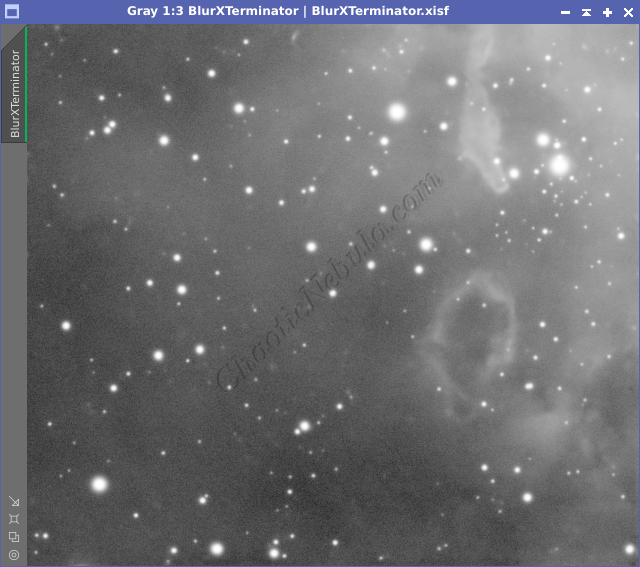
The Deconvolution did reduce the bloat on the stars, but there are still rings around the larger stars. Spending more cycles would help to fix those errors. However, when compared to the default settings of BlurXTerminator, it is quite obvious the improvement it made to sharpening the image.
How to Use BlurXTerminator
BlurXTerminator is very easy deconvolution process. In many situations, the default settings work wonderfully. However, you can tweak the settings, but it is useful to understand how they work.
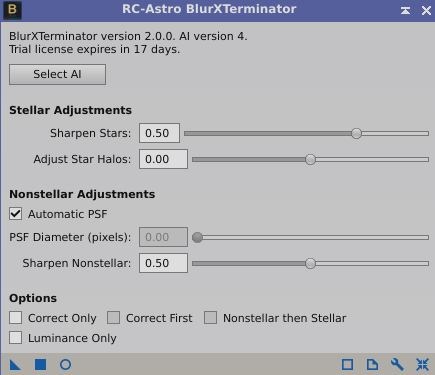
Stellar Adjustments
- Sharpen Stars: Controls how fat the final stars should be, often associated with FWHM. Full Width at Half Maximum, is a measure of star sharpness in astrophotography. A lower FWHM means stars appear sharper and more pinpoint, indicating good atmospheric conditions and focusing.
- Adjust Star Halos: Controls the glowing effect around stars. A higher value reduces the glow more significantly, but it can create an artificial look as there should not be a sharp cutoff at the edge of the star.
Nonstellar Adjustments
- Automatic PSF: Determines the amount of blurring within the image by analyzing the stars. It is usually best to leave this enabled. In rare cases, when the image contains very few stars will it be required to disable the setting and configure the PSF Diameter setting manually.
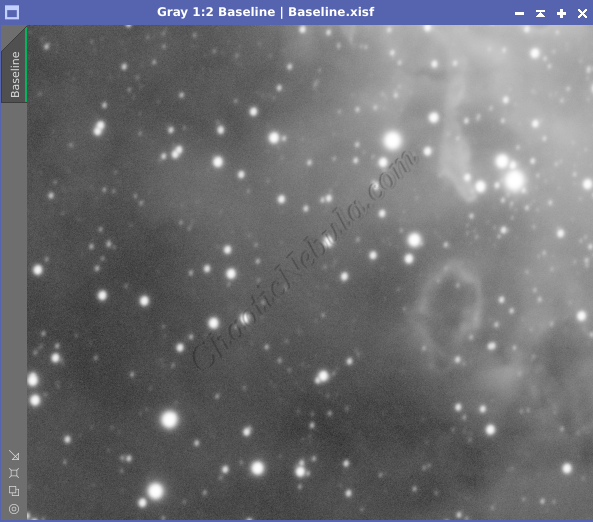
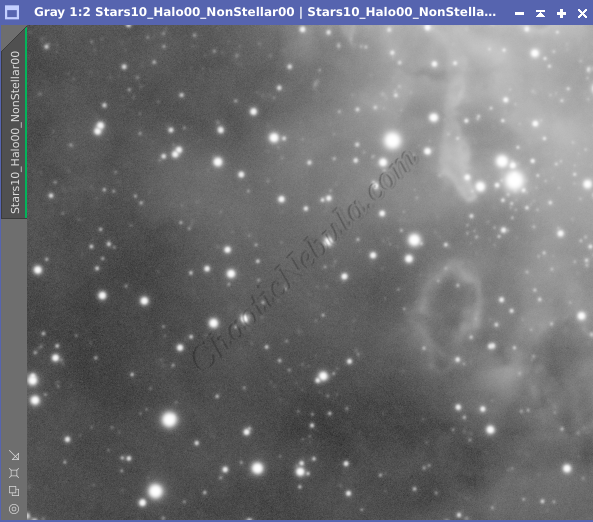
- Sharpen Nonstellar: Controls the sharpening for the nebulas, galaxies, and dust clouds in astrophotography image – anything that’s not a star. A higher value sharpens more, making the nebulas and galaxies appear crisper with more detail. Too much sharpening can create unwanted noise or halos around the objects. In the following example, pay attention to the bright edges of the nebula in the top-right corner.
Options
- Correct Only: Correction focuses specifically on aberrations in the image, like coma and chromatic aberrations. This process is always performed when using BlurXTerminator. If Correct Only is selected, BlurXTerminator only works on correcting those aberrations and does not perform stellar and non-stellar sharpening. If is usually better to run Correct Only first, and then BlurXTerminator again for sharpening.
BlurXTerminator Example
The following shows the sequence of dialing in the optimal BlurXTerminator parameters for an image. Although BlurXTerminator does allow for live preview, it is often easier to use preview windows to make it easier to compare against different settings. It is useful to create preview windows that contain stars and bright nebula edges.
First, let’s simply fix the aberrations by selecting Correct Only.
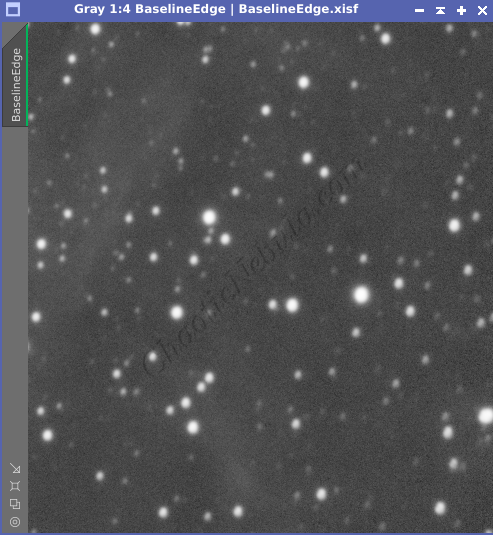
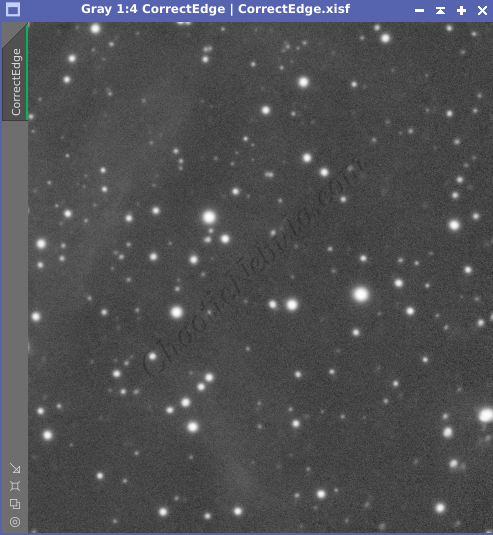
This process fixed the coma noticeable in the corners of the image. The stars are now round instead of oblong.
With the aberrations corrected, let’s now find the optimal value for the stellar adjustments.


After close examination, a stellar sharpen setting around 50-70 seems to work well without producing dark halos.
The next step is to adjust how much glowing to keep around the stars.


A value of minus 0.40 is able to shrink the star glow without producing artifacts. And because the stars were so large to begin with, even applying a strong halo reduction doesn’t appear to be overpowering.
The next step is to adjust the non-stellar sharpening. because there are plenty of stars in the image, the automatic PSF setting is enabled.


Paying attention to the bright nebula edge in the upper right, a value between 0.50 and 1.00 would work.
With the values identified, they should be tested on another area of the image before applying permanently.