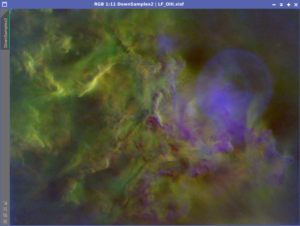
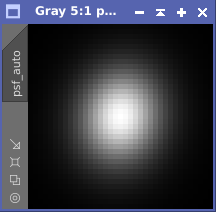
The blurring effect within an image is often characterized by a mathematical function known as the Point Spread Function (PSF), which describes how a point source of light is spread out in the image. The point light sources are your stars, which should be circular.
When used with the PixInsight Deconvolution process, an accurate PSF model shows the blurring characteristics within the image, which deconvolution can correct. To be accurate, the PSF creation process should use a linear image (one that has not been stretched). When an image is stretched, the PSF characteristics are no longer accurate, resulting in a poor deconvolution result.
In ideal conditions, the PSF image would be a perfect circle with no rotation. However, due to atmospheric blurring and issues with the imaging rig, this is not going to happen. The PSF image is the guide for how Deconvolution will correct your image. The closer to a perfect circle your PSF image is, the smaller impact deconvolution will have.
Within PixInsight, there are two ways to create a PSF model: Manual and Automated. Learn how to create both and see if there is a difference between the approaches.
Automated PSF Creation Process
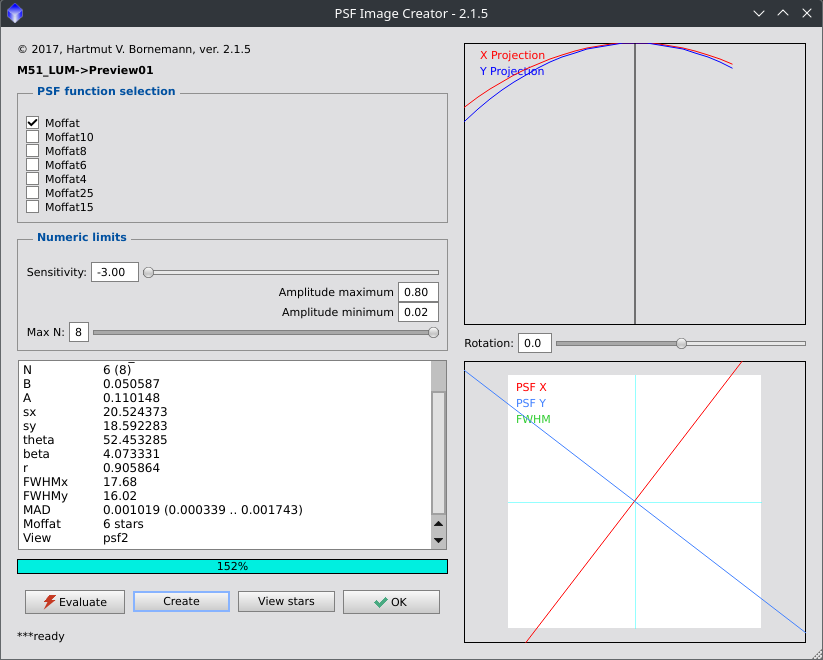
PixInsight includes a script to automatically create a PSF image (Scripts – Render – PSFImage).
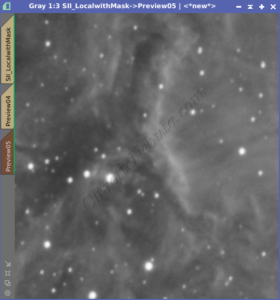
- Create a preview window on a section of your linear image that contains stars. Using a preview window for the script allows you to test the parameters quickly.
- With the preview window selected, launch the PSF Image Creator script (Scripts – Render – PSFImage).
- Leave the defaults and select Evaluate.
- The Moffat function describes the shape of a point spread function (PSF) or the distribution of light around a point source in an image
- Moffat(Number) is a reference to the mathematical function used to model the star shape. If you know the right reference, select it (not common)
- If you do not know the right Moffat reference (most common), select Moffat, which will find the best parameter for you
- If no stars were detected, decrease the sensitivity slider slightly to identify more stars. Repeat until stars are identified.
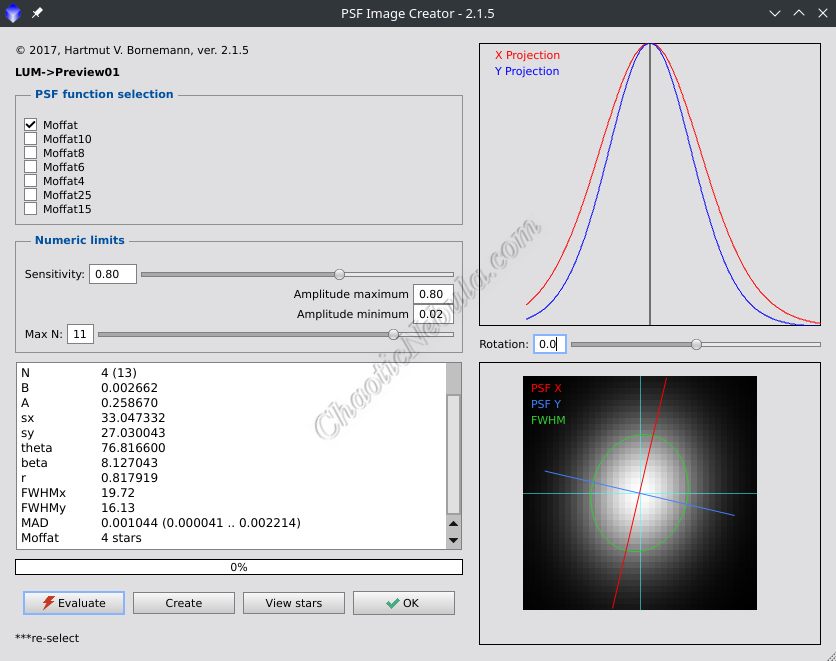
- When the script identifies stars, you can adjust the Max N to include more stars. Selecting Evaluate again just adds/removes stars without rerunning the script.
- Once the settings are identified, close the script, select the entire image, and relaunch the script. This time, when you select evaluate, it will use the entire image instead of the preview.
- Select Create to build the PSF image.
- Remember to save the PSF image file
Troubleshooting
From time-to-time, the automated PSF image creator script will identify stars, but return an unusual result in the preview window. The preview window is missing the star’s model.
If Create is used to create the PSF model, it results in a PSF model that is 1 pixel in size.
This is often due to having an image that is too noisy. Two options to overcome this are
- Apply noise reduction to the image, like TGVDenoise. However, it is typically best to complete deconvolution before applying any noise reduction to the image.
- Use the manual PSF creation process.
Manual PSF Creation Process
PixInsight includes a process to manually create a PSF image (Process – Image – Dynamic PSF).
- With the unstretched image (linear) active, select Process – Image – Dynamic PSF
- Click on several isolated, bright, and unsaturated stars in your image. Aim for 20-40 stars distributed across the entire image
- With the stars selected, sort the data and remove outliers
- Star Type: In the star ID column, determine what you have more of: Moffat or Gaussian. Remove all entries for the type you have less of.
- Amplitude (A): The higher the value, the brighter and over-saturated the star is. The opposite is true for smaller values. Ideally, remove any entry where the Amplitude (A column) where the value is is not between .2 and .8.
- Rotation Angle (θ): You want to remove any entries where the rotation angle is vastly different than the average.
- With the stars selected and filtered, select all items from the list and select Export a Synthetic PSF Function (Camera)
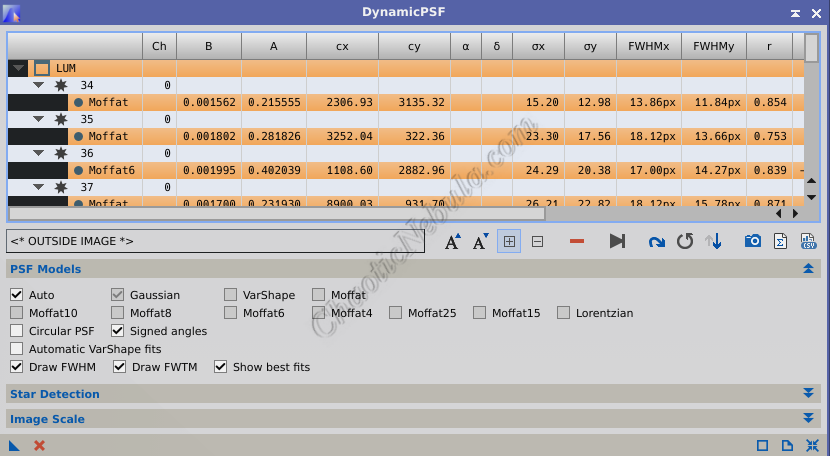
- This creates your PSF image. Save this file.
Why should the amplitude be between .2 and .8? If the star is less than .2, it is too dim to create a spread from the point of light. If it is too bright, the top of the slope gets cut off as it is oversaturated.
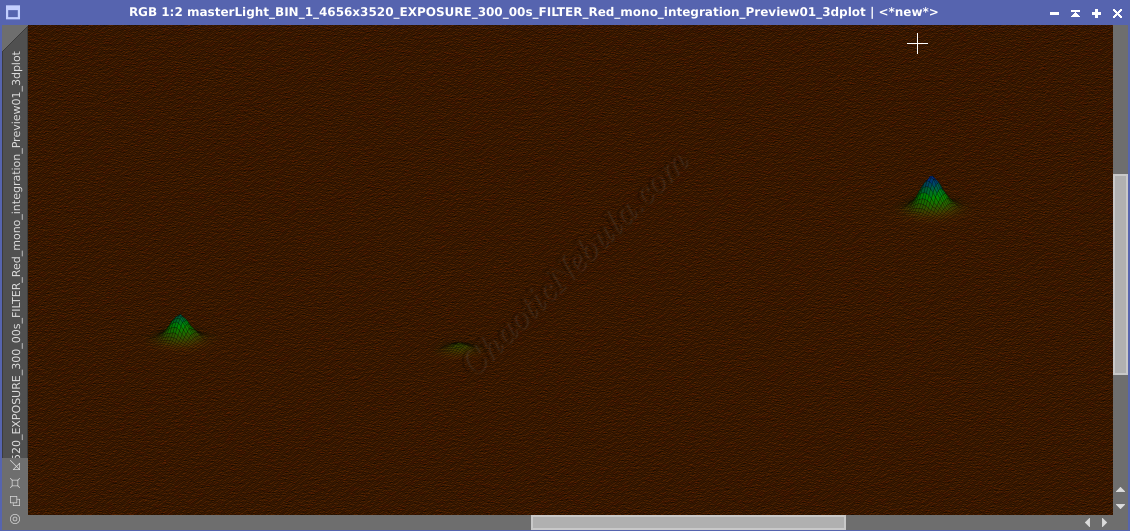
Take a look at the following example image and the stars selected.

Even though the stars look adequate in the image, all three are too dim.
- Star 1 Amplitude: .101
- Star 2 Amplitude: .025
- Star 3 Amplitude: .141
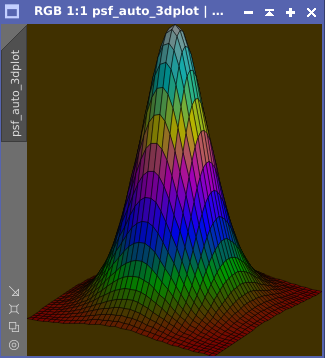
A good 3D Plot of a star should look like this:

However, these three stars don’t have enough amplitude to generate an adequate 3D plot.
Comparing PSF Creation Models
Two options for creating a PSF model. Which is better?
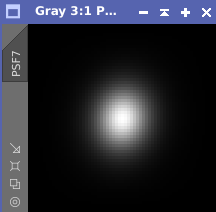
First, it is good to know how to create a PSF model with the manual approach using Dynamic PSF. However, the automated approach is easier and faster. If you compare between the two, it is difficult to determine if they are similar due to the difference in the size of the image. However, if you use the 3D Plot function within PixInsight (Scripts – Render – 3D Plot), you can easily tell the PSF Models are nearly identical.
Based on this, it would appear that the automated PSF Model creation is just as good as the manual approach.