Note: NoiseXTerminator is a paid add-on for PixInsight.
In astrophotography, faint details often hide within the darkness. Background noise, characterized by random fluctuations in pixel brightness, can obscure these details and introduce artifacts. This noise is particularly prominent in low-signal areas like the night sky or object shadows.
Minimizing background noise is crucial for astrophotography. It reveals the subtlest celestial features, otherwise hidden by the static, and prevents the introduction of distracting blemishes in the final image.
Early on in the image processing workflow is the optimal time to do a generalized noise reduction of the low signal areas of the image. Historically, the image processing workflow would utilize a combination of TGV Denoise and Multiscale Linear Transform. These options are valid options, but NoiseXTerminator is a third party add-on that can greatly improve and simplify the noise reduction process.
How It Works
NoiseXTerminator tackles the challenge of background noise in astrophotography using artificial intelligence. In brief, it works as follows:
- Large Language Model: NoiseXTerminator utilizes a neural network specifically trained on a massive dataset of astrophotographic images. The training allows it to learn about the characteristics of background noise and typical details within astrophotos.
- Noise Identification: During processessing, NoiseXTerminator analyzes the image and identifies areas likely impacted by background noise. This allows it to distinguish between noise and features of the deep sky object.
- Noise Reduction: Once the noise is identified, NoiseXTerminator does selective noise reduction while trying to minimize the impact on fine details and sharpness within the image. This can help maintain a natural look of the astrophoto without creating blurring effects.
Think about it this way. When you see an image that has not been processed, you can distinguish the noise from the signal because you know what celestial images should look like. NoiseXTerminator is also trained on what astrophotos look like. This makes it easier for it to find and reduce noise within the image when compared to general-purpose based noise reduction tools that often utilize statistics and masks to help protect the signal.
Let’s compare a baseline image, vs the TGV Denoise and Multiscale Linear Transform combination, vs NoiseXTerminator.
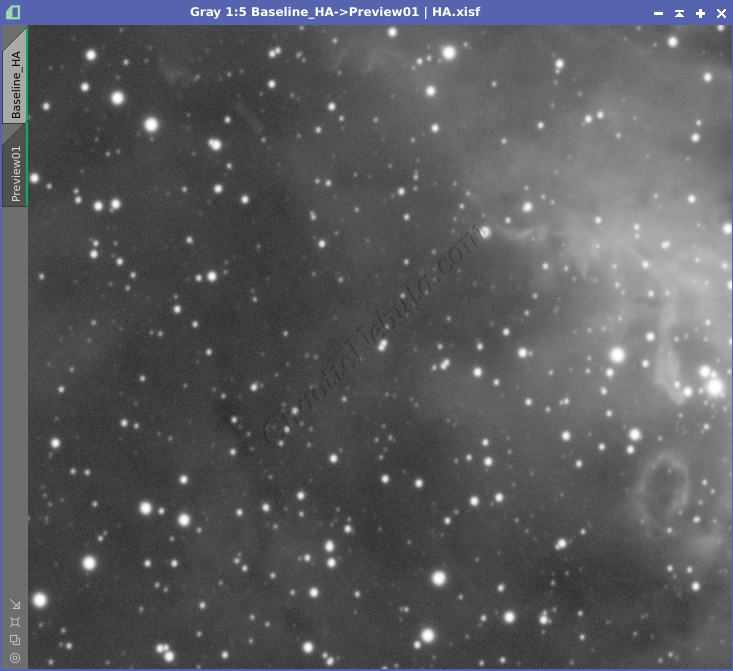
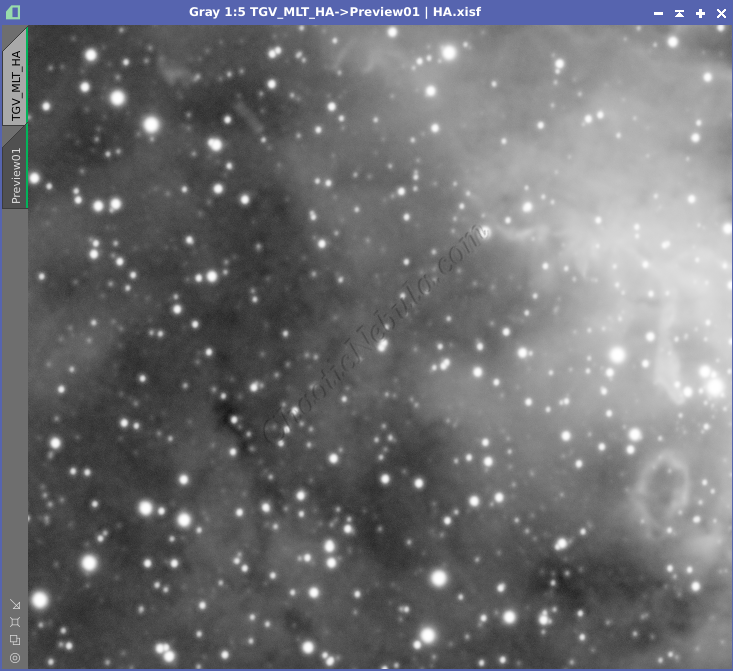
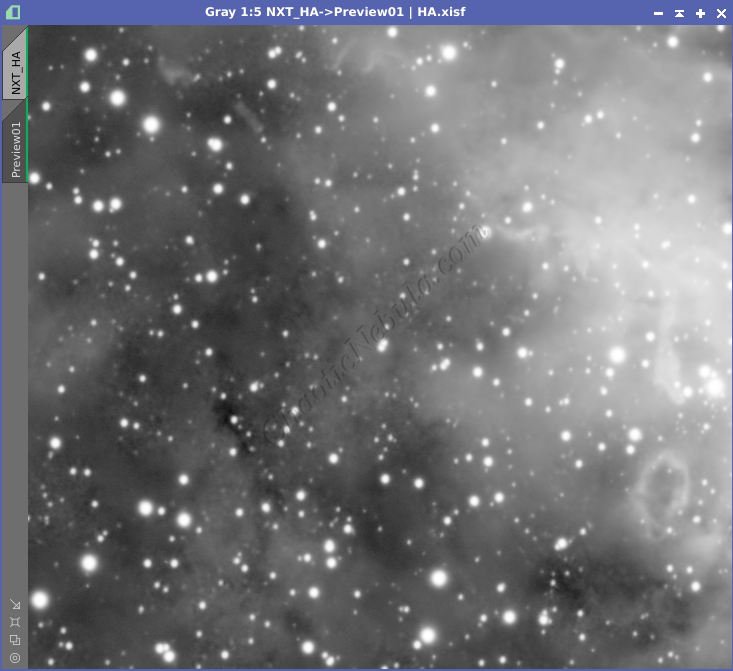
The combination of TGV Denoise and Multiscale Linear Transform does make a significant improvement to the underlying noise while protecting the higher signal areas. However, pay attention to the lower signal areas. This is where NoiseXTerminator stands out. Not only does it reduce noise, but it also better protects the high and low signal areas. In addition, NoiseXTerminator is also much easier to setup and apply.
How to Use NoiseXTerminator
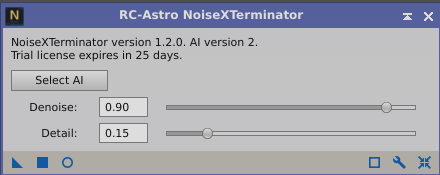
NoiseXTerminator is an extremely simple noise reduction process with only a few options. In most cases, the defaults work fine. But to tweak the settings, it is good to first understand the following:
- Denoise: This controls the strength of the noise reduction applied to the image. A higher value removes more noise, but can also affect the sharpness of fine details.
- Detail: Noise reduction can sometimes blur details. This controls how much sharpening is applied after the noise reduction process.
The ideal settings for Denoise and Detail will depend on the image and the level of noise present.
- Typically, start with a low Denoise setting and gradually increase it until you see a major reduction in noise without impacting the detail
- Once noise has been removed to the desired level, adjust the Detail setting to improve the sharpness. You can often increase this until dark halos start appearing around stars or structure start appearing in the noise where no structure should be present.
Noise Reduction Example
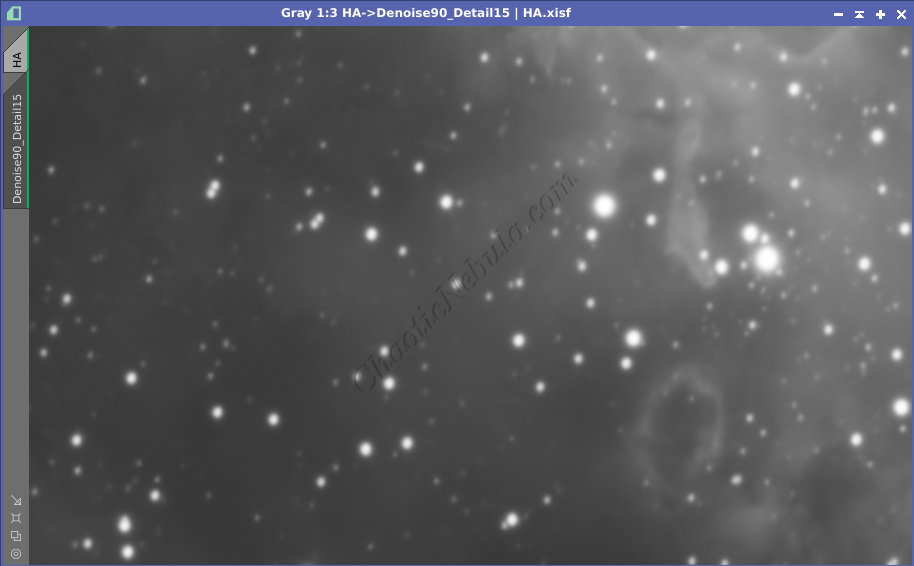
The following shows the sequence of dialing in the optimal NoiseXTerminator parameters for an image. Although NoiseXTerminator does allow for live preview, it is often easier to use preview windows to make it easier to compare against different settings. It is useful to create preview windows intersecting low and high signal areas.
First, let’s find the optimal value for the Denoise setting.


After close examination, a Denoise of 70 or 90 is appropriate. With that identified, the next step is to focus on adjusting the detail level.


With this example, the changes are almost non-existent. Part of this is because BlurXTerminator was applied before NoiseXTerminator. The signal is fully visible, resulting in less blurring from applying NoiseXTerminator.