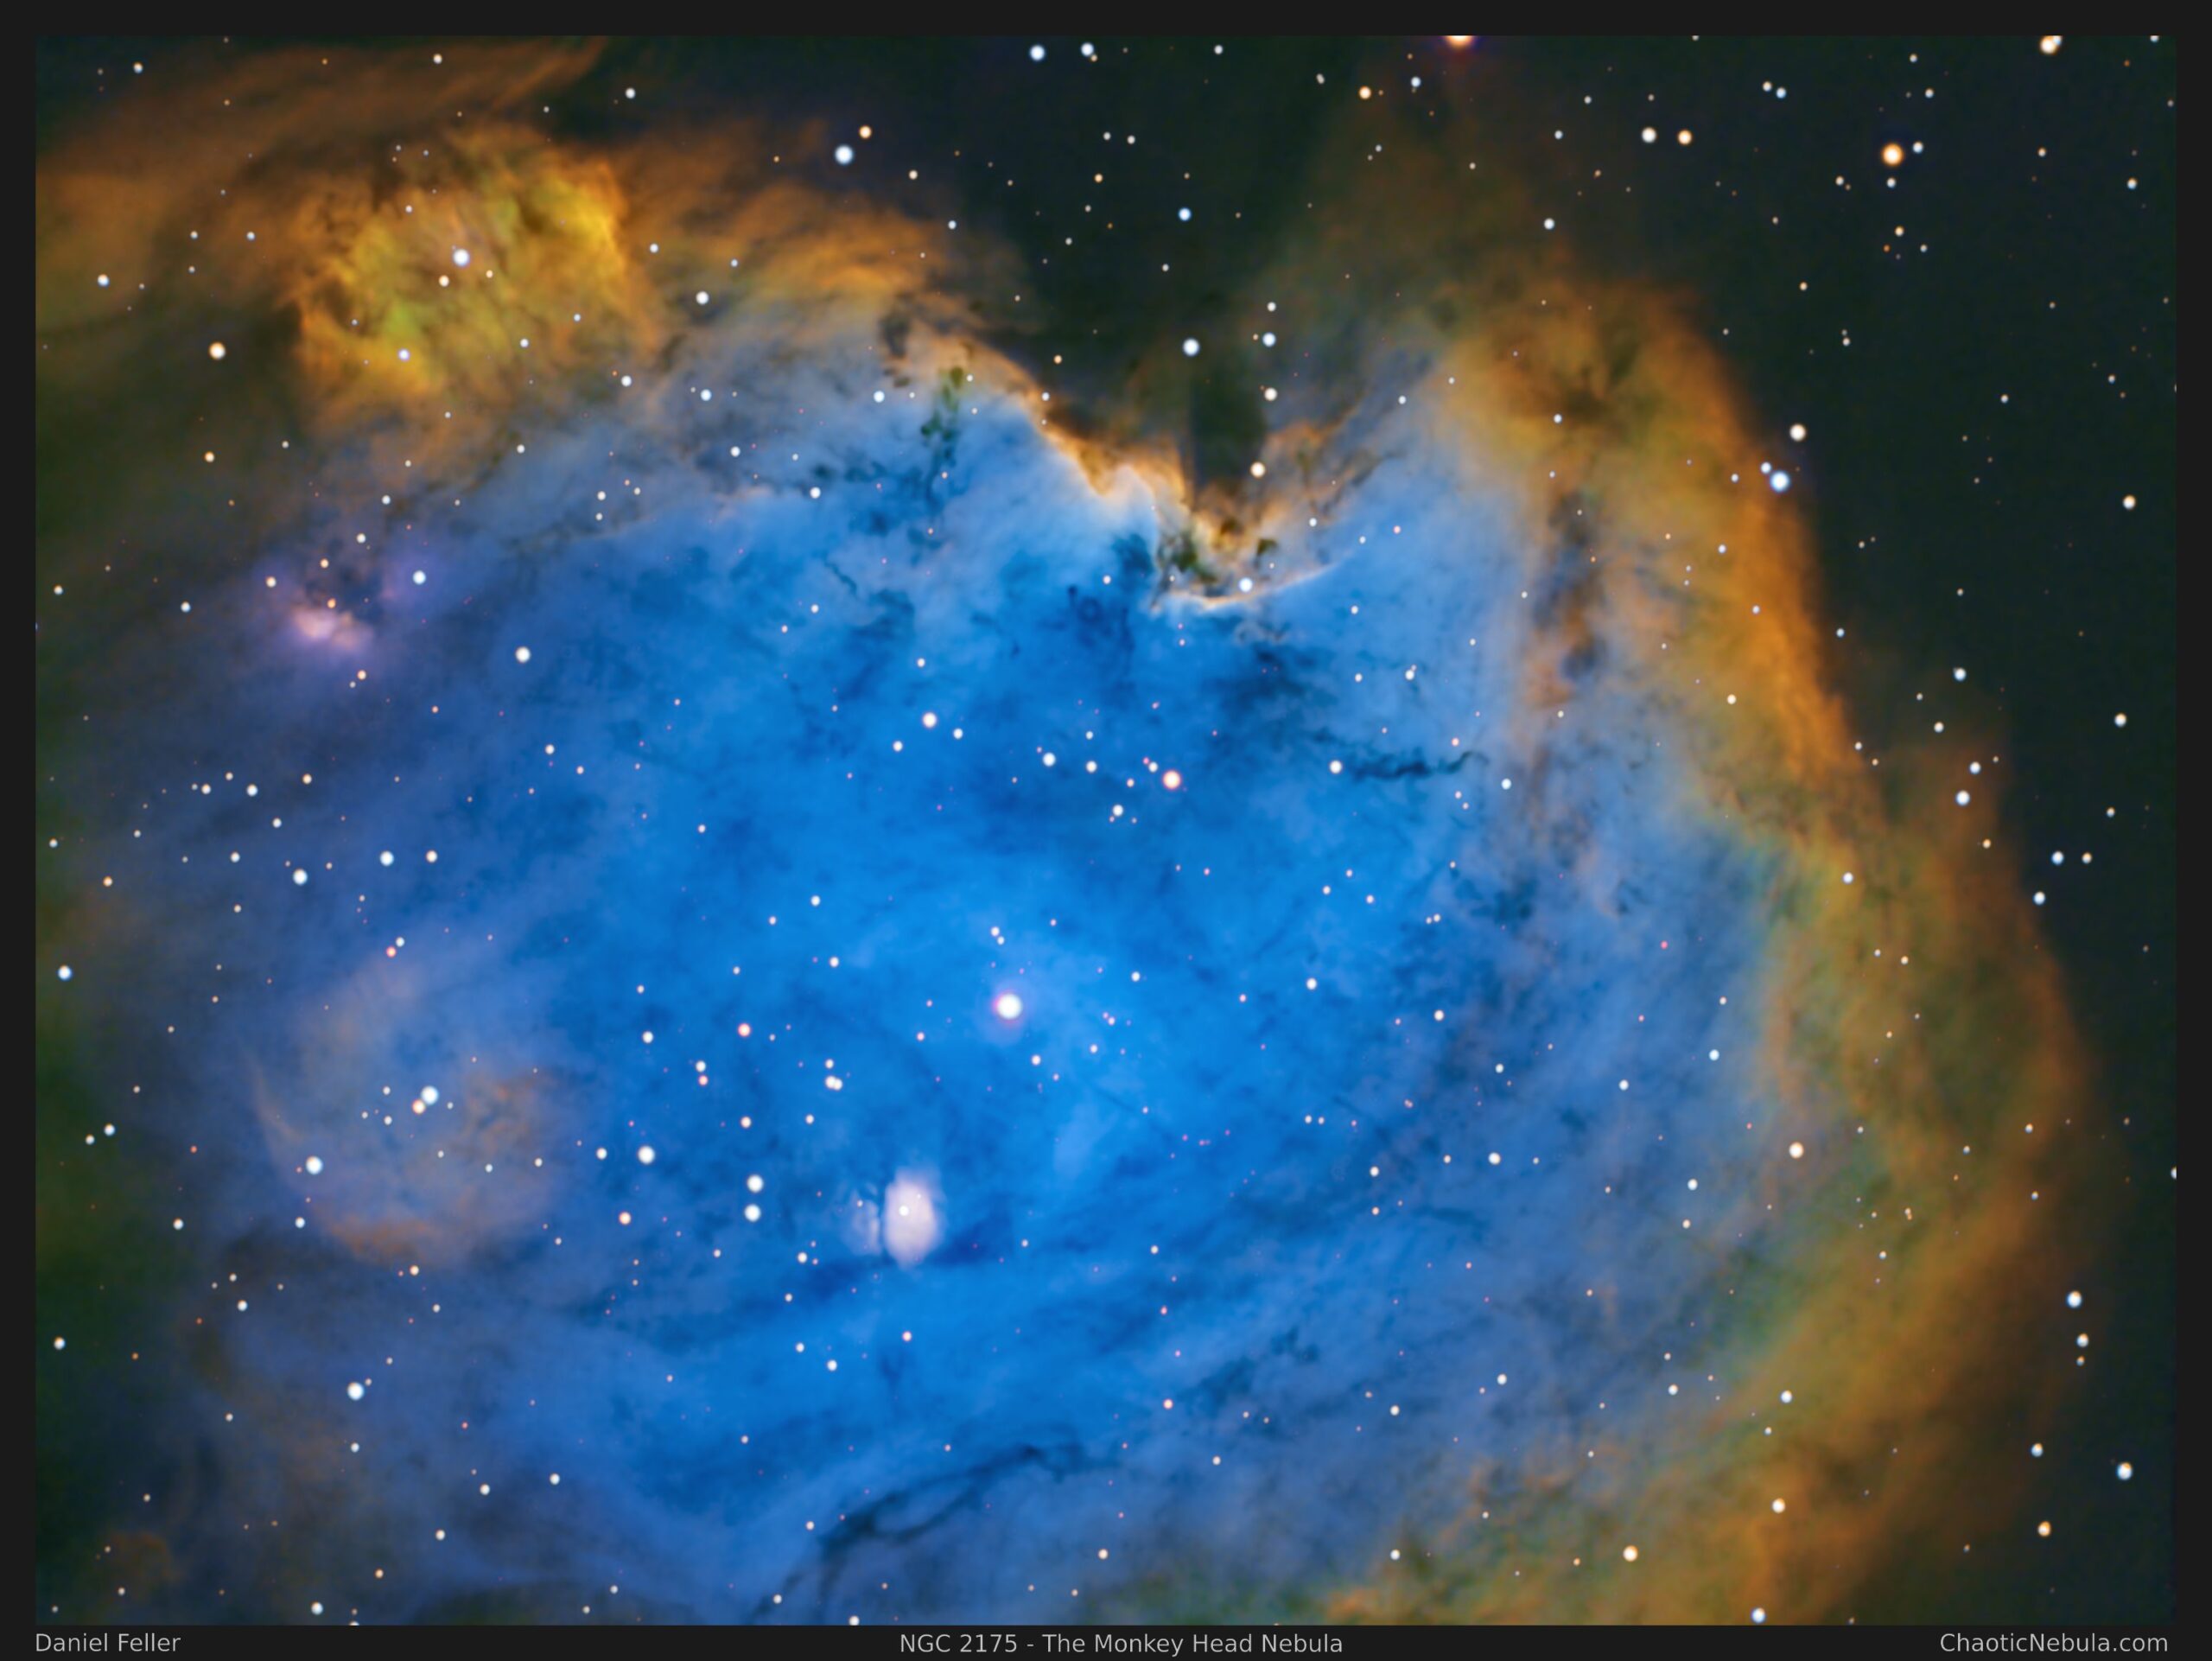
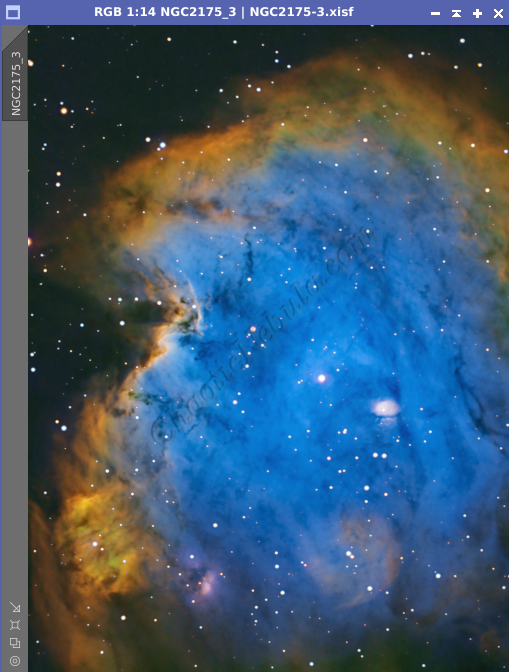
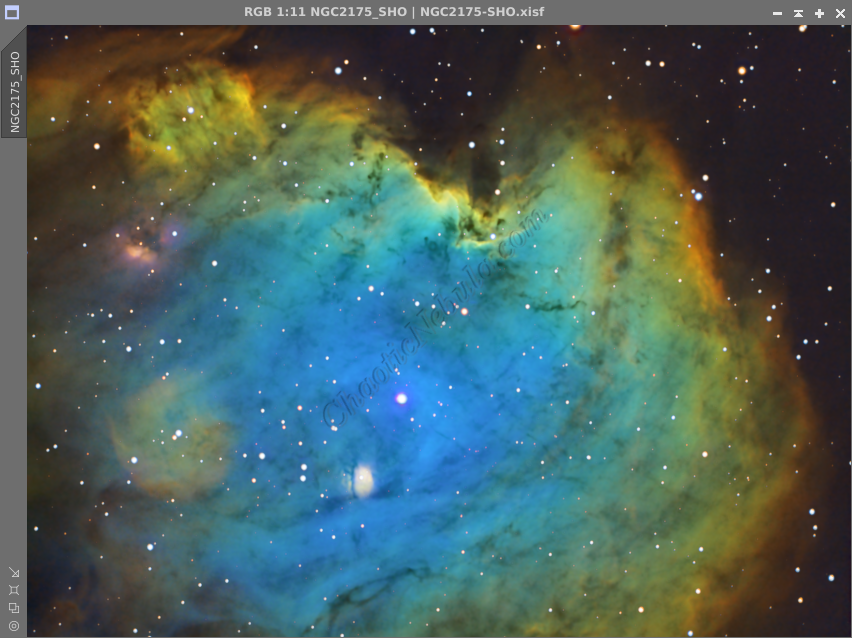
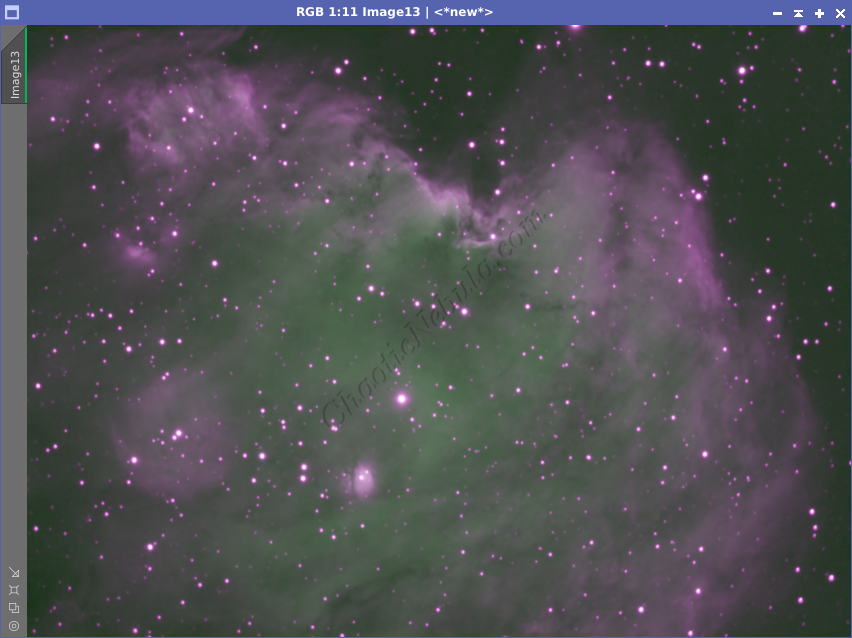
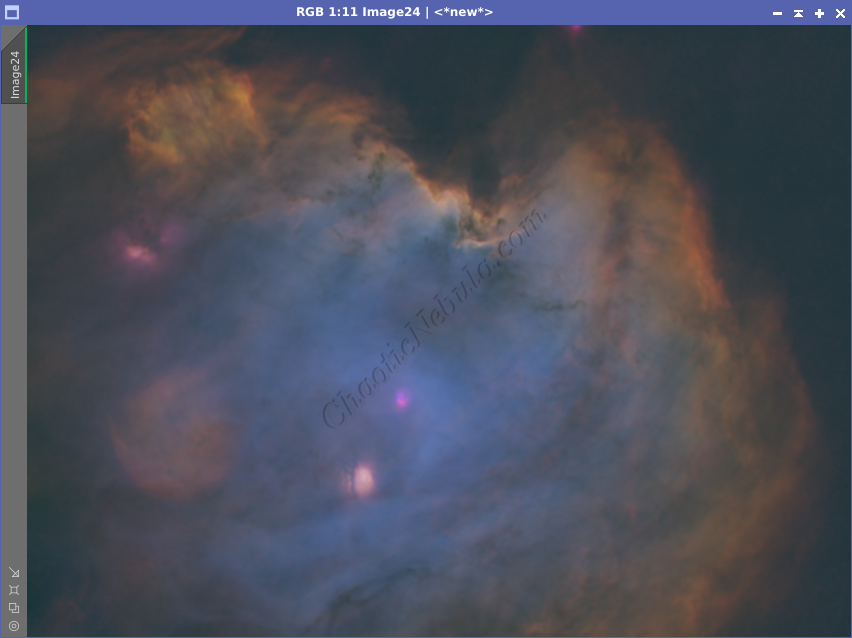
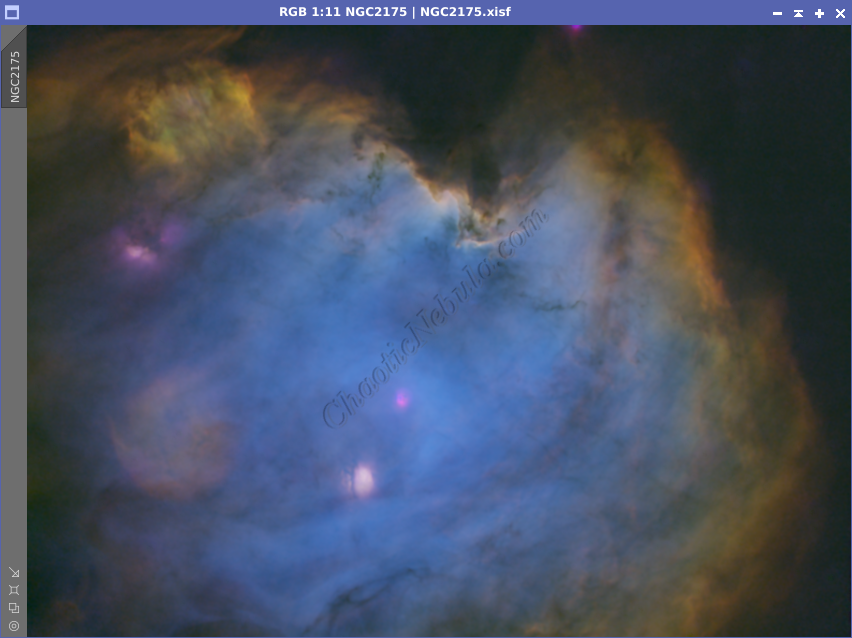
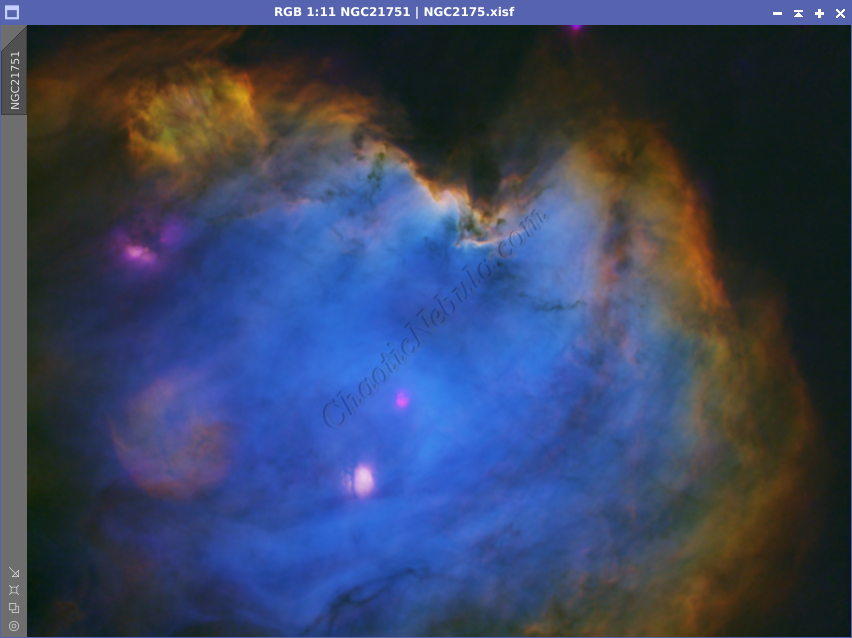
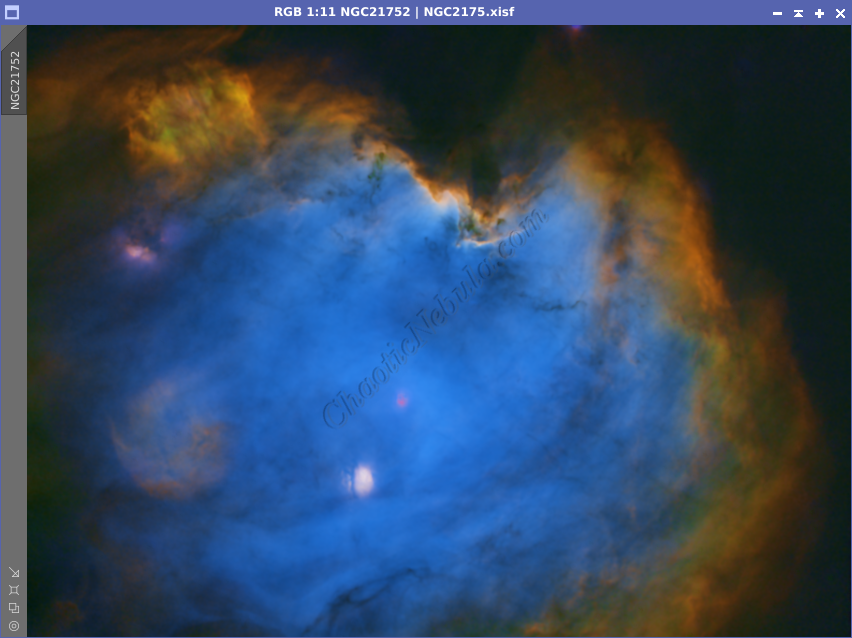
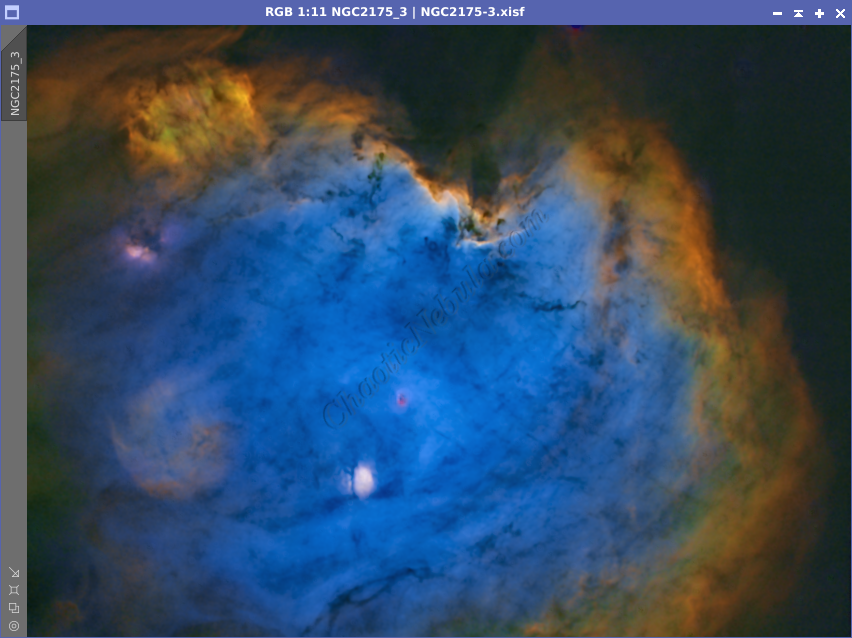
During the winter months, many of us immediately image M42 – The Orion Nebula. But Orion contains many other interesting targets, including NGC 2175 – The Monkey Head Nebula. Only 6,350 light years away, the Monkey Head Nebula is bright and easy to photograph, especially with narrowband filters (Hydrogen-Alpha, Sulphur-II, and Oxygen-III).
This cosmic wonder isn’t just a pretty face; it’s a fascinating open cluster and emission nebula teeming with young, hot stars and swirling clouds of gas and dust. NGC 2175 is an open cluster, a group of roughly 50 to 100 young stars born from the same giant molecular cloud. These stars, estimated to be only a few million years old, are still in their fiery adolescence, burning brightly and illuminating the surrounding gas and dust.
The nebula’s ethereal glow comes from the interaction between the hot stars and the surrounding gas and dust. The energetic ultraviolet radiation from the stars excites the gas, causing it to emit light in various colors. This creates the stunning tapestry of reds, blues, and pinks that characterize the Monkey Head Nebula.
Imaging Details
- Workflow: Narrowband
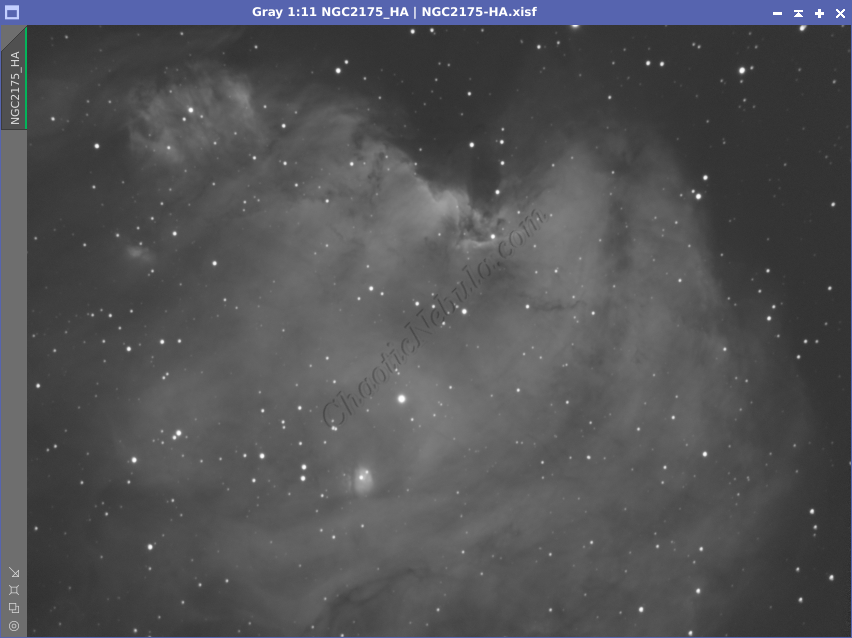
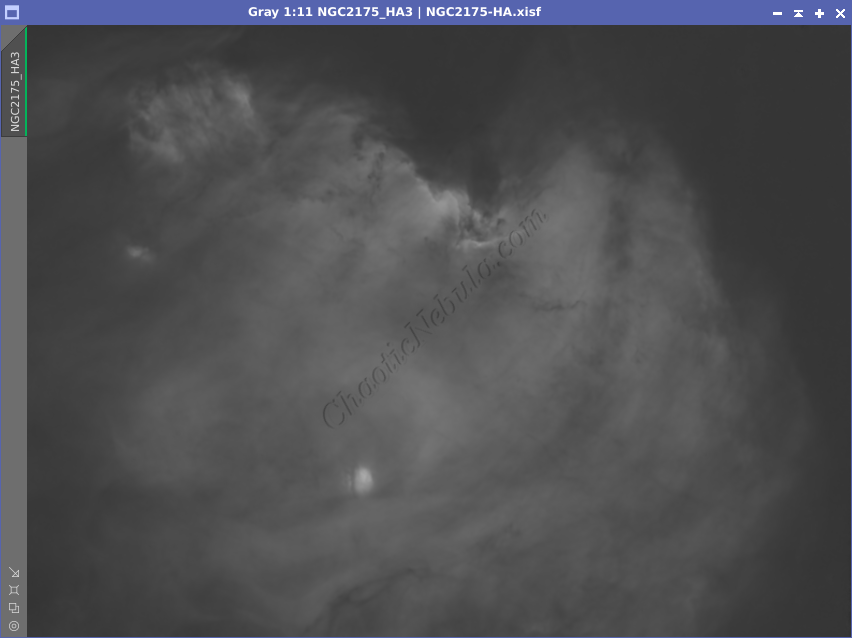
- HA: 60*600 seconds
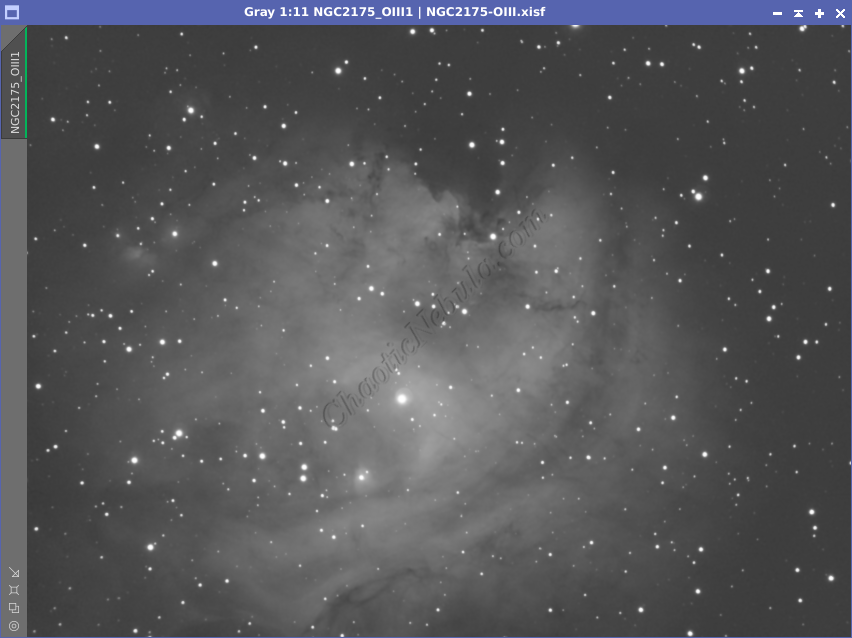
- OIII: 60*600 seconds
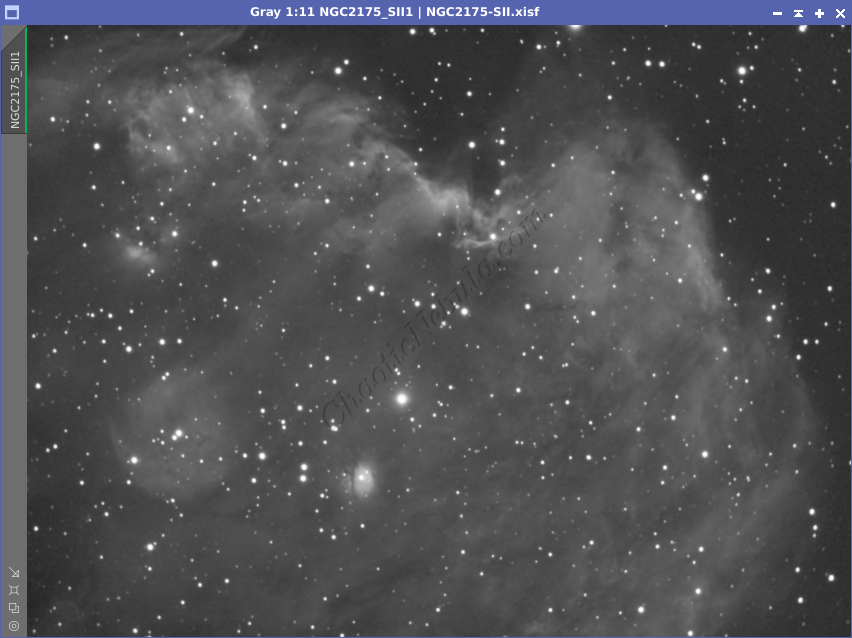
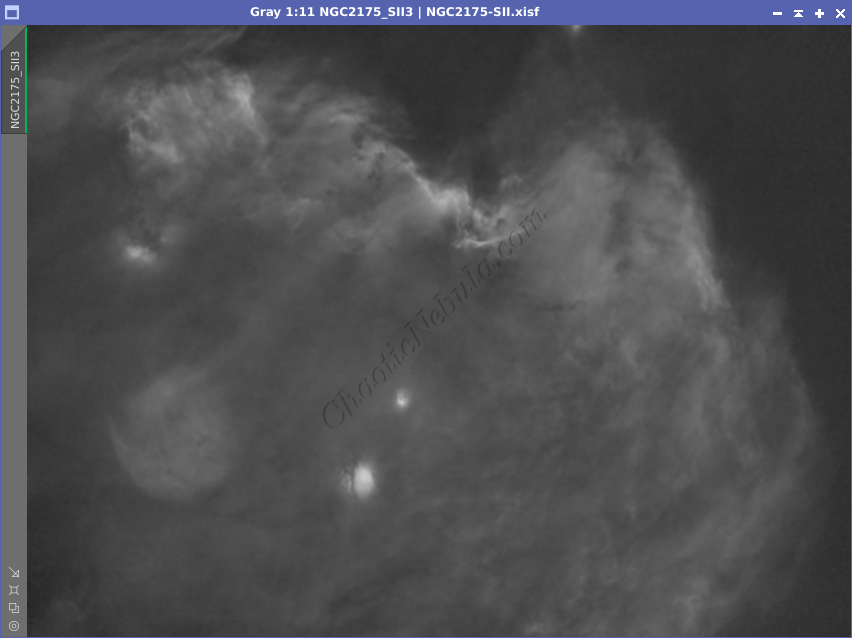
- SII: 60*600 seconds
- Total Imaging Time: 30 hours
- Imaging Dates (12 nights):
- 9/26/2022
- 10/18/2022
- 10/20/2022
- 10/23/2022
- 10/29/2022
- 11/2/2022
- 11/23/2022
- 11/25/2022
- 11/26/2022
- 11/28/2022
- 2/7/2023
- 2/10/2023
Imaging Notes
This image has been sitting in my backlog of images to process. I started imaging in the very early hours in the fall of 2022, only able to gather a few hours per night. During the longest nights of winter, the skies remained cloudy, preventing me from finishing the data gathering until late winter.
NGC 2175’s nickname, the Monkey Head Nebula, arises from its distinctive shape. With a bit of imagination, you can see two dark eye-like regions and a protruding snout formed by denser dust clouds. This playful moniker adds a touch of whimsy to this celestial wonder, inviting us to engage with its cosmic visage.
Overall, this image was quite easy to develop because I was able to capture a lot of data, resulting in a very high signal-to-noise ratio. As you will see during my workflow, the separate channels remain very smooth, including the SII filter, thanks to the strong SII signal.
But during the processing phase, I’m not sure if I prefer removing the green tint that the strong HA channel generates or keep it. You decide.

Imaging Workflow
This image followed my standard Narrowband workflow very closely, except that I removed stars early on.
Integrated Image
I started off with three really good images for HA, OIII, and SII. I did my normal integration process with drizzle integration, dynamic crop, and dynamic background extraction.


Noise Reduction
I followed my normal noise reduction process, first starting with TGV Denoise. I ran this process twice for the HA, OIII, and SII frames.

The second part of noise reduction was to use multi-scale linear transformation.


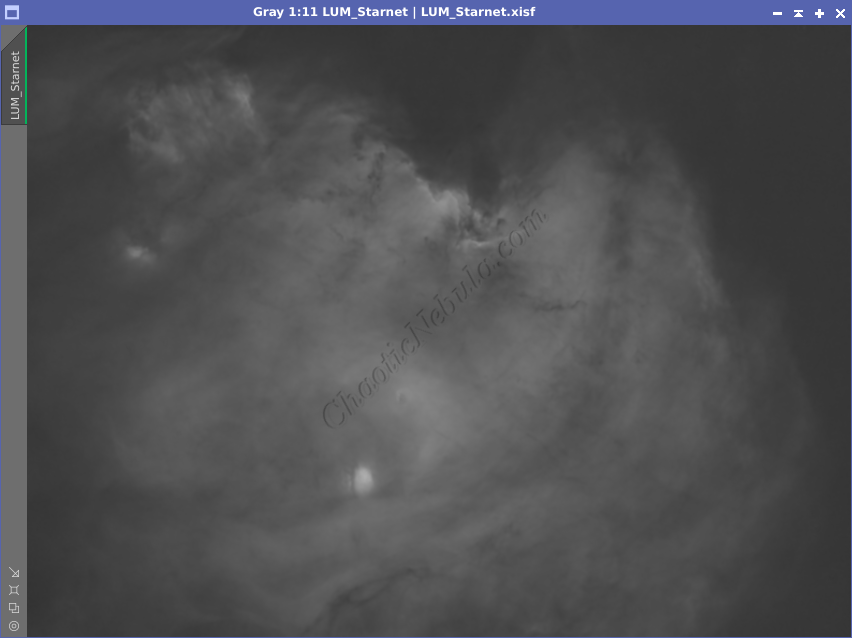
Channel Combination for Luminance
I ran my normal channel combination approach (SHO combination).
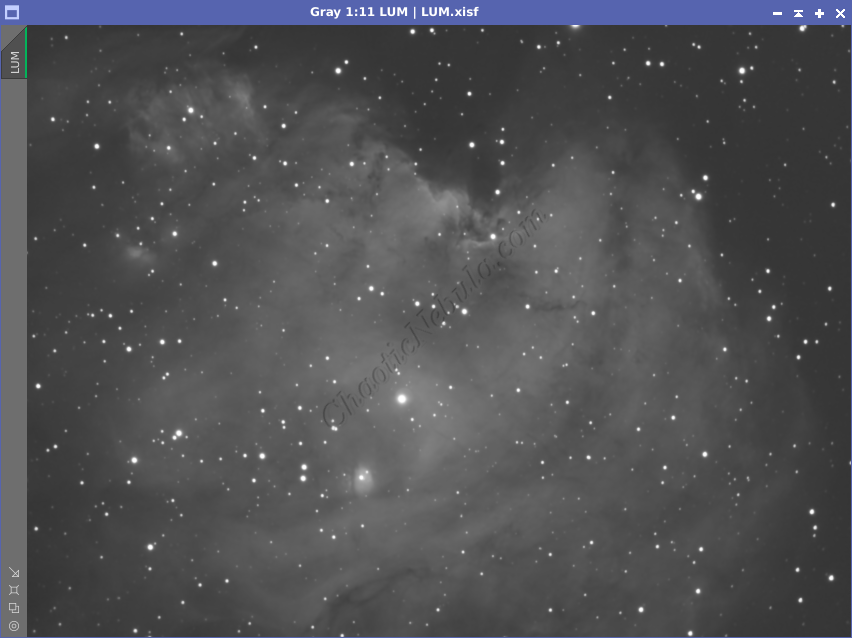
I only did this combination so I could generate a Luminance image, which I will use in the Luminance workflow.
Star Removal
I’ve been testing image processing by removing the stars early on as a way to keep the stars from getting bloated due to additional processing being applied to the image. As part of this process, I had StarNet create a star mask, which I will use later to re-add the stars. I did this for all three channels (HA, OIII, and SII)

Channel Combination for RGB
With the stars removed, I will use Pixel Math to combine the channels dynamically, using the same formulas as previously explained.
Histogram Stretch
I used histogram transformation to stretch the image.
Color Saturation
After I stretched the image, I used Curves Transformation to increase the overall color saturation.
SCNR
I then used SCNR in the inverted mode to remove the magenta sections of the image. I only set SCNR to 70%.
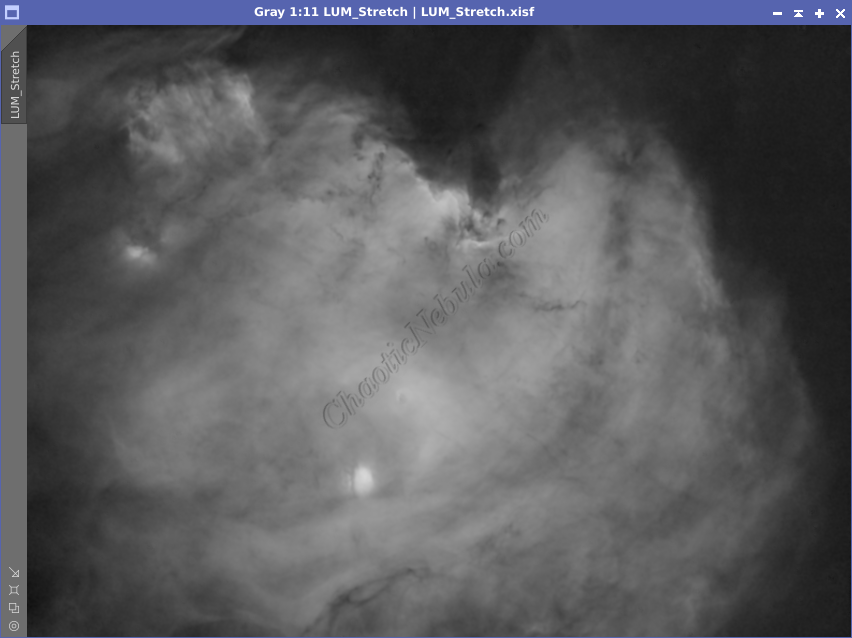
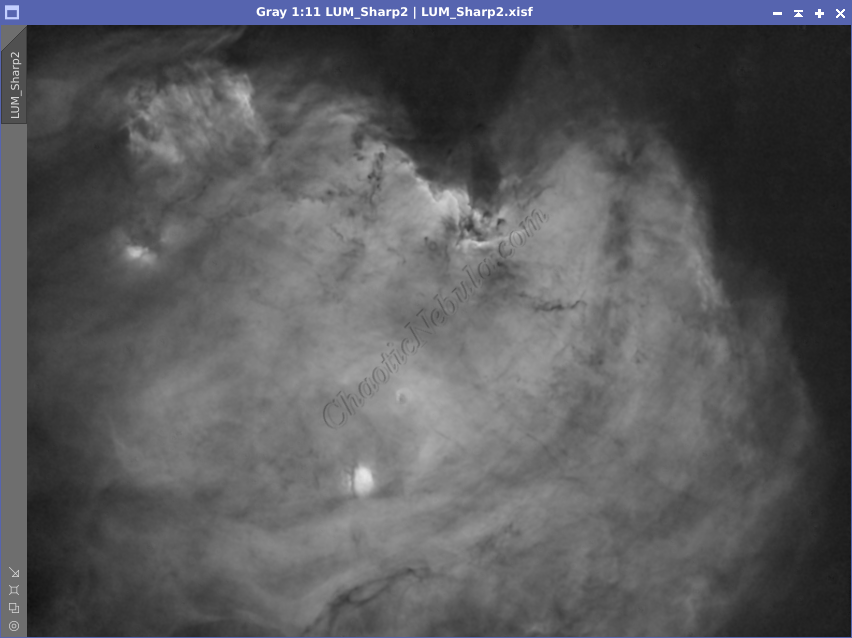
Luminance Workflow
Before doing anything more to the color image, I need to go through my Luminance Workflow.
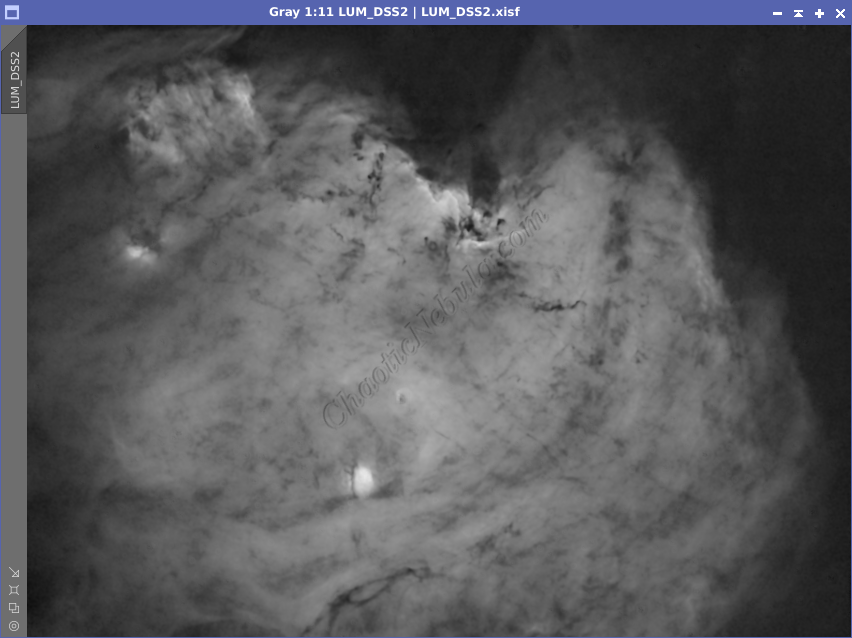
Early on, I created a color image that included the stars. From that image, I extracted the luminance channel. With a luminance image, I ran through the luminance workflow, paying attention to the subtle wisps on the edges. I used my enhanced stretching routine to bring out those features.

Luminance Integration (LRGB)
With the luminance image processed, I can integrate it with the color image with Channel Combination. I run this process five times until I get the desired result.
Brightness and Color Adjustments
I used Curves Transformation to increase the overall brightness and colors.
Noise Reduction
Now that the image is done, I run one last noise reduction with ACDNR.

Star Integration
Now that the image is almost complete, it is time to add the stars back into the image. I will use the star mask the StarNet created during the star removal process for the HA, OIII, and SII channels. I used linear fit before doing a simple SHO channel combination.
Once combined, Histogram Transformation permanently stretch the image, to make the stars visible. I did the same thing for the star mask created during the star removal on the luminance image.
I applied the luminance star mask to the RGB image.
Then, using Pixel Math, take the maximum values from both images and apply to the color image. Because of the star mask applied to the color image, this formula only impacts the unprotected areas from the star mask.