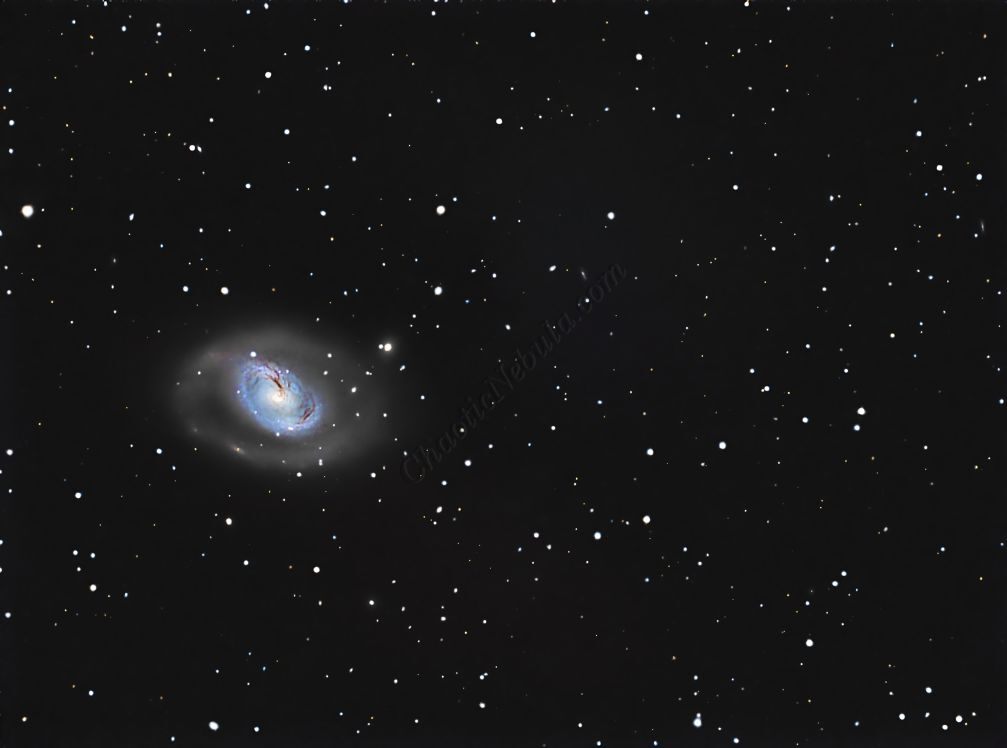
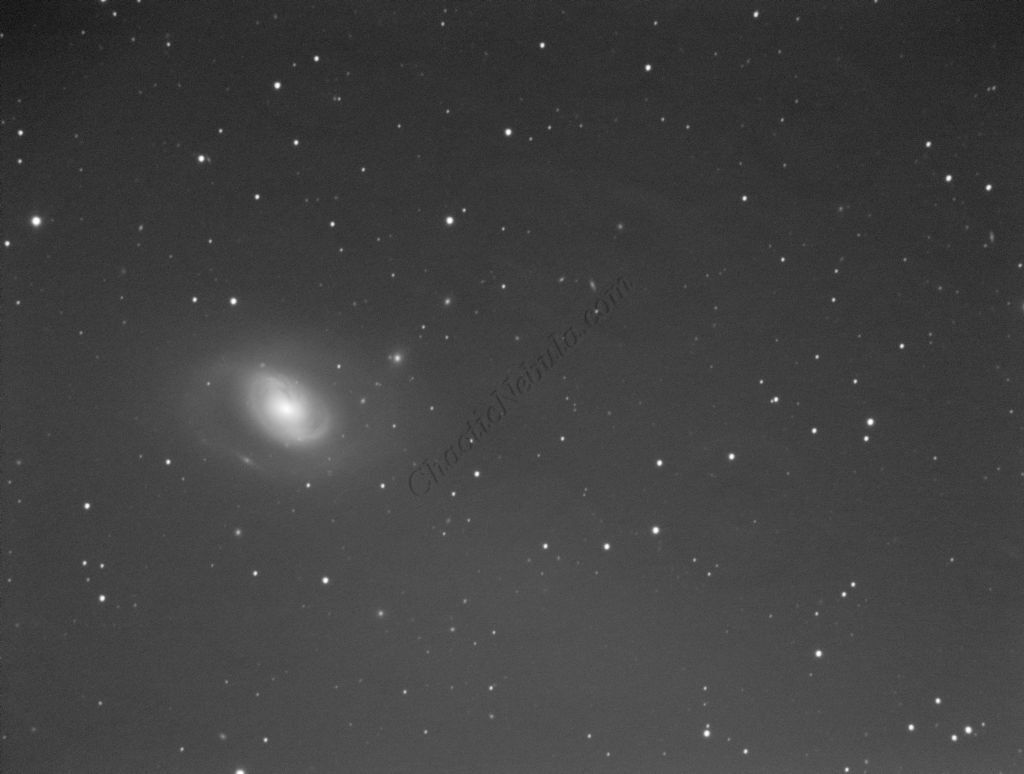
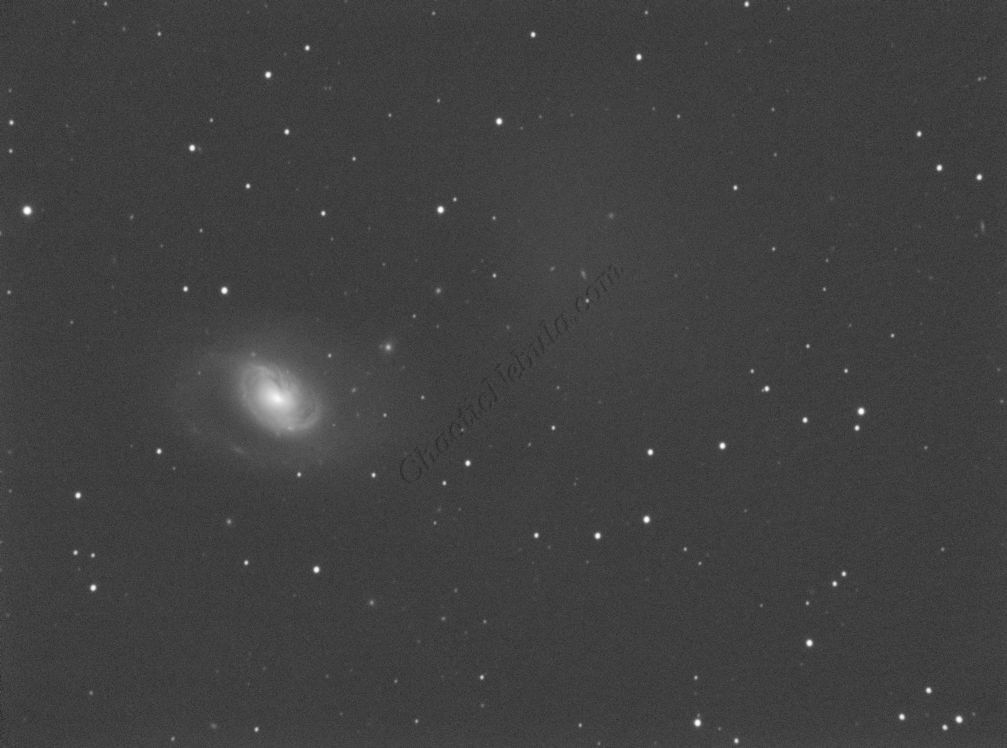
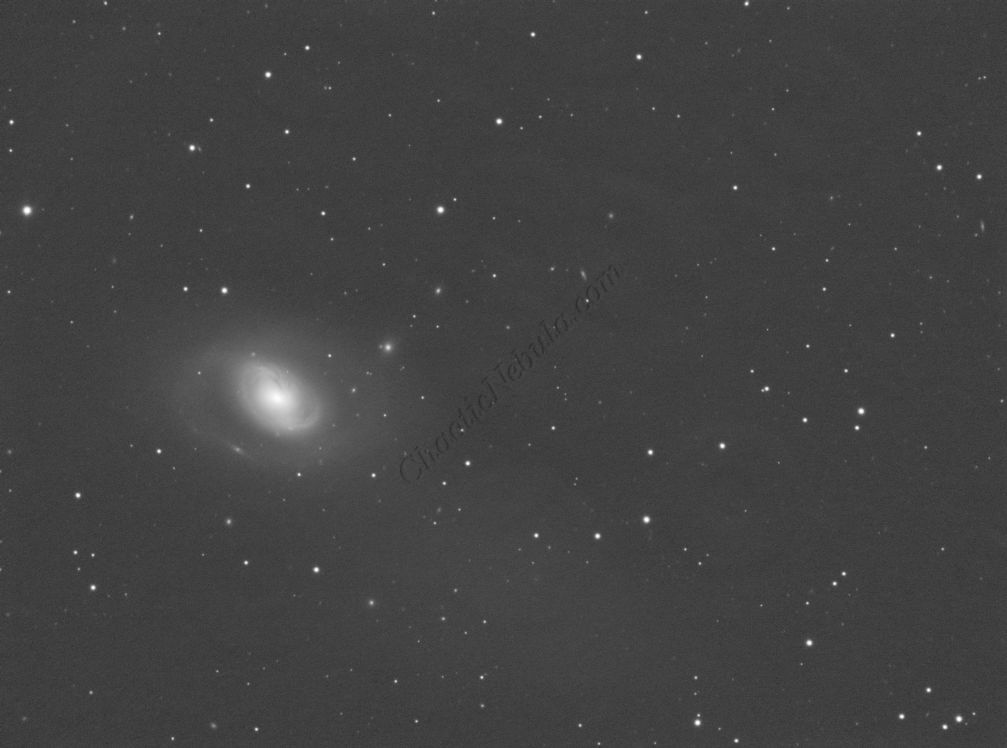
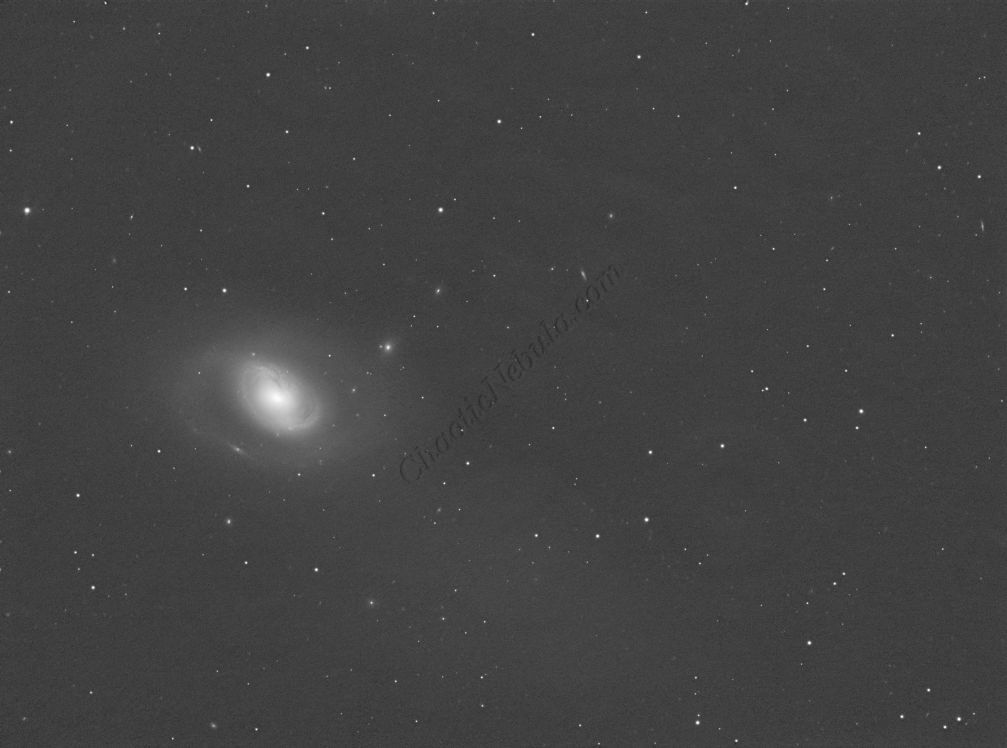
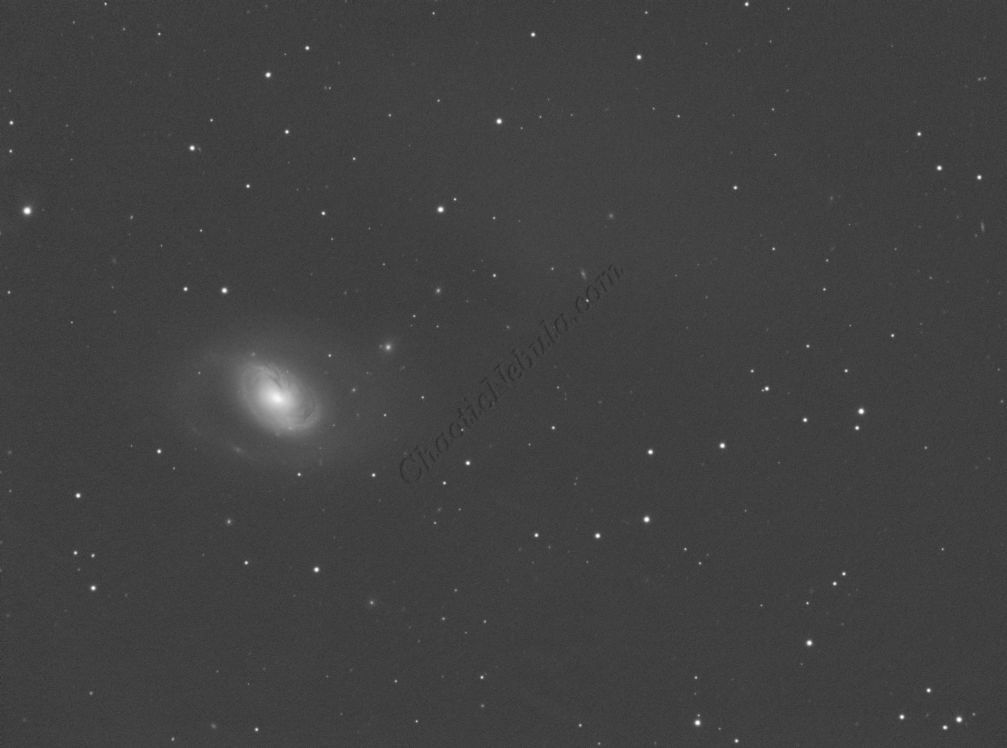
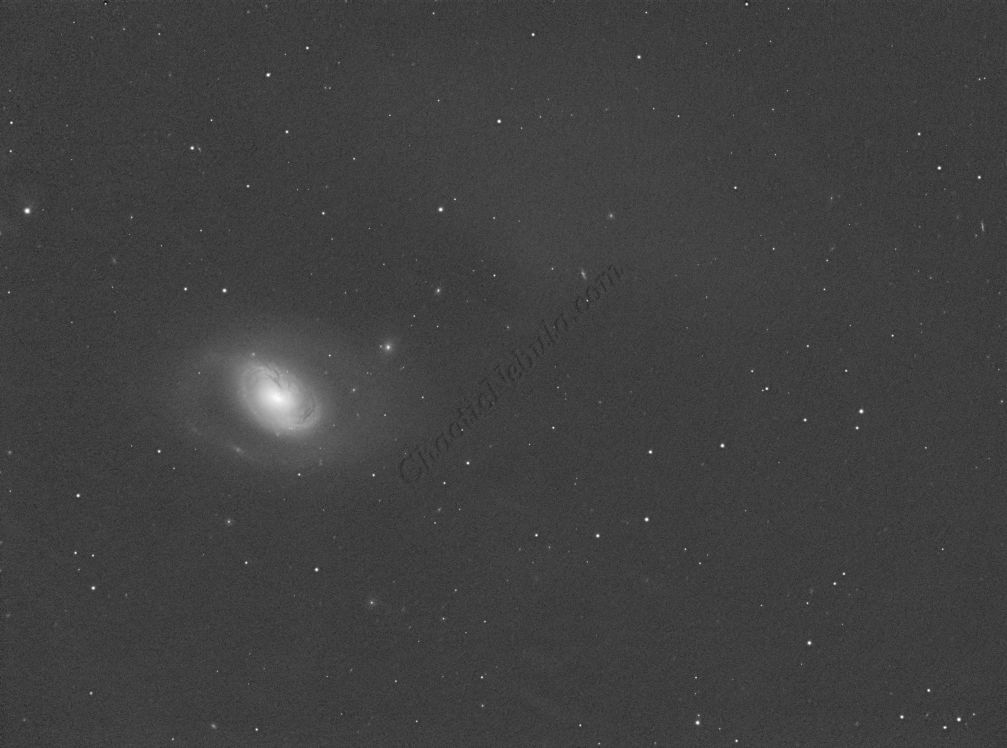
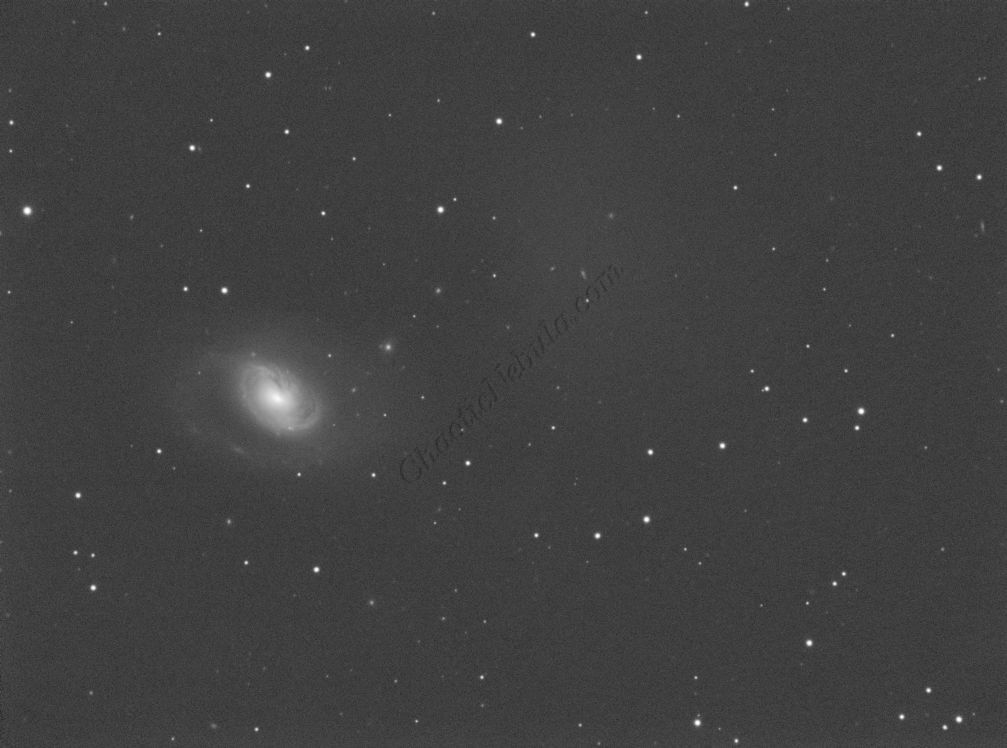
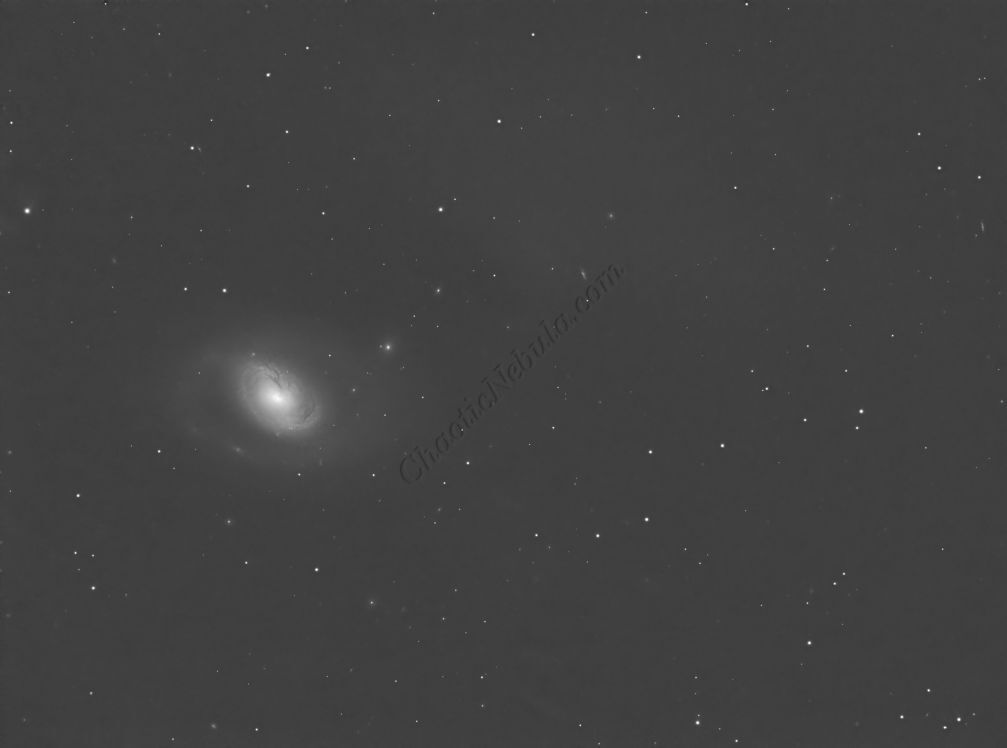
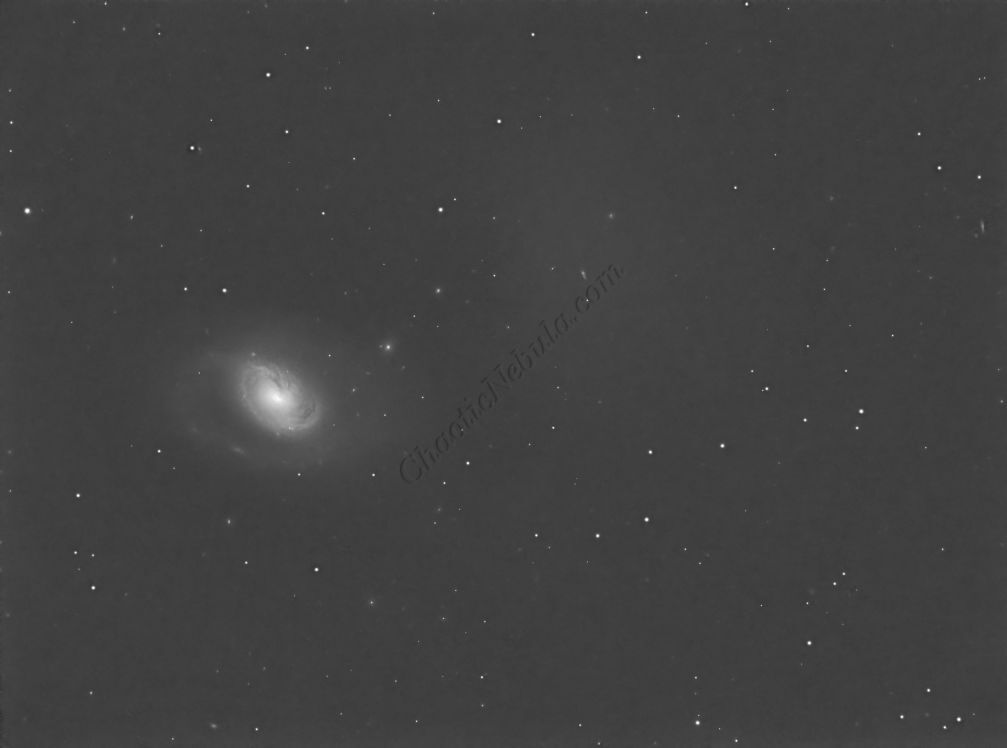
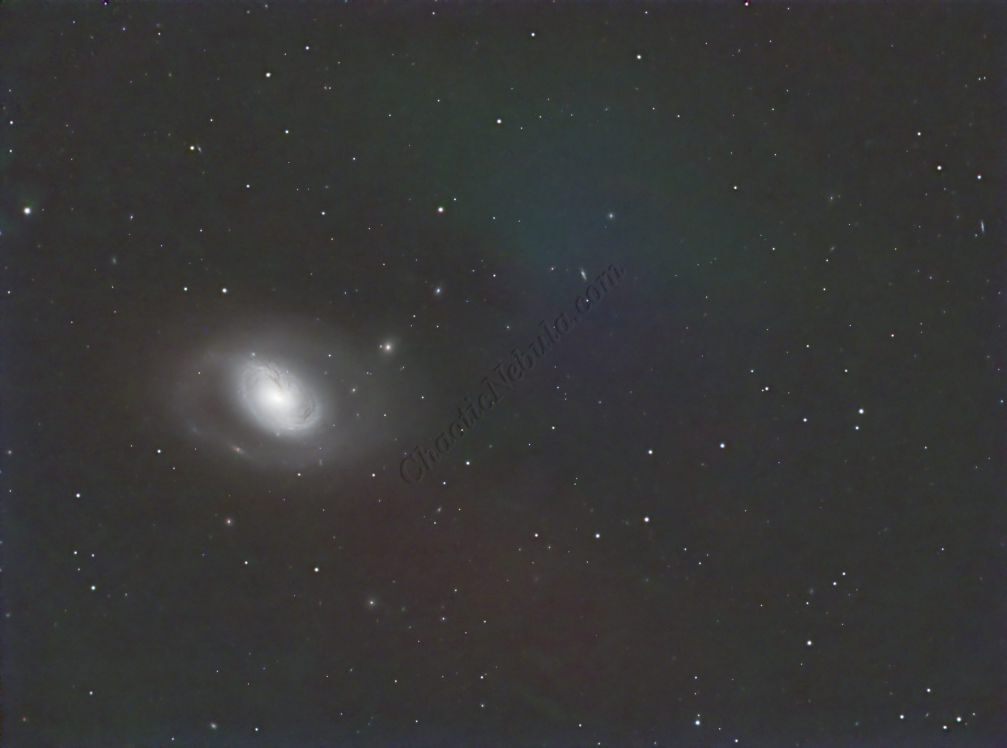
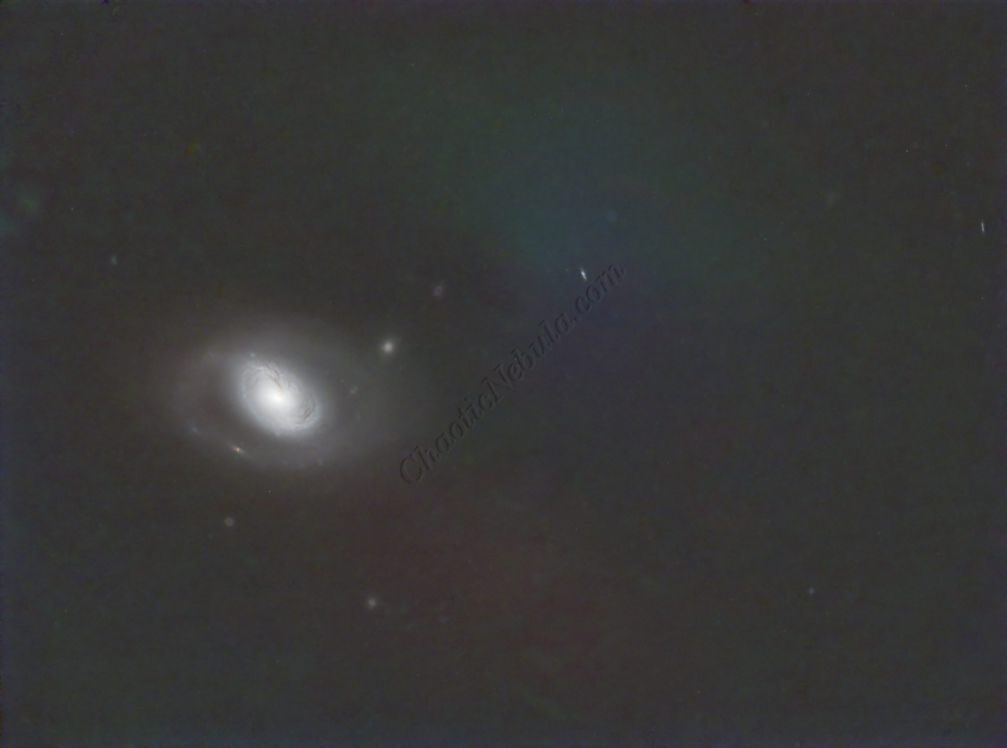
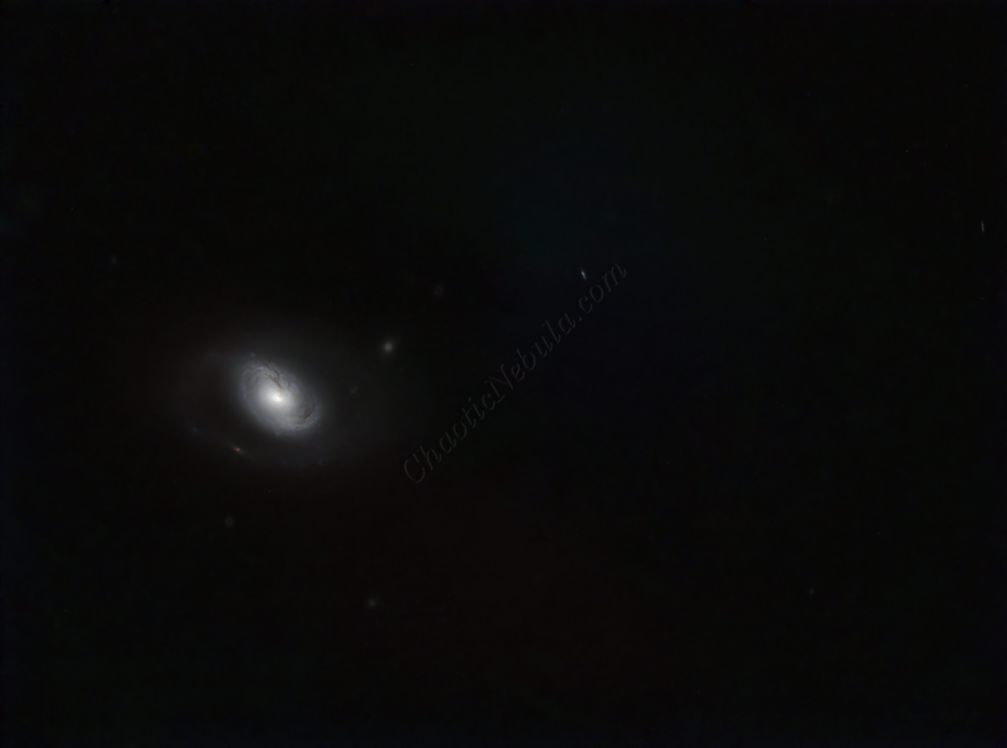
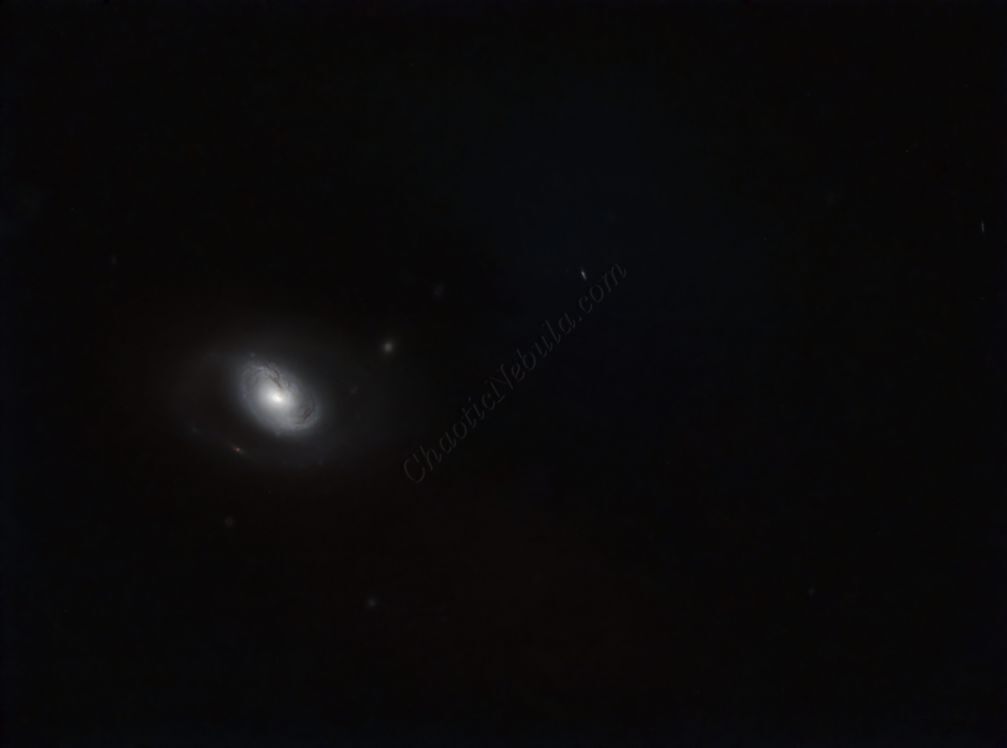
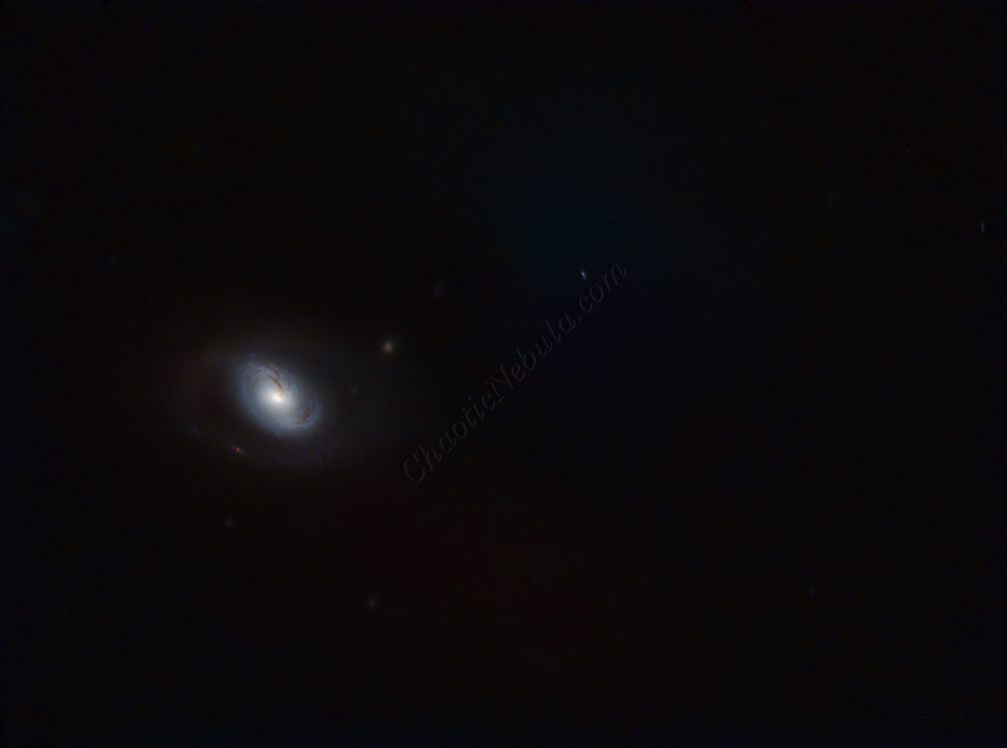
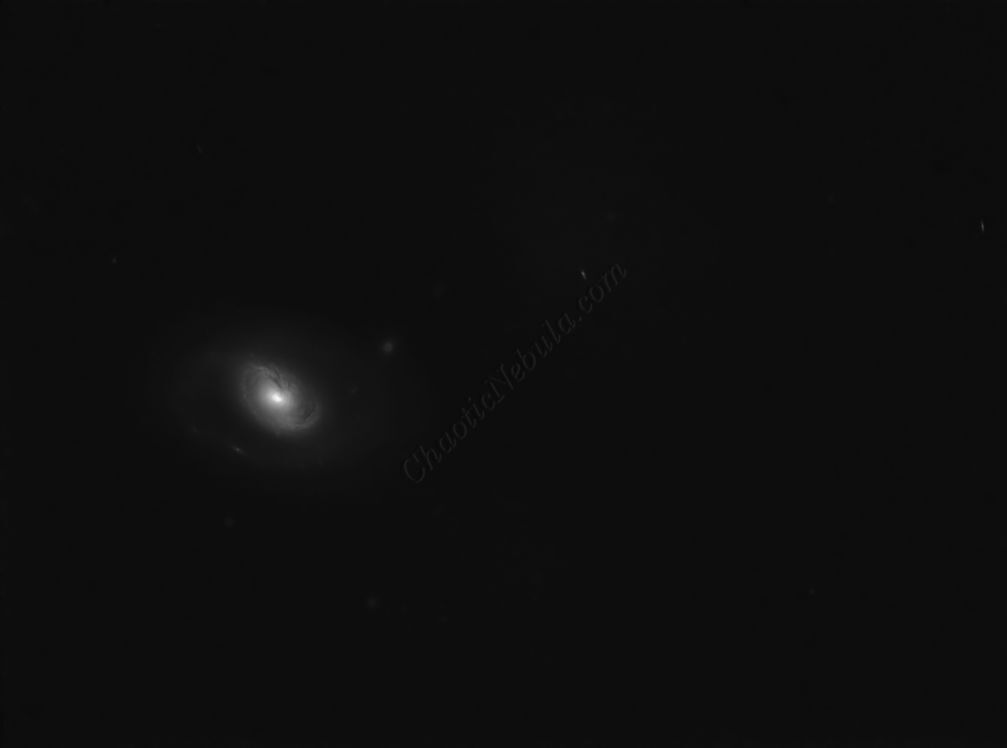
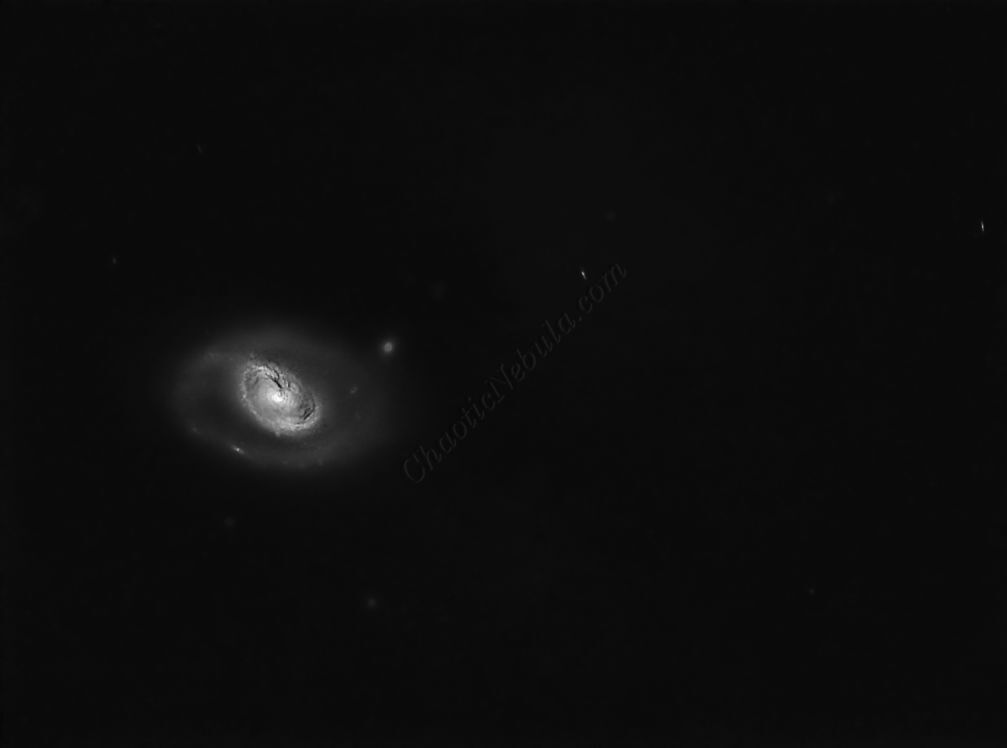
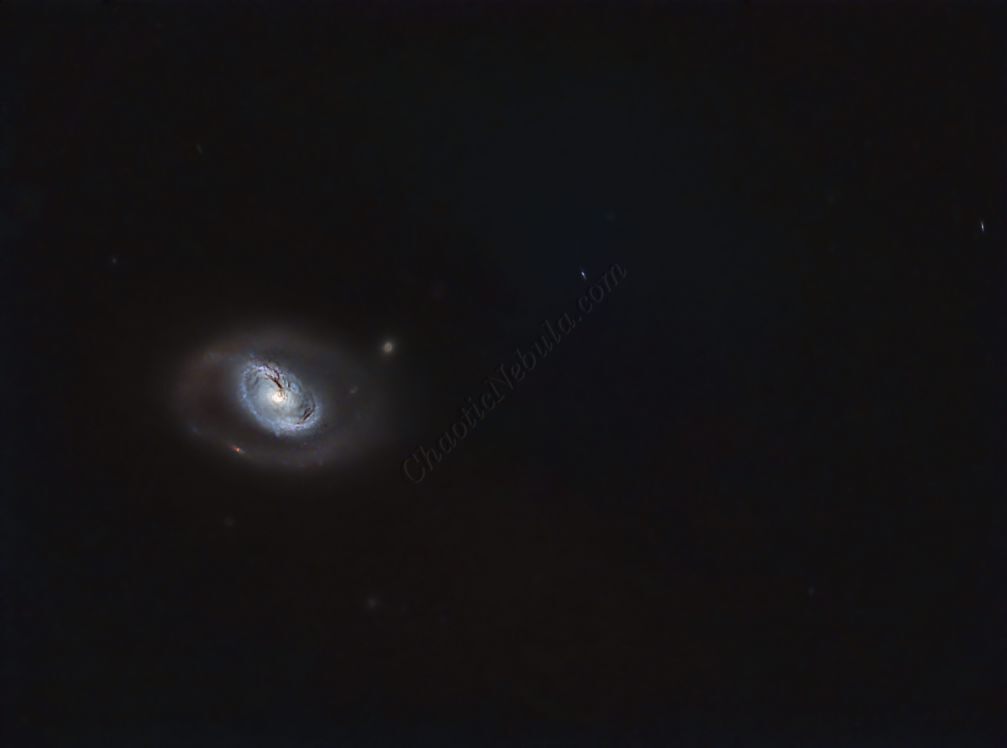
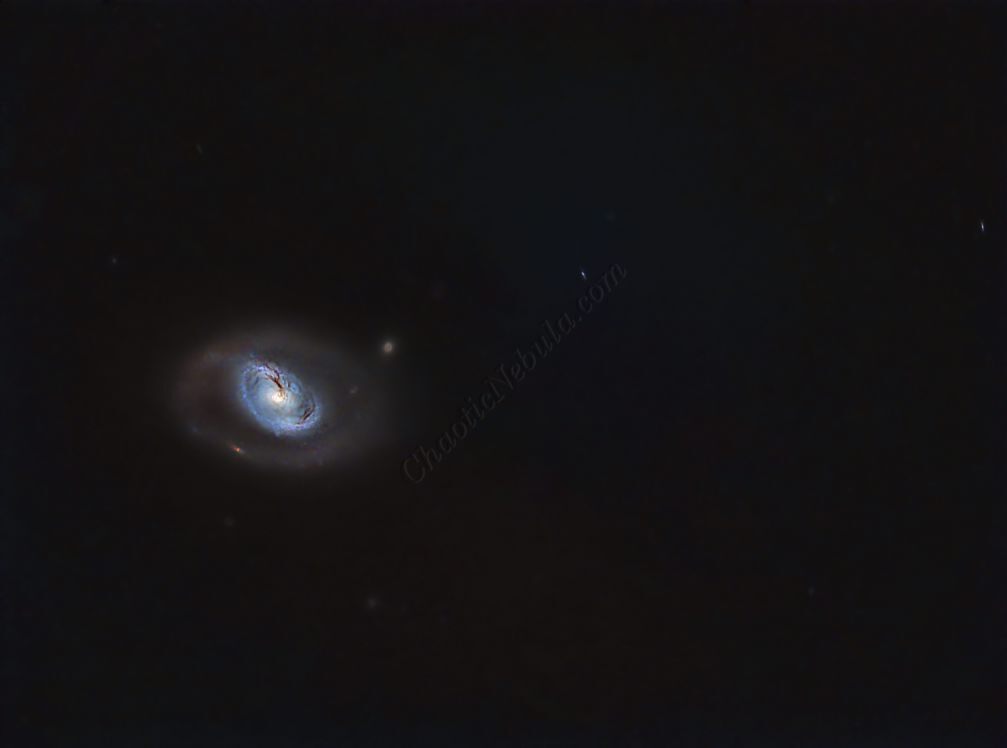
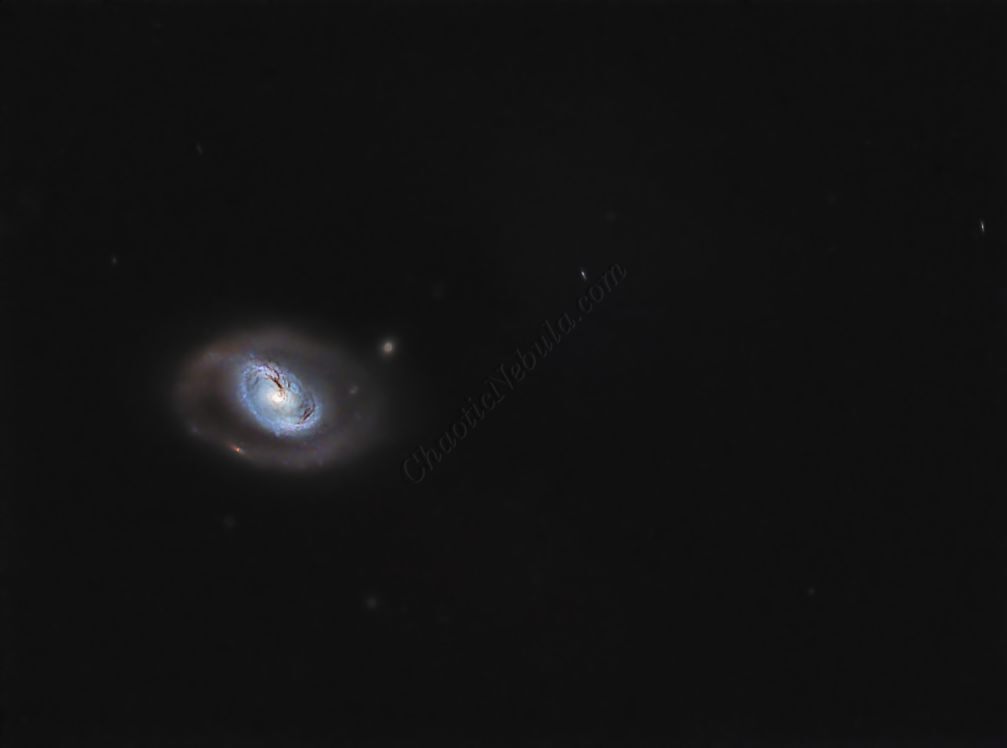
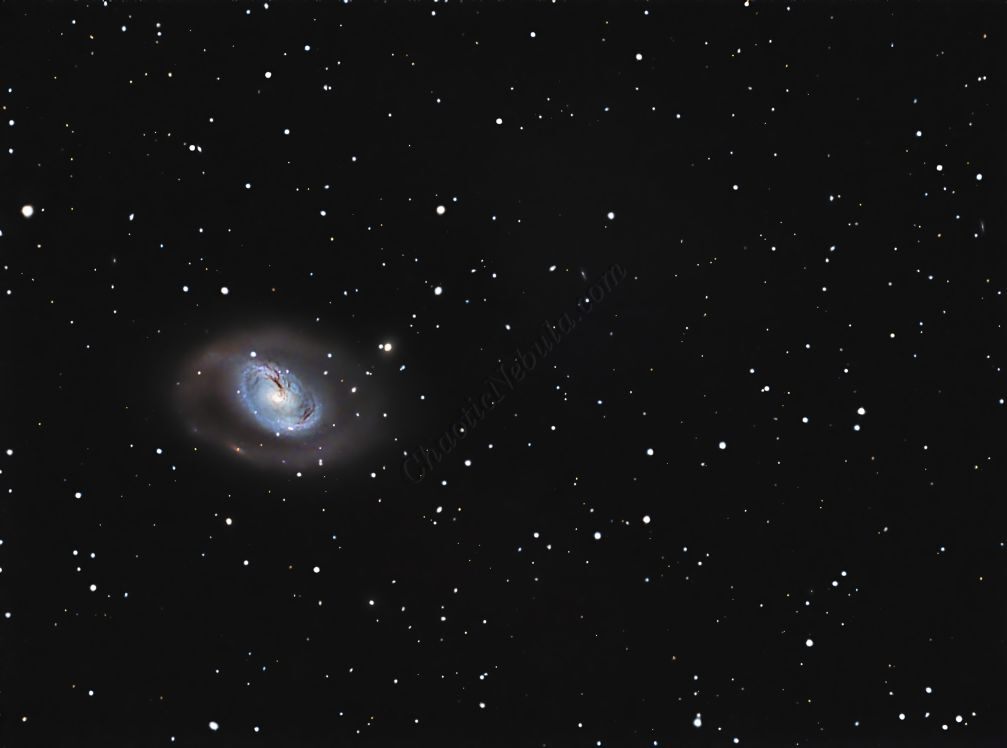
M96, an impressive spiral galaxy of grand design, dwells approximately 31 million light-years away in the constellation Leo Minor. This galaxy presents well-defined spiral arms that wrap around a prominent central core. Unlike some spiral galaxies with loosely wound or fragmented arms, M96 showcases a majestic symmetry.
The dark dust lanes within M96’s spiral arms are not merely aesthetic; they play a crucial role in the galaxy’s ongoing star formation. These dense clouds of dust and gas provide the raw materials for birthing new stars. As the dust and gas collapse under their own gravity, they heat up and eventually reach a point where nuclear fusion ignites, giving rise to a newborn star.
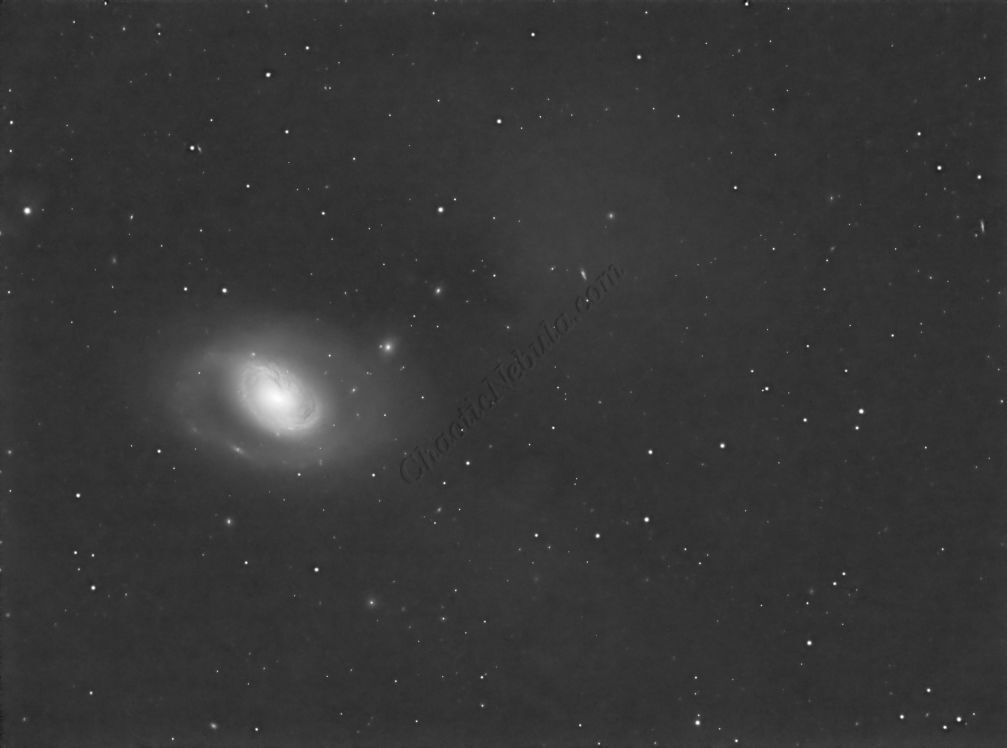
For astrophotographers, M96 presents a rewarding target. Its relatively large size and moderate brightness make it accessible to telescopes of various sizes. With careful planning, image stacking techniques, and appropriate filters, astrophotographers can capture the intricate details of M96’s spiral arms, dust lanes, and bright star clusters.
M96 is part of a small group of galaxies called the Leo I Group, which also includes its neighbors M95 and M105. Astronomers believe the interaction between these galaxies may influence their star formation rates. M95 and M96 are often photographed together to help showcase different galaxy structures.

Imaging Details
- Workflow: Broadband workflow for Galaxies
- Red: 36*300 seconds
- Green: 36*300 seconds
- Blue: 36*300 seconds
- Binning: 1×1
- Total Imaging Time: 9 hours
- Imaging Dates: (2 nights)
- 3/9/2024
- 4/13/2024
Imaging Notes
This image is part of a larger 1×3 mosaic that also includes the galaxy M95.
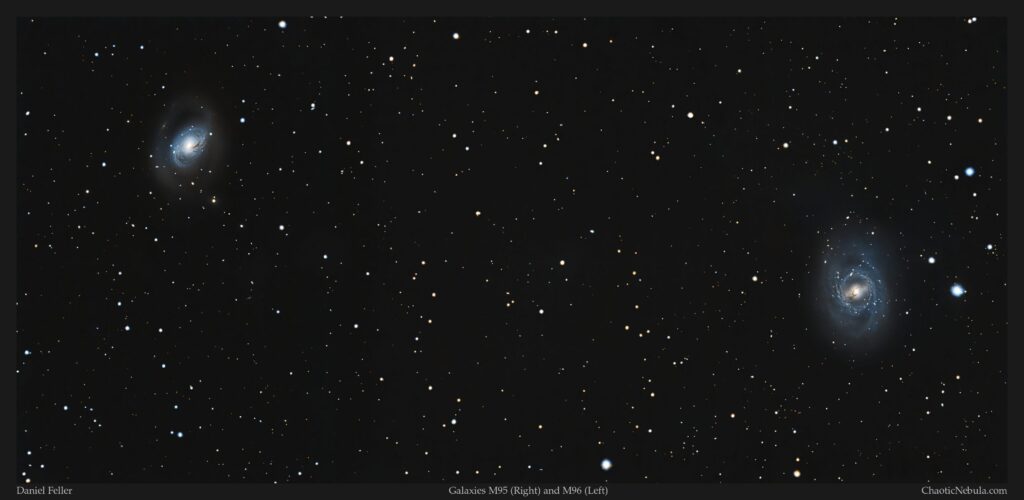
Combining them into a single image helps show the differences between the stellar neighbors. However, by separating them and presenting them individually, more detail within the core and galactic arms are visible.
Imaging Workflow
This image followed the Broadband Workflow for Galaxies and Reflection Nebula.
Integrated Image
I started off with three images for red, green, and blue filters. I did my normal integration process using the PixInsight Weighted Batch Preprocessing Script.
Gradient Correction
The Gradient Correction process made it easy to remove the extreme darkness/brightness around the edges.


Deconvolution
BlurXTerminator is applied two times. The first time is for Correction only. This takes care of the coma (blurring of stars along the edges).
The second application of BlurXTerminator handles deconvolution, which improves the sharpness and details of the nebula while removing the blur from the image.

Noise Reduction
With the blurring corrected, it is time to do noise reduction. This time I used the new NoiseXTerminator add on.

Channel Combination for RGB
The next step is to do a Linear Fit and then a Channel Combination to combine the channels into RGB.
In addition, once the color image was created, the luminance channel was extracted to be used for the luminance workflow.
Star Removal
To better protect the stars from bloating due to additional processing, they are removed with StarNet+
Histogram Stretch
I used histogram transformation to stretch the image. Although the image appears dark, the entire image will get brighter when the synthetic luminance is added.
SCNR
To remove the slight green hue, SCNR was applied.
Color Saturation
PixInsight Curves Transformation increased the overall color saturation.
Luminance Workflow
Before doing anything more to the color image, it is time to go through the Luminance Workflow.
Deconvolution was skipped as it was done to the RGB image with the use of BlurXTerminator.


Luminance Integration (LRGB)
With the luminance image processed, it can get integrated with the color image with LRGB Combination process. This used 45% for lightness and 35% for saturation.
Saturation
PixInsight Curves Transformation increased the overall color saturation.
Brightness
PixInsight Curves Transformation increased the overall brightness.

ACDNR for Chrominance
Although NoiseXTerminator did a great job in removing the noise from the image early on in the workflow, some of the processing might have added noise in the color. Applying ACDNR for only chrominance helps correct this without losing details.
Stars
Pixel Math was used to re-add the star field back into the image. The luminance star field was used as a mask and the color star field was then applied.
Final Adjustments
To finish the image, I make a few minor tweaks to the brightness and colors of the stars using Curves Transformation.