We’ve reached the an exciting step in the creation of a mineral moon – adding color! In the previous installments, you saw how to Align, Crop, Equalize, Integrate, and Sharpen. All of these steps are critical so that the colors adjustments you apply will help create a vibrant mineral palette. This is when you get to transform the moon from a dusty gray image into a breathtaking image by using a combination of color adjustments tools within GIMP.
Color Saturation
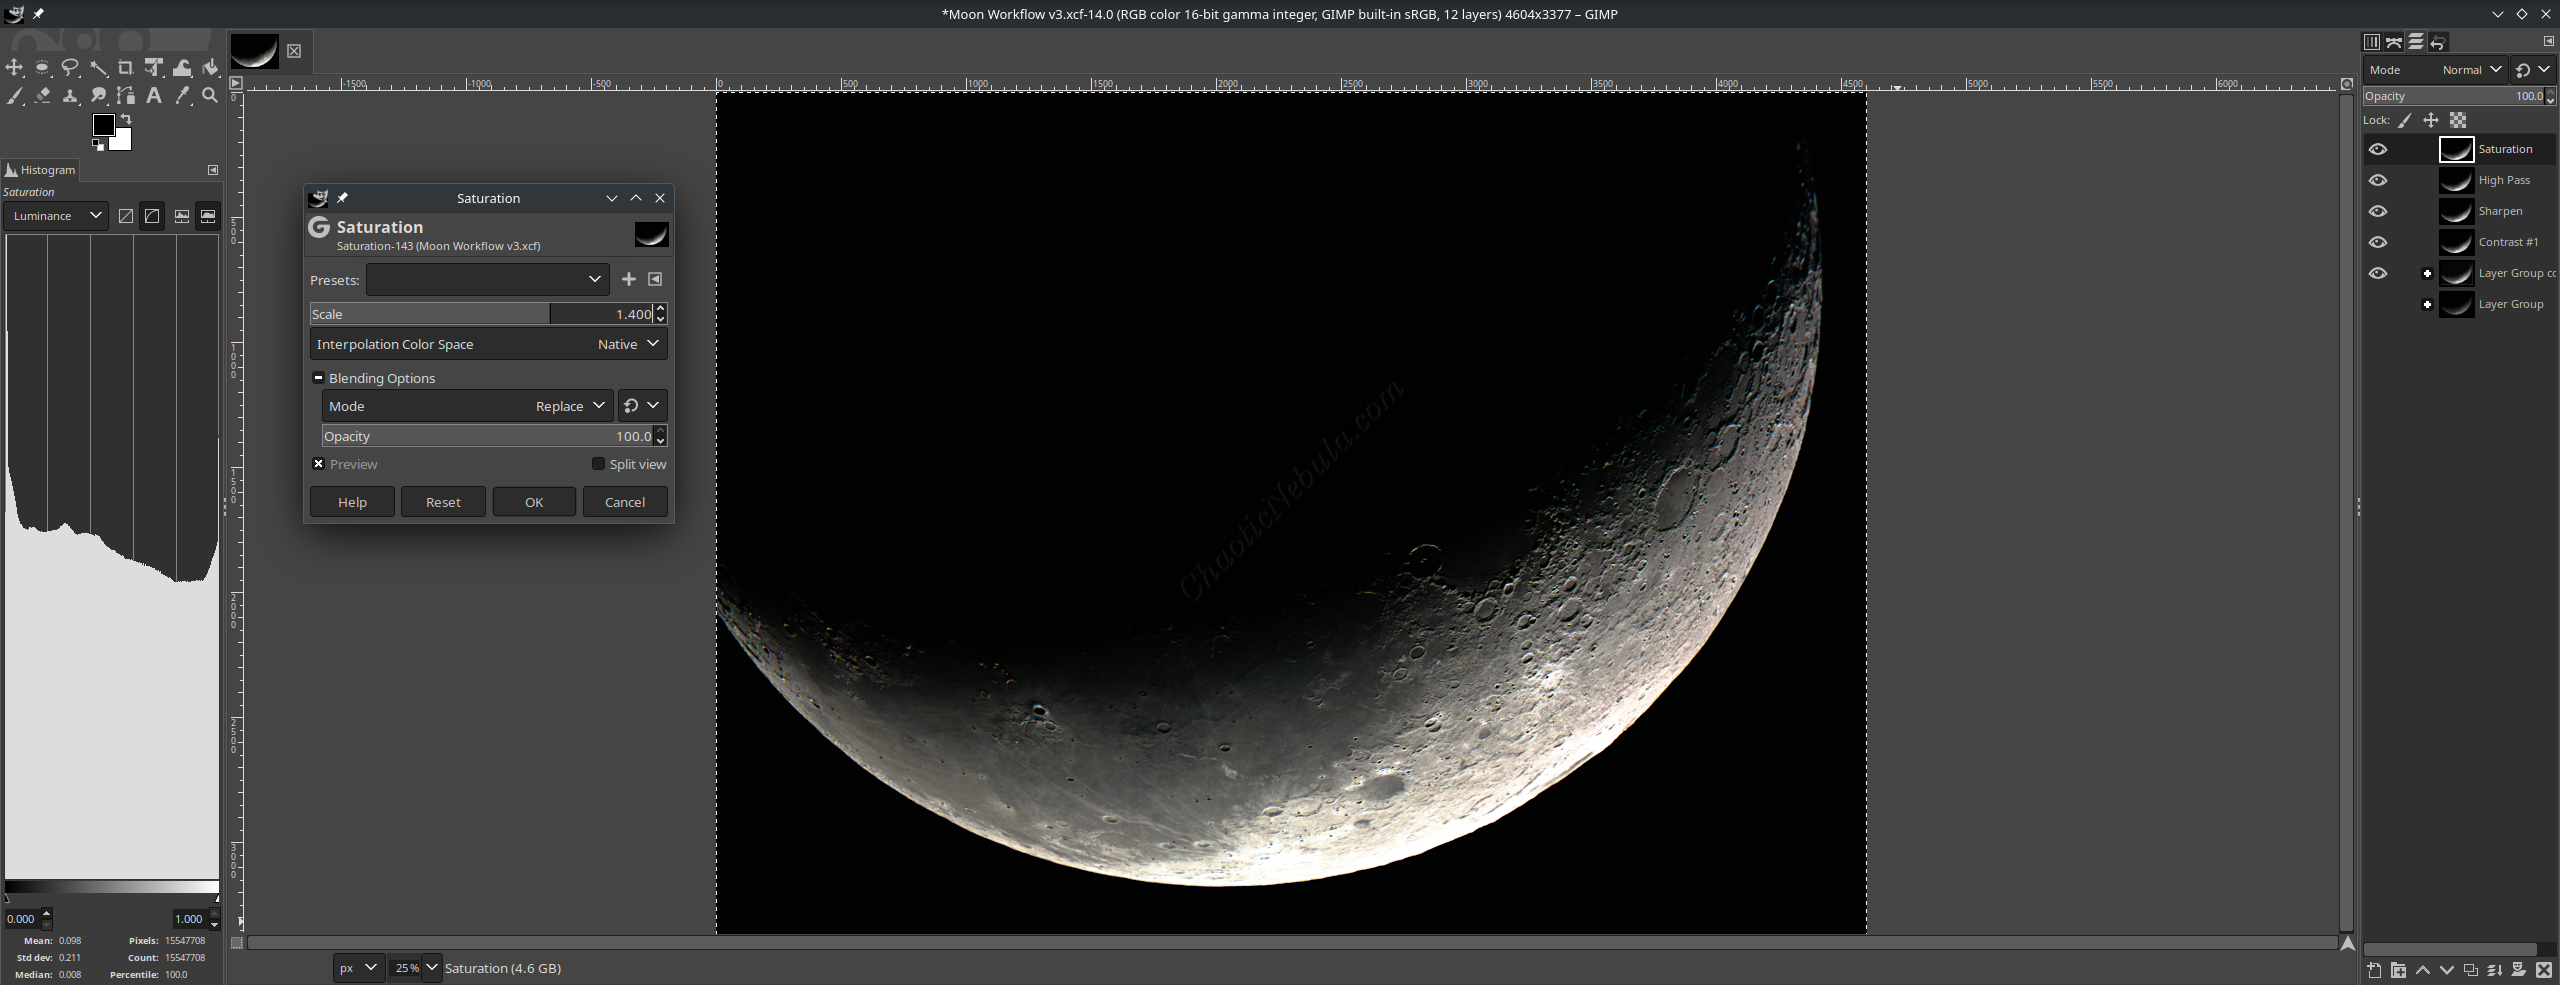
Although the moon image looks completely devoid of color, some does exist. With GIMP, this color can be brought into the light.
The initial process is to use the Saturation process found by select Colors – Saturation in the menu bar. This is a straightforward process, simply increase the scale.
- Tip 1: Apply saturation in increments. Depending on the image, anywhere between 1.25 and 1.5 is a good range.
- Tip 2: With each application of the saturation process, duplicate the layer to make it easy to compare different iterations

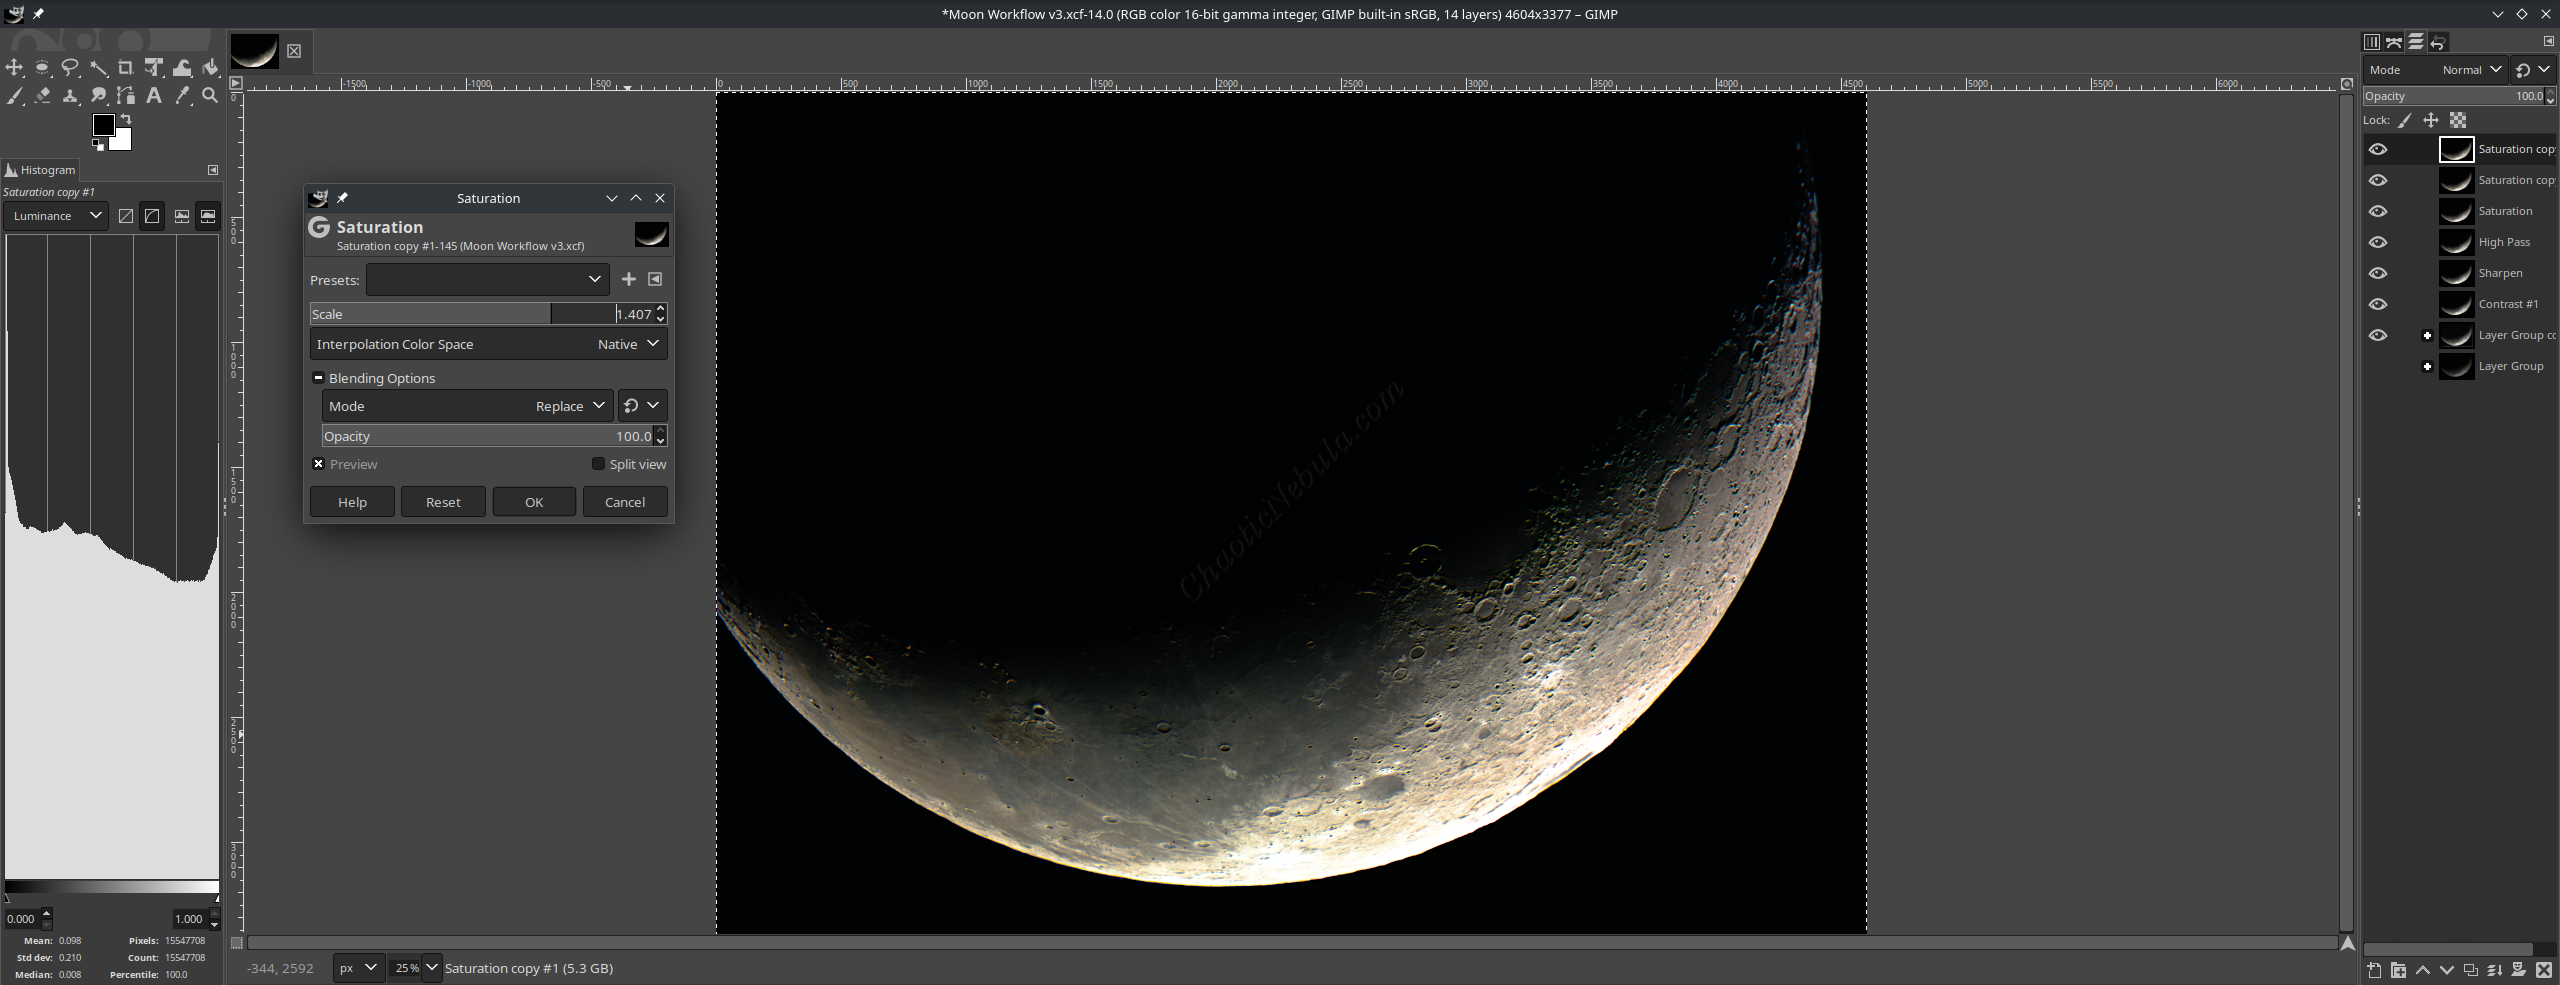
With each round, it becomes easy to see the colors starting to appear. However, eventually the colors will become over saturated. In this example, round 4 felt too extreme.
Color Balance
The saturation process applied the same levels across the entire image. The next step is to make minor adjustments in the shadows, mid-tones, and highlights.
For this, the Color Balance process within GIMP makes the process easy. The process can be found in the menu bar by selecting Color – Color Balance.
- Tip 1: Use very small increments, as the goal is to make subtle changes to the hue. It is best to use the up and down arrows on the dialog.
- Tip 2: Remember to duplicate the image so you have an easy to compare sequence.
- Tip 3: Start with the shadows, then move to the mid-tones, and end with the highlights.
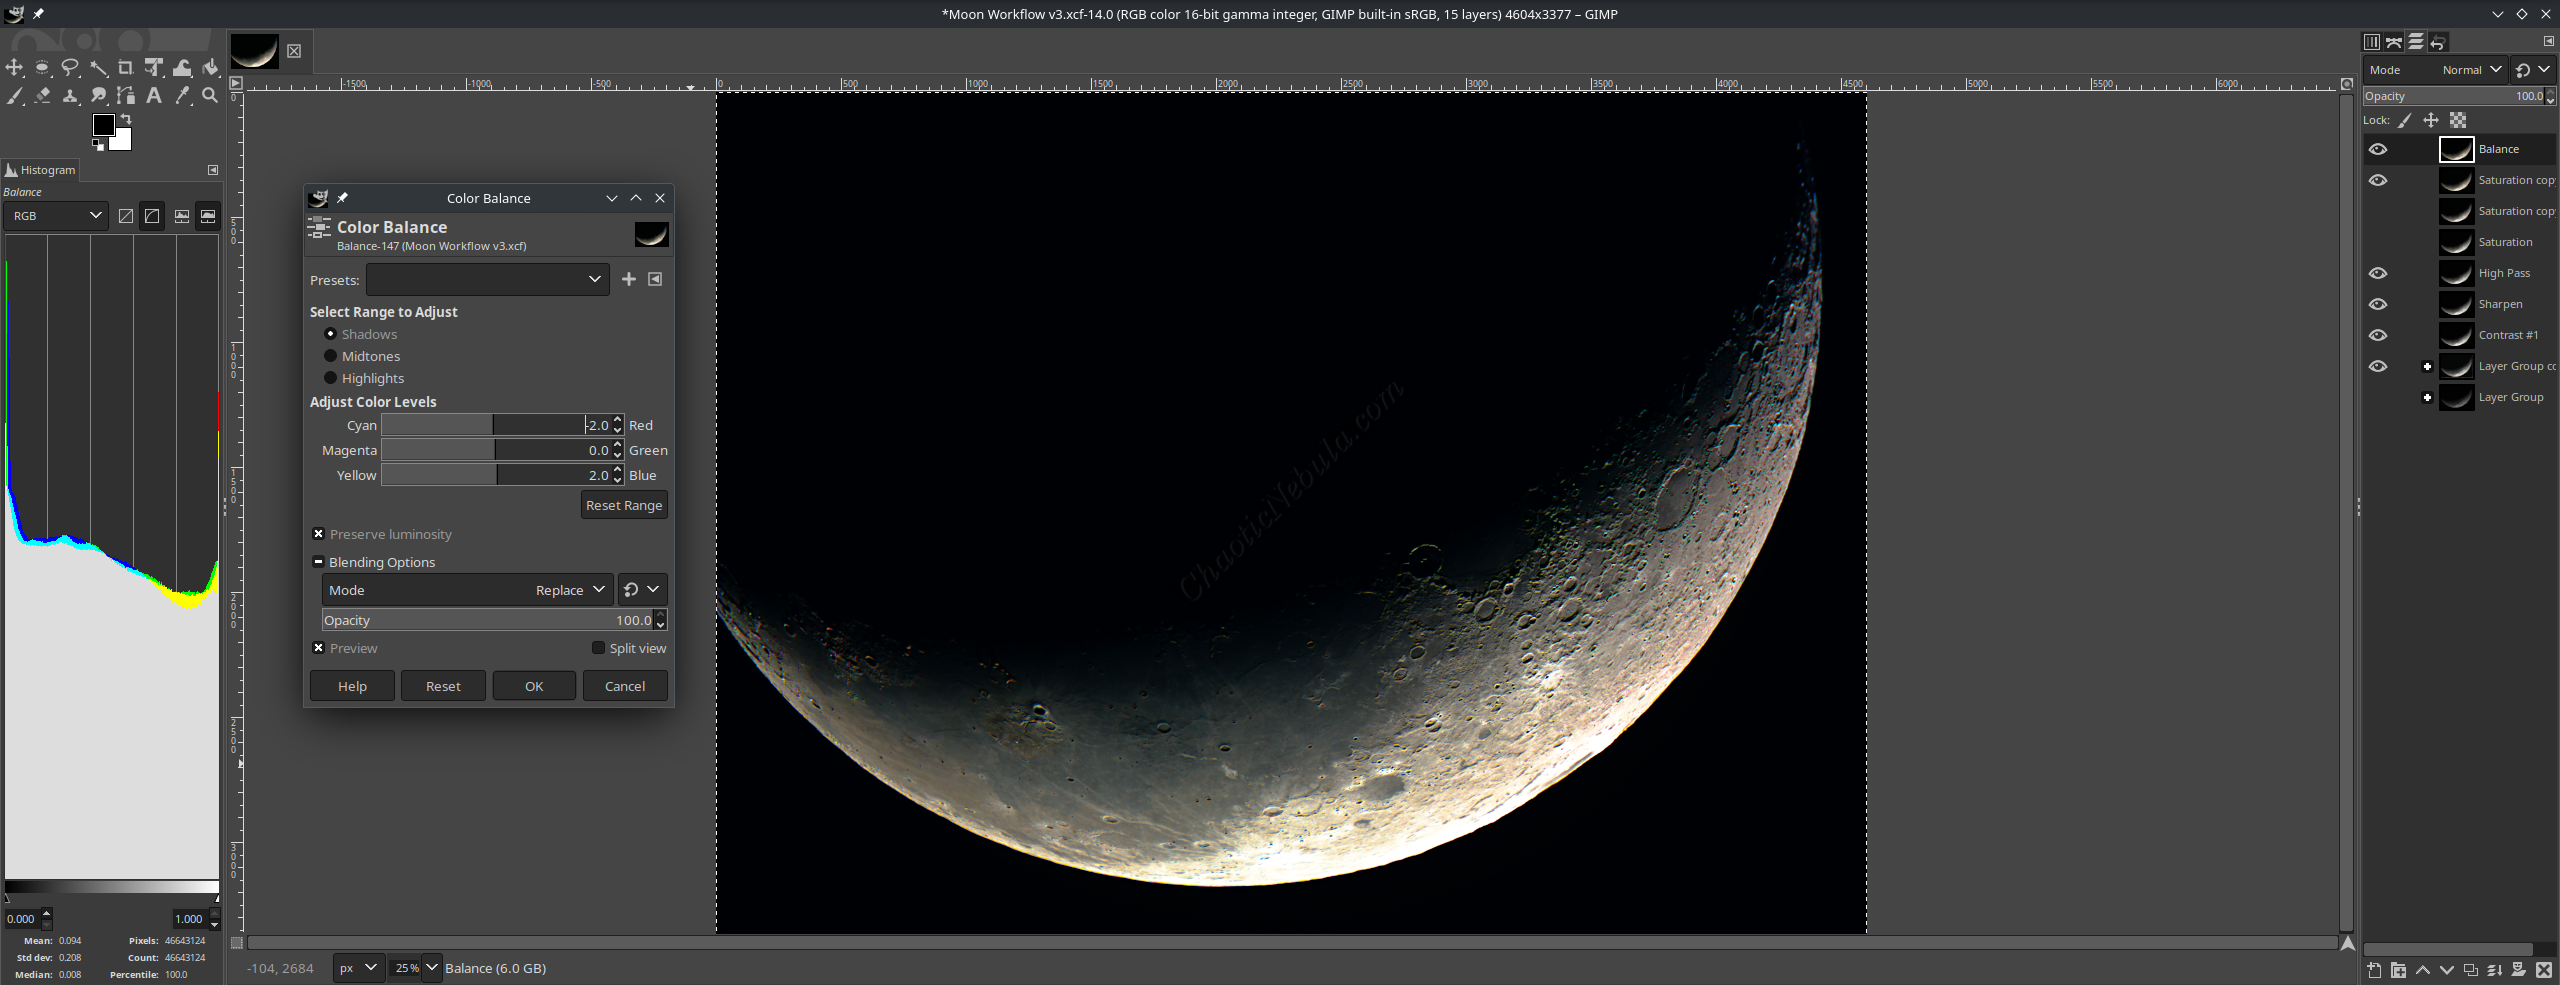


Based on this example, the following changes were made:
- Shadows: Increased the blue and decrease the red color
- Mid-Tones: Decreased the green color
- Highlights: Increased the red and decrease the blue color
Color Temperature
By adjusting the temperature of the image, you can give the moon a warmer or cooler color. This is similar to buying warm and cool light bulbs.
To modify the color temperature, select Colors – Color Temperature from the menu bar.
The process is extremely easy to use. Move the Intended Temperature to the left to give the moon a cooler (bluer) color. Move to the right to give it a warmer (yellower) color.
And don’t forget to duplicate the layer to make it easy to compare before and after.
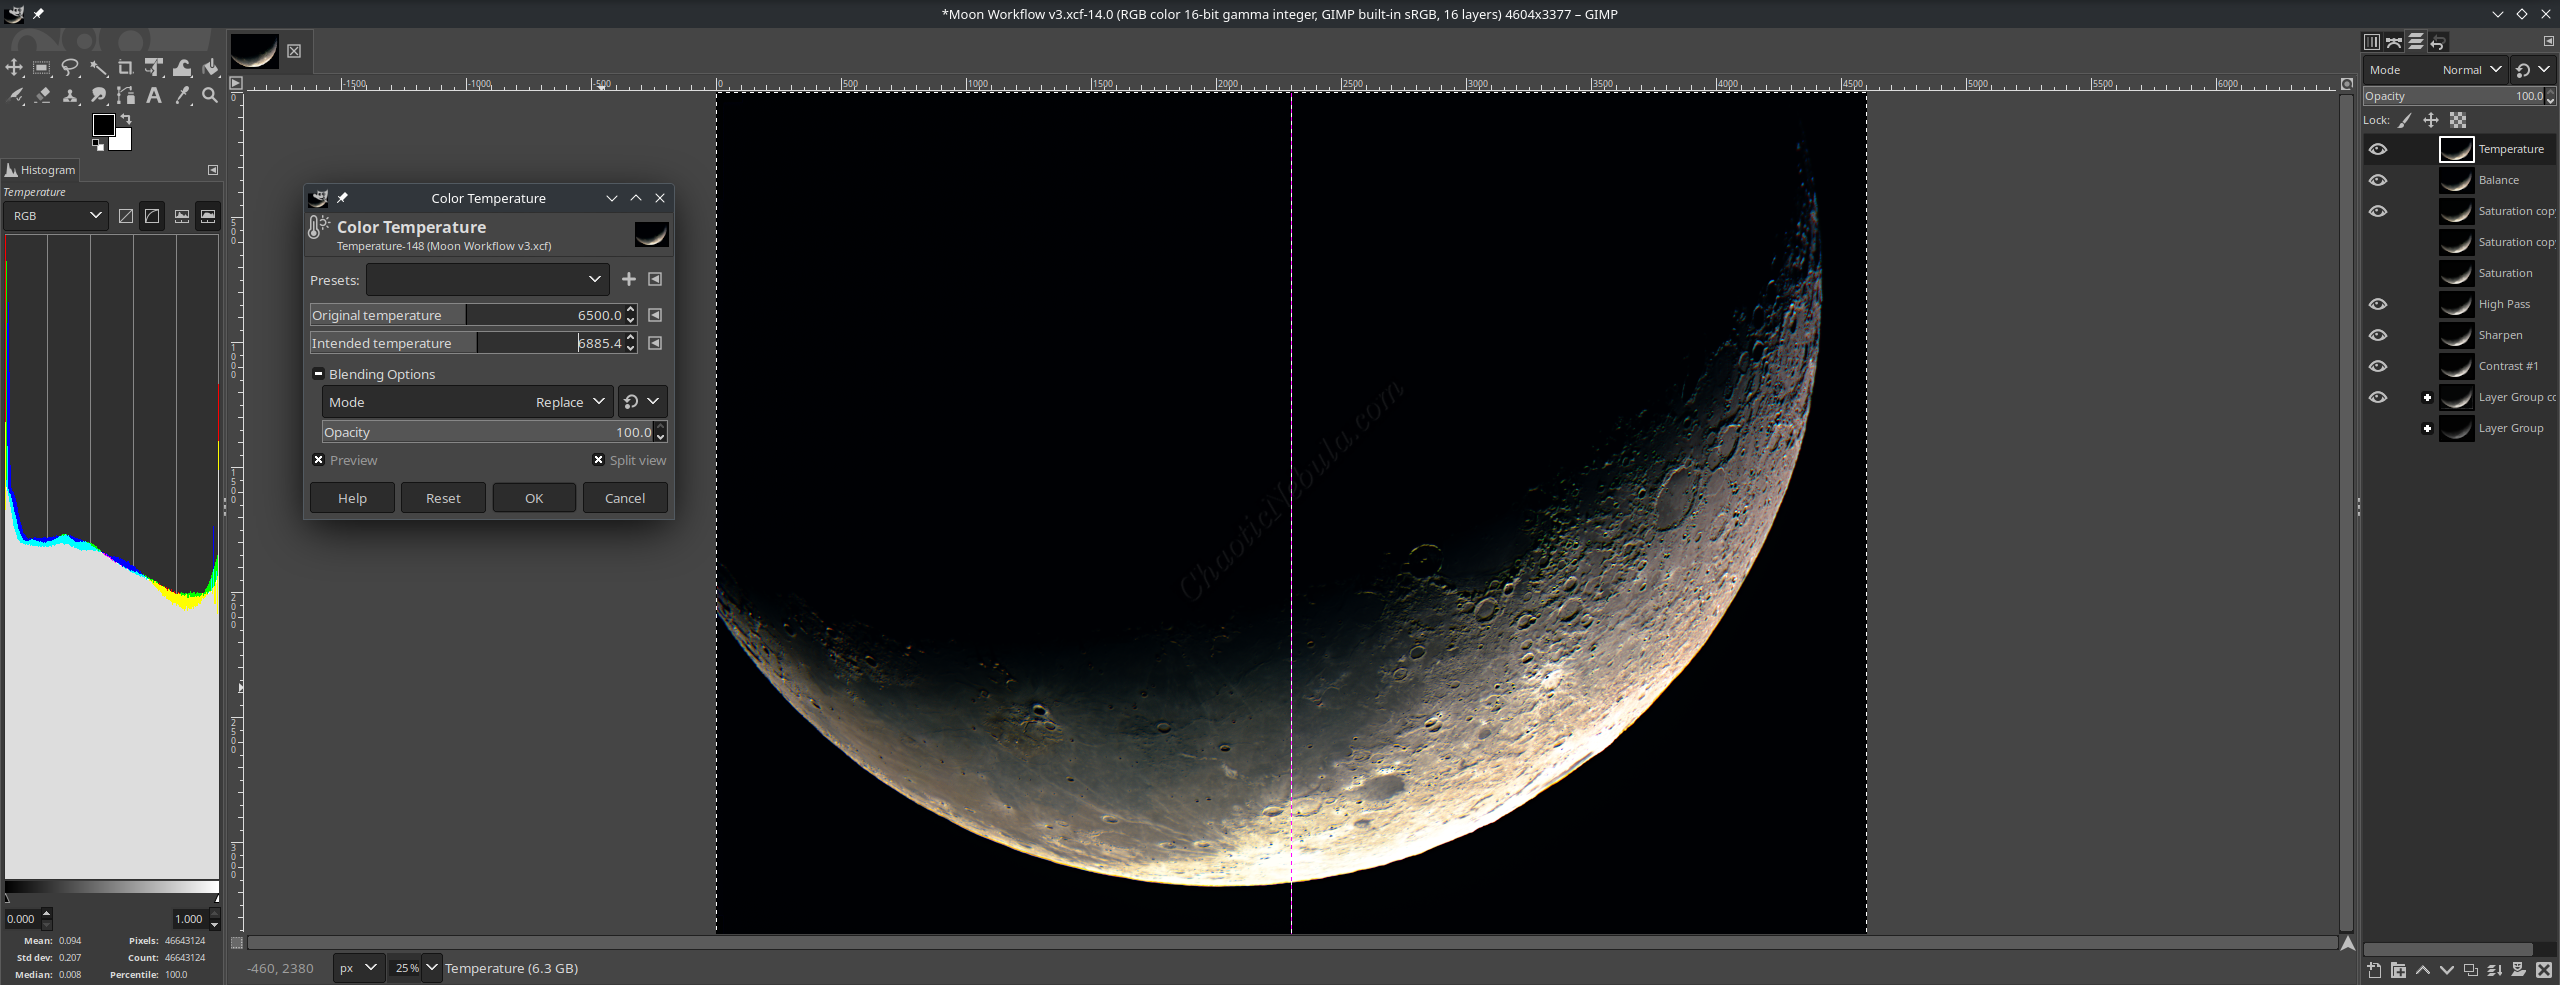
This example opted for a warmer color for the lunar image.
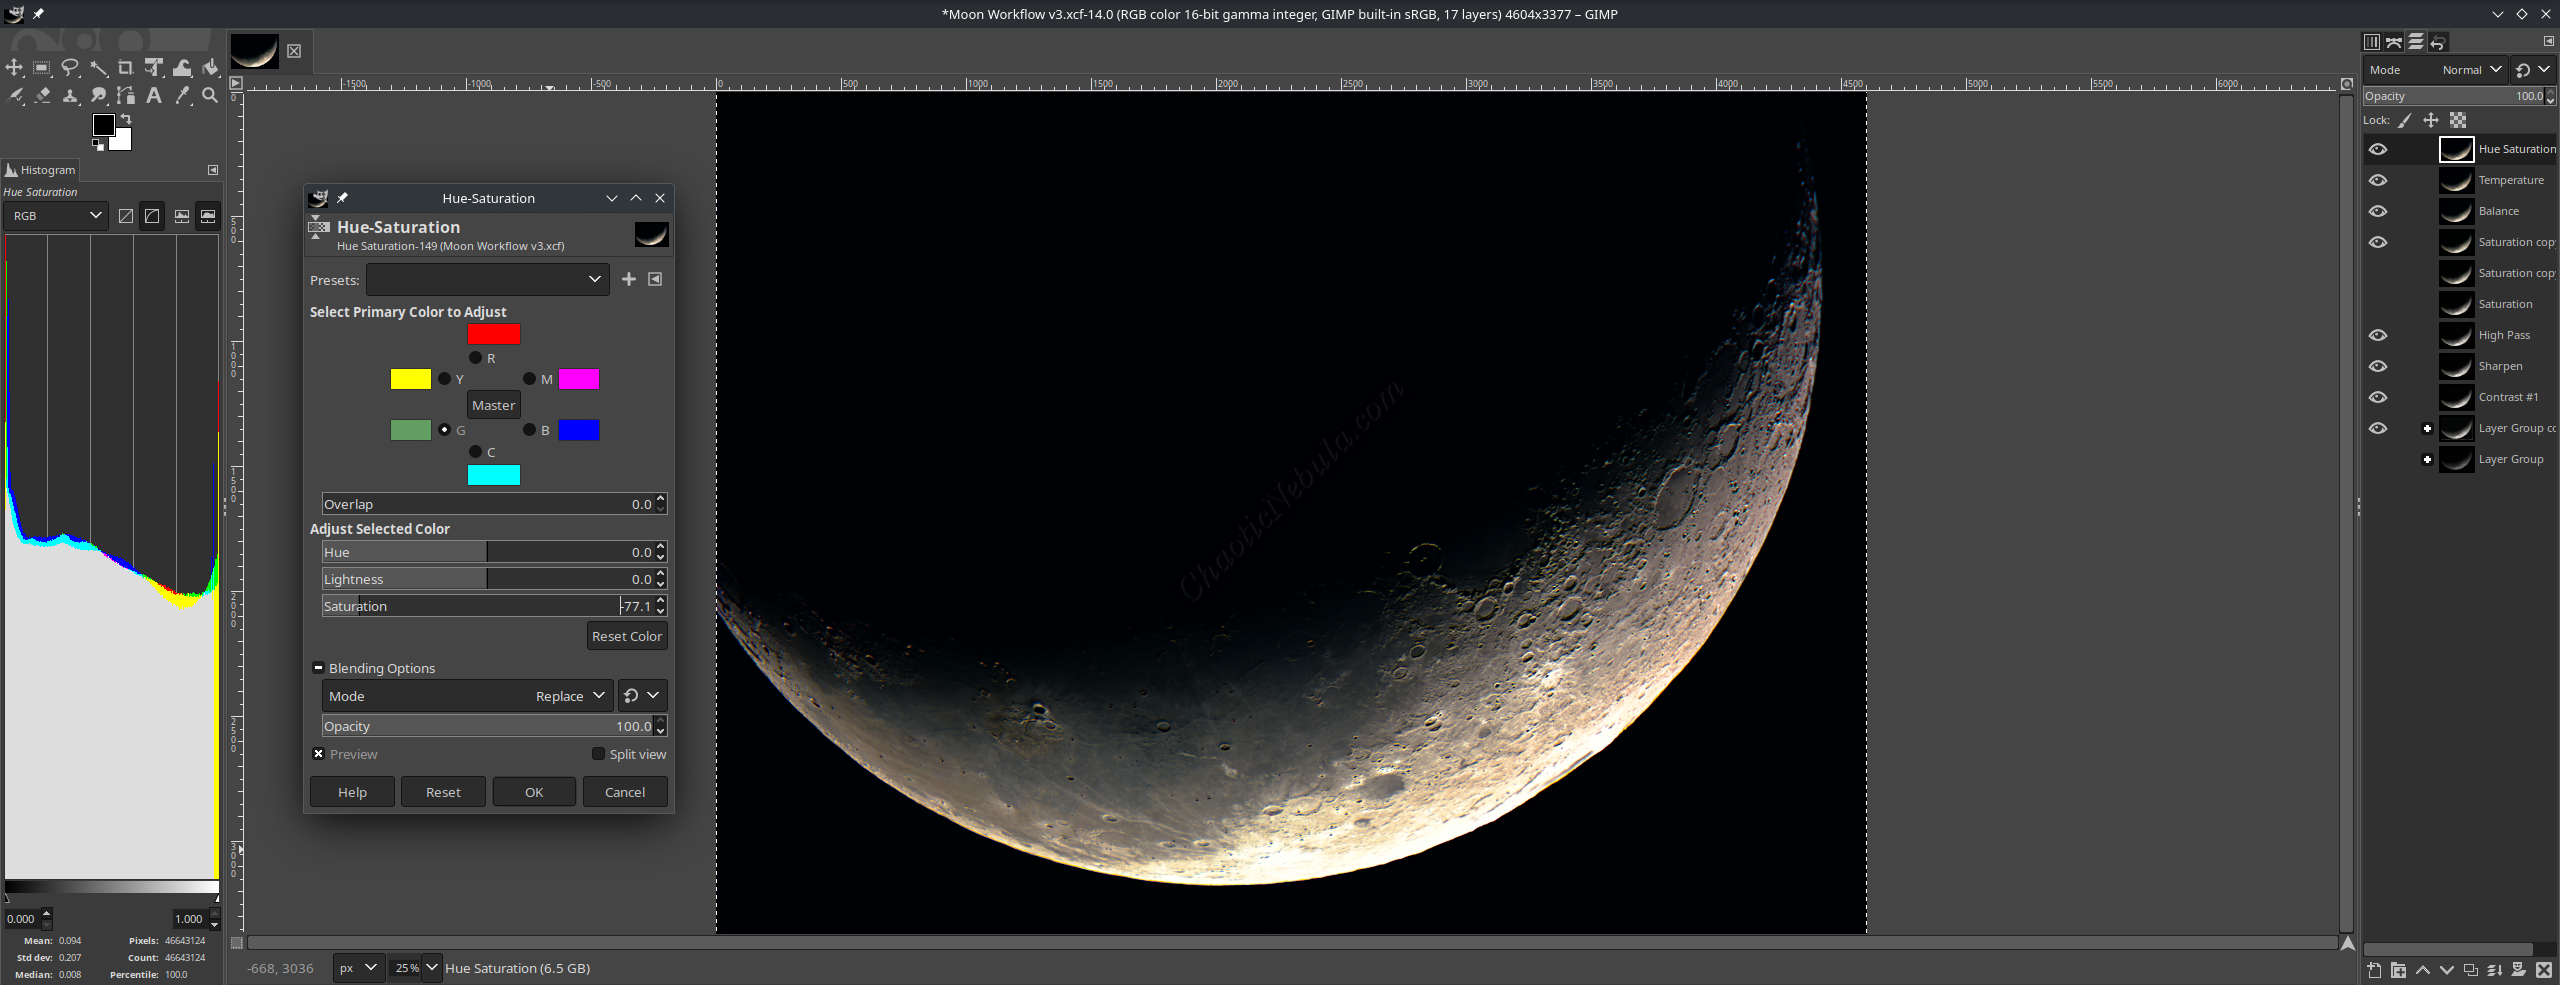
Hue Saturation
After all of these color adjustments, you might notice some unwanted anomalies. For example, in this image, you might notice how the crater edges on the right side tend to have a green outline. One way to reduce the intensity is to use the Hue Saturation process within GIMP. This process can be found by selecting Colors – Hue Saturation in the menu bar.
This process has four parameters:
- Color: This corresponds to the color within the image you want to modify.
- Hue: This setting controls the actual color itself. Moving the hue slider lets you shift the colors in your image. For example, moving it to the right might turn reds more orange, while moving left could make them purple.
- Lightness: This setting controls the brightness of colors. Moving the lightness slider to the right makes colors brighter, while moving it left makes them darker. It’s important to note that this lightness adjustment affects the entire selected color range, not just the overall image brightness.
- Saturation: This setting controls the intensity or vibrancy of colors. Moving the saturation slider to the right increases saturation, making colors appear more vivid. Moving it left decreases saturation, making colors appear duller or even grayscale.
Because the goal is to reduce the intensity of the green around the crate edges, the saturation slider is moved so as to not change the brightness of the crater edges.
What’s Next
Adding color in GIMP is easy to do, but it often requires the use of multiple processes to get the result you desire. There is no right or wrong amount, it is what is pleasing to you and what you wish to accomplish.
But before being done with the creation of a mineral moon image, there is still the need to reduce noise that these processes might have introduced into the image.