Before increasing the color saturation to create the mineral moon appearance, it is useful to improve the contrast and sharping the lunar features in GiMP.
Improve Contrast
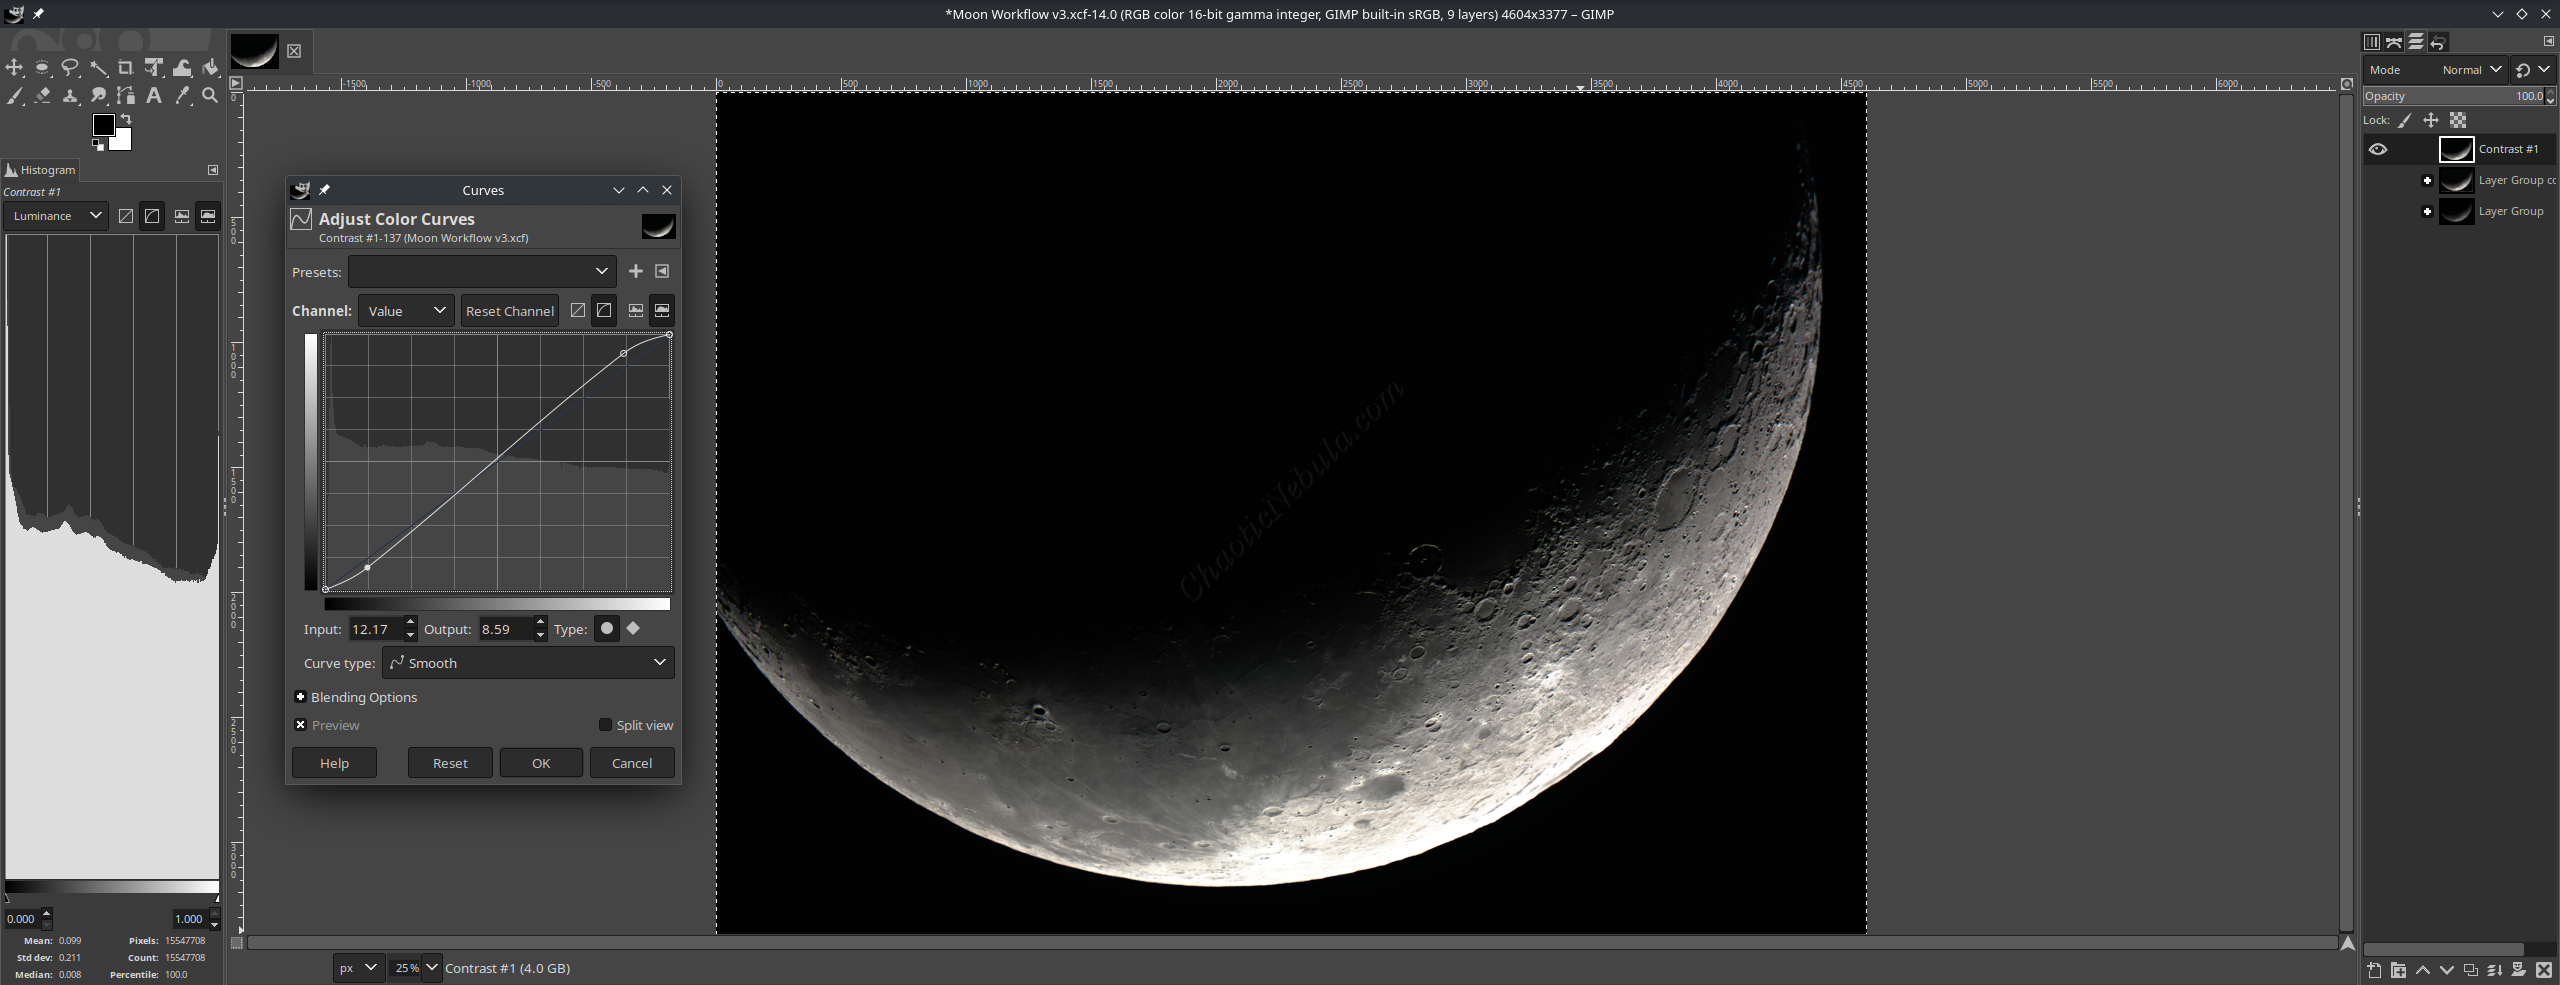
By adjusting the contrast of the lunar image, it will create a more dynamic image. Because the moon is a sphere, shading across the surface changes based on the sun’s location. Applying contrast enhancements brings out this detail.
Within GIMP, first duplicate the layer and name it Contrast. This allows you to easily compare and revert back to the previous version.
With the new layer selected, load the Curves tool by selecting Colors – Curves from the menu bar.
With the Curves tool loaded, create a small S-Curve and notice how the image gets darker in the darker areas and brighter in the brighter areas. Adjust as necessary based on the moon and sun angle.
Sharpen with Unsharp Mask
The next step is to sharpen the lunar surface features.
First, duplicate the layer and rename it to Sharpen.
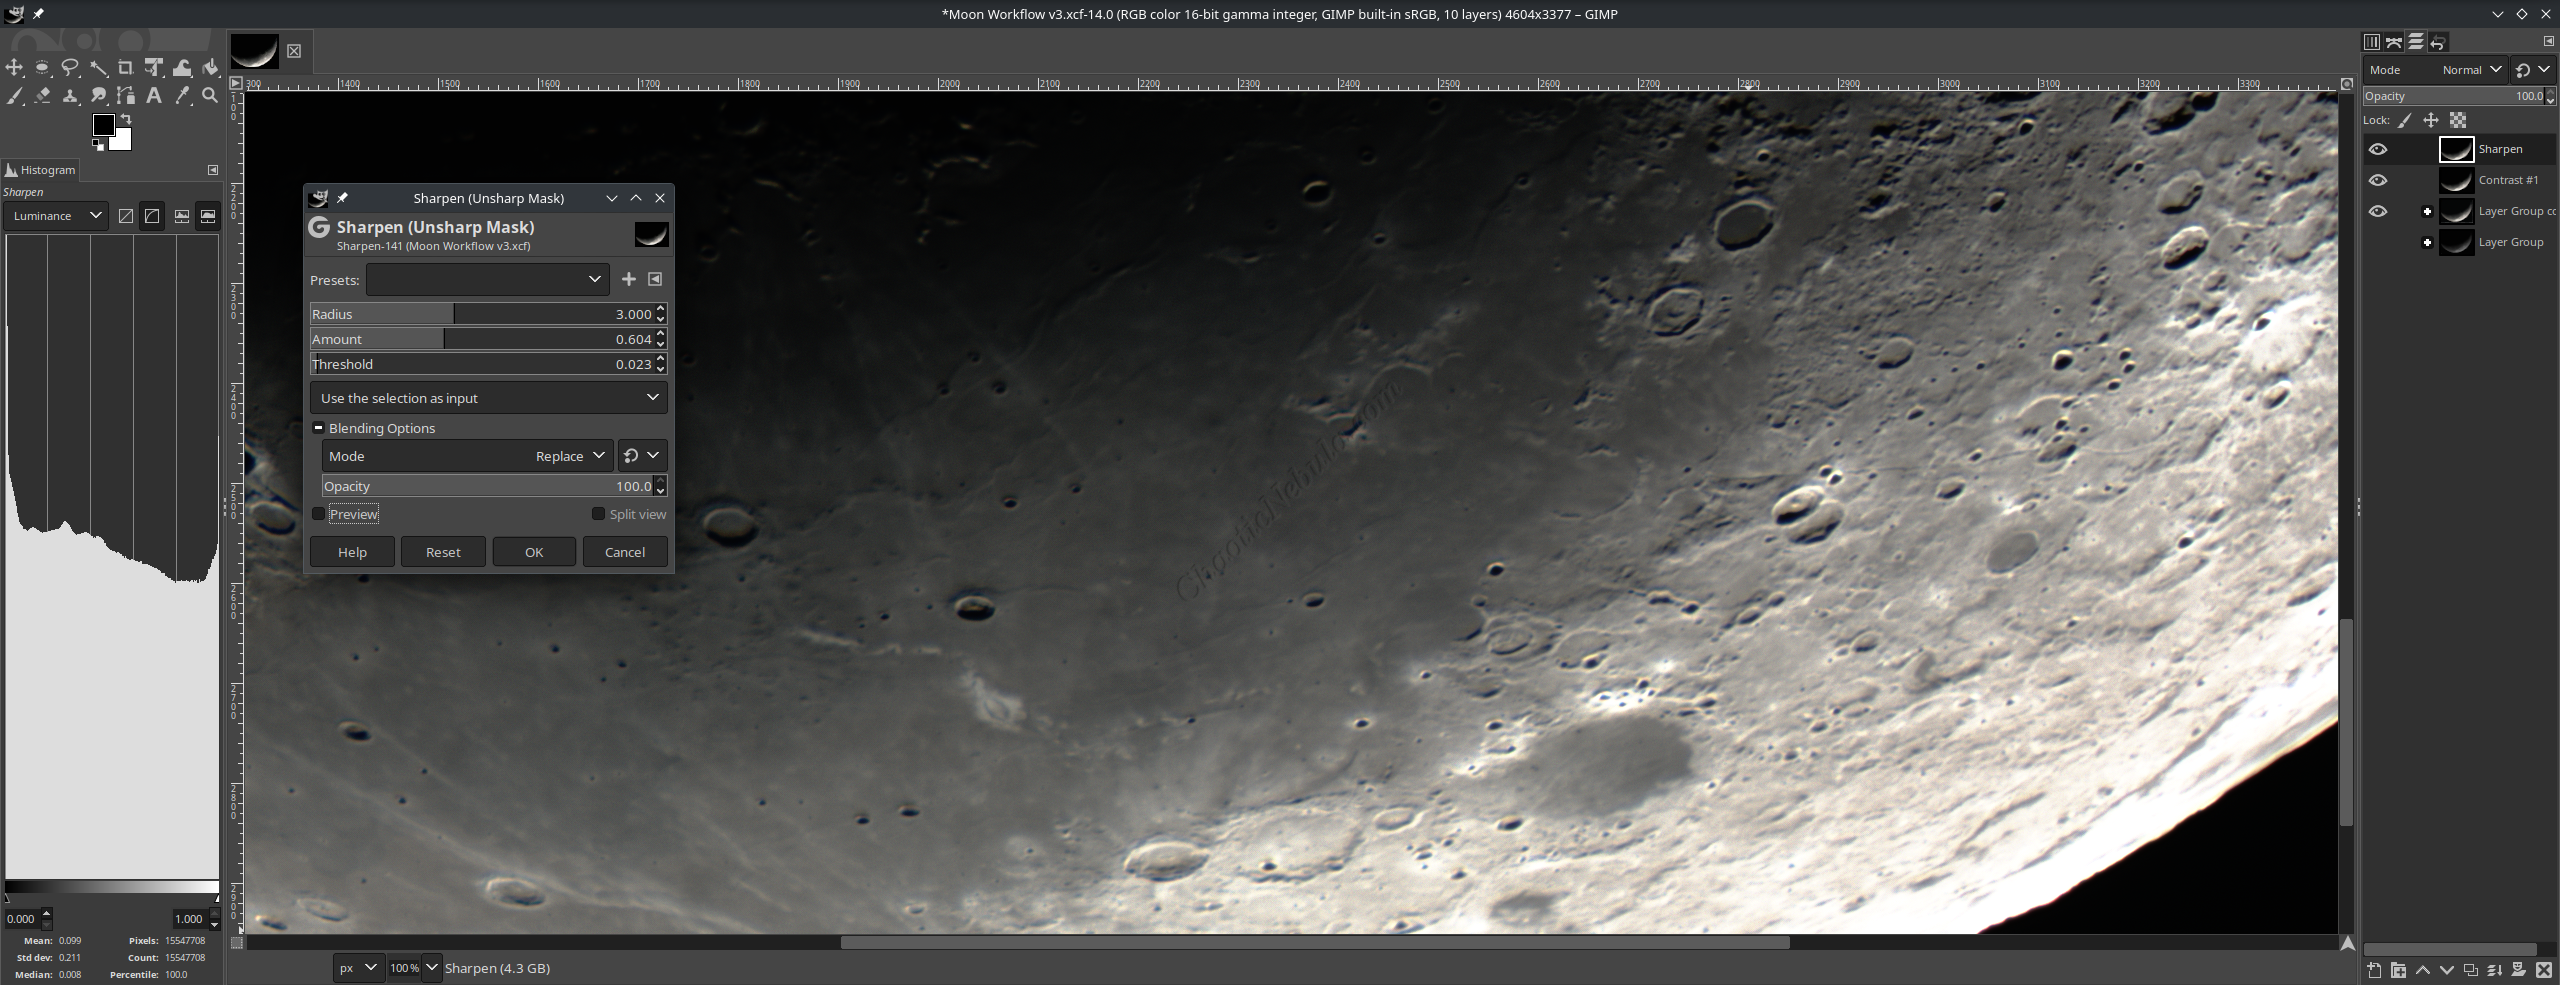
To really see what is happening, zoom in to a section of the image and load the Unsharp Mask filter by selecting Filters – Enhance – Sharpen (Unsharp Mask) from the menu bar.
- Radius: This setting determines how wide the area around an edge will be affected by the sharpening. A higher radius value sharpens a broader area around the edges, creating a more dramatic effect. However, using too high a value can lead to unwanted halo effects around edges.
- Amount: This setting controls the intensity of the sharpening effect. A higher amount value creates a stronger sharpening effect, making edges appear more crisp. However, be cautious, as overdoing it can introduce noise or artifacts in your image.
- Threshold: This setting helps target specific areas for sharpening. A higher threshold value tells the filter to only sharpen areas with significant contrast differences between pixels. This can be useful for preserving smooth areas like lunar mare while sharpening details like lunar craters.
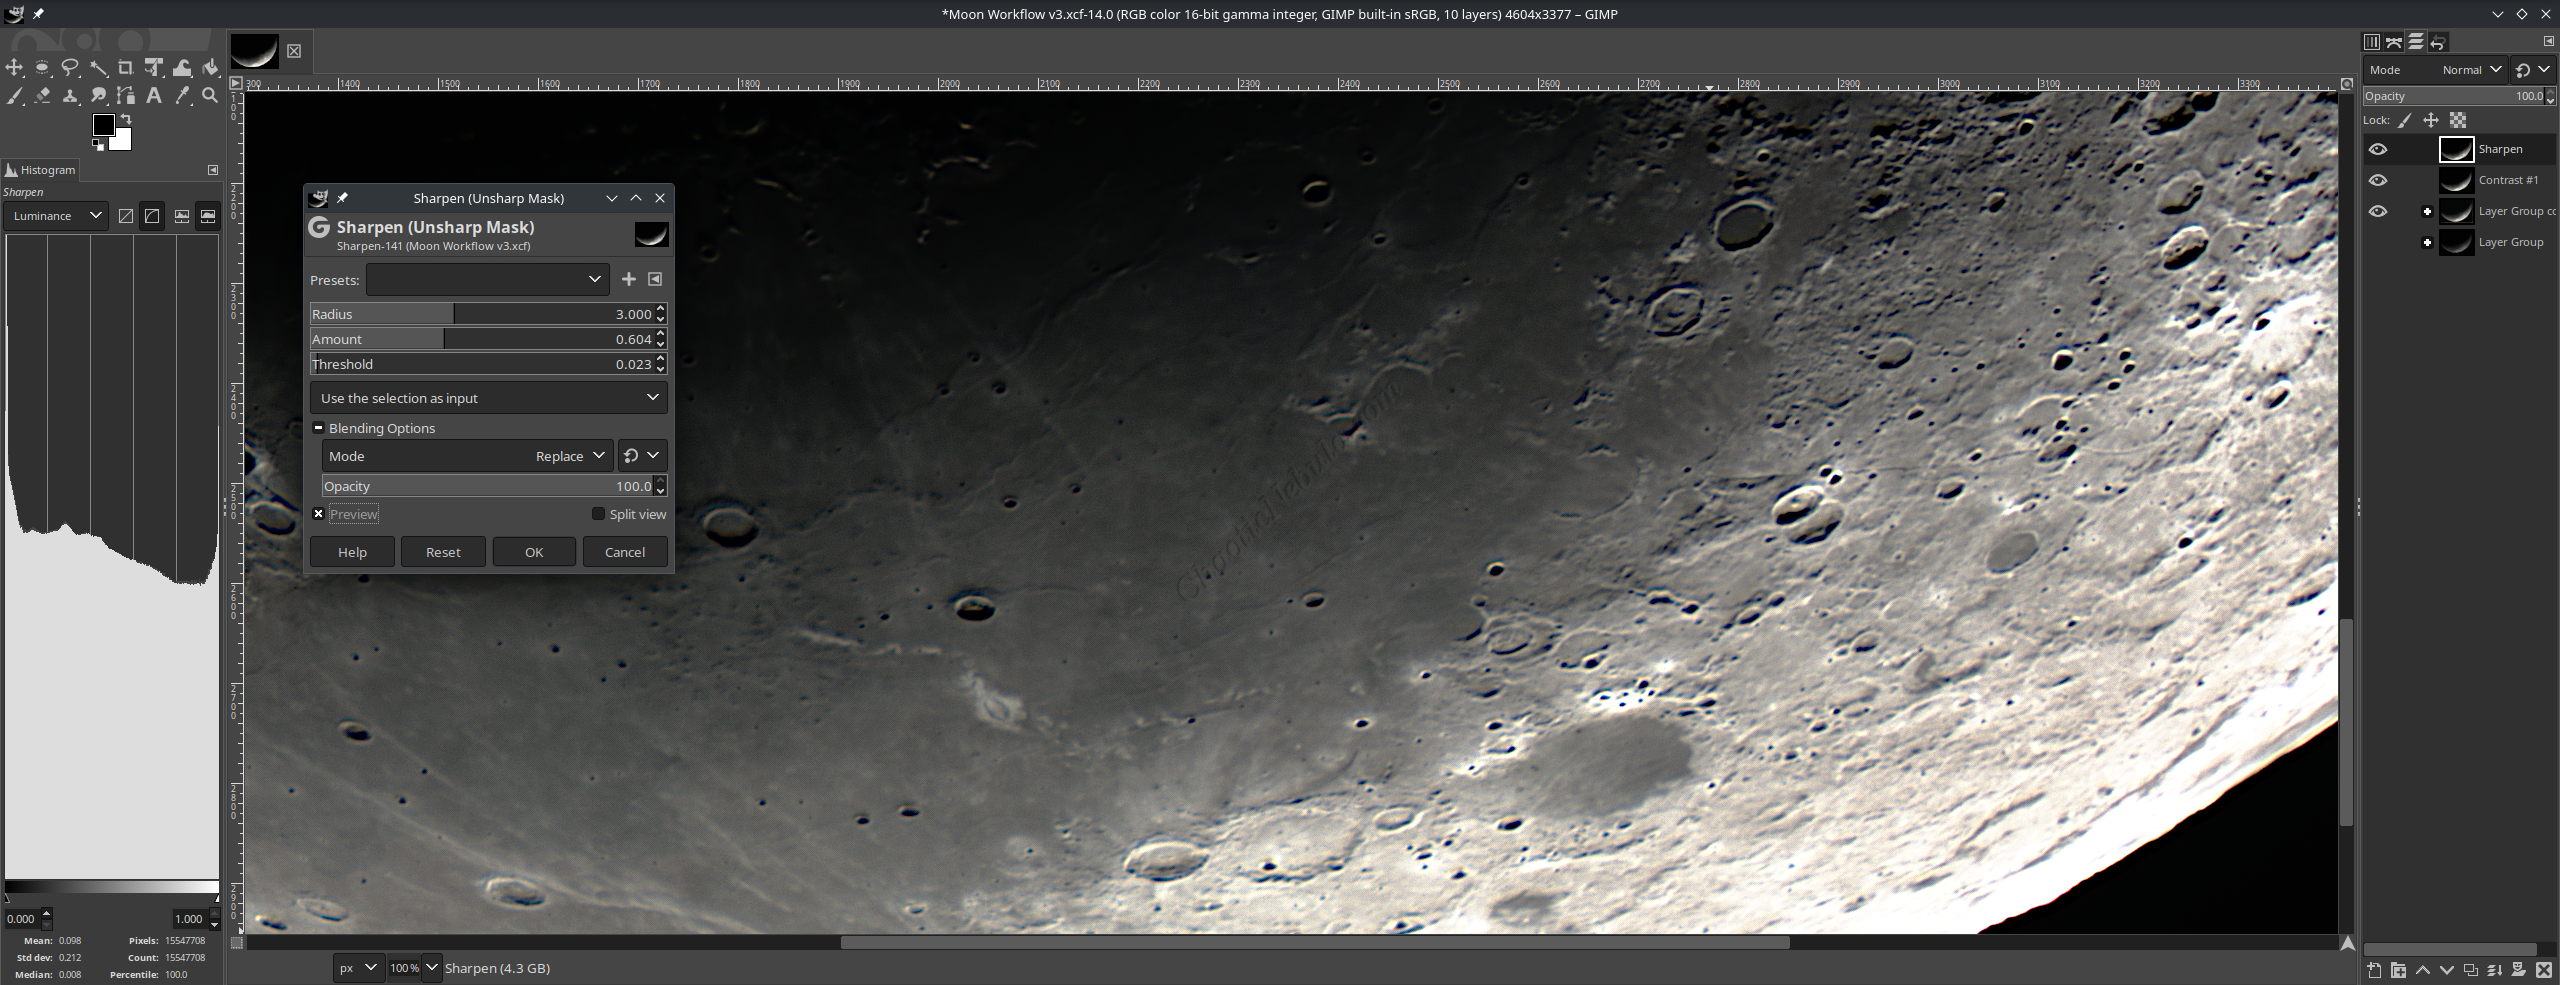
Be careful of applying a too aggressive sharpening effect as it can make the image look like it is covered in plastic.
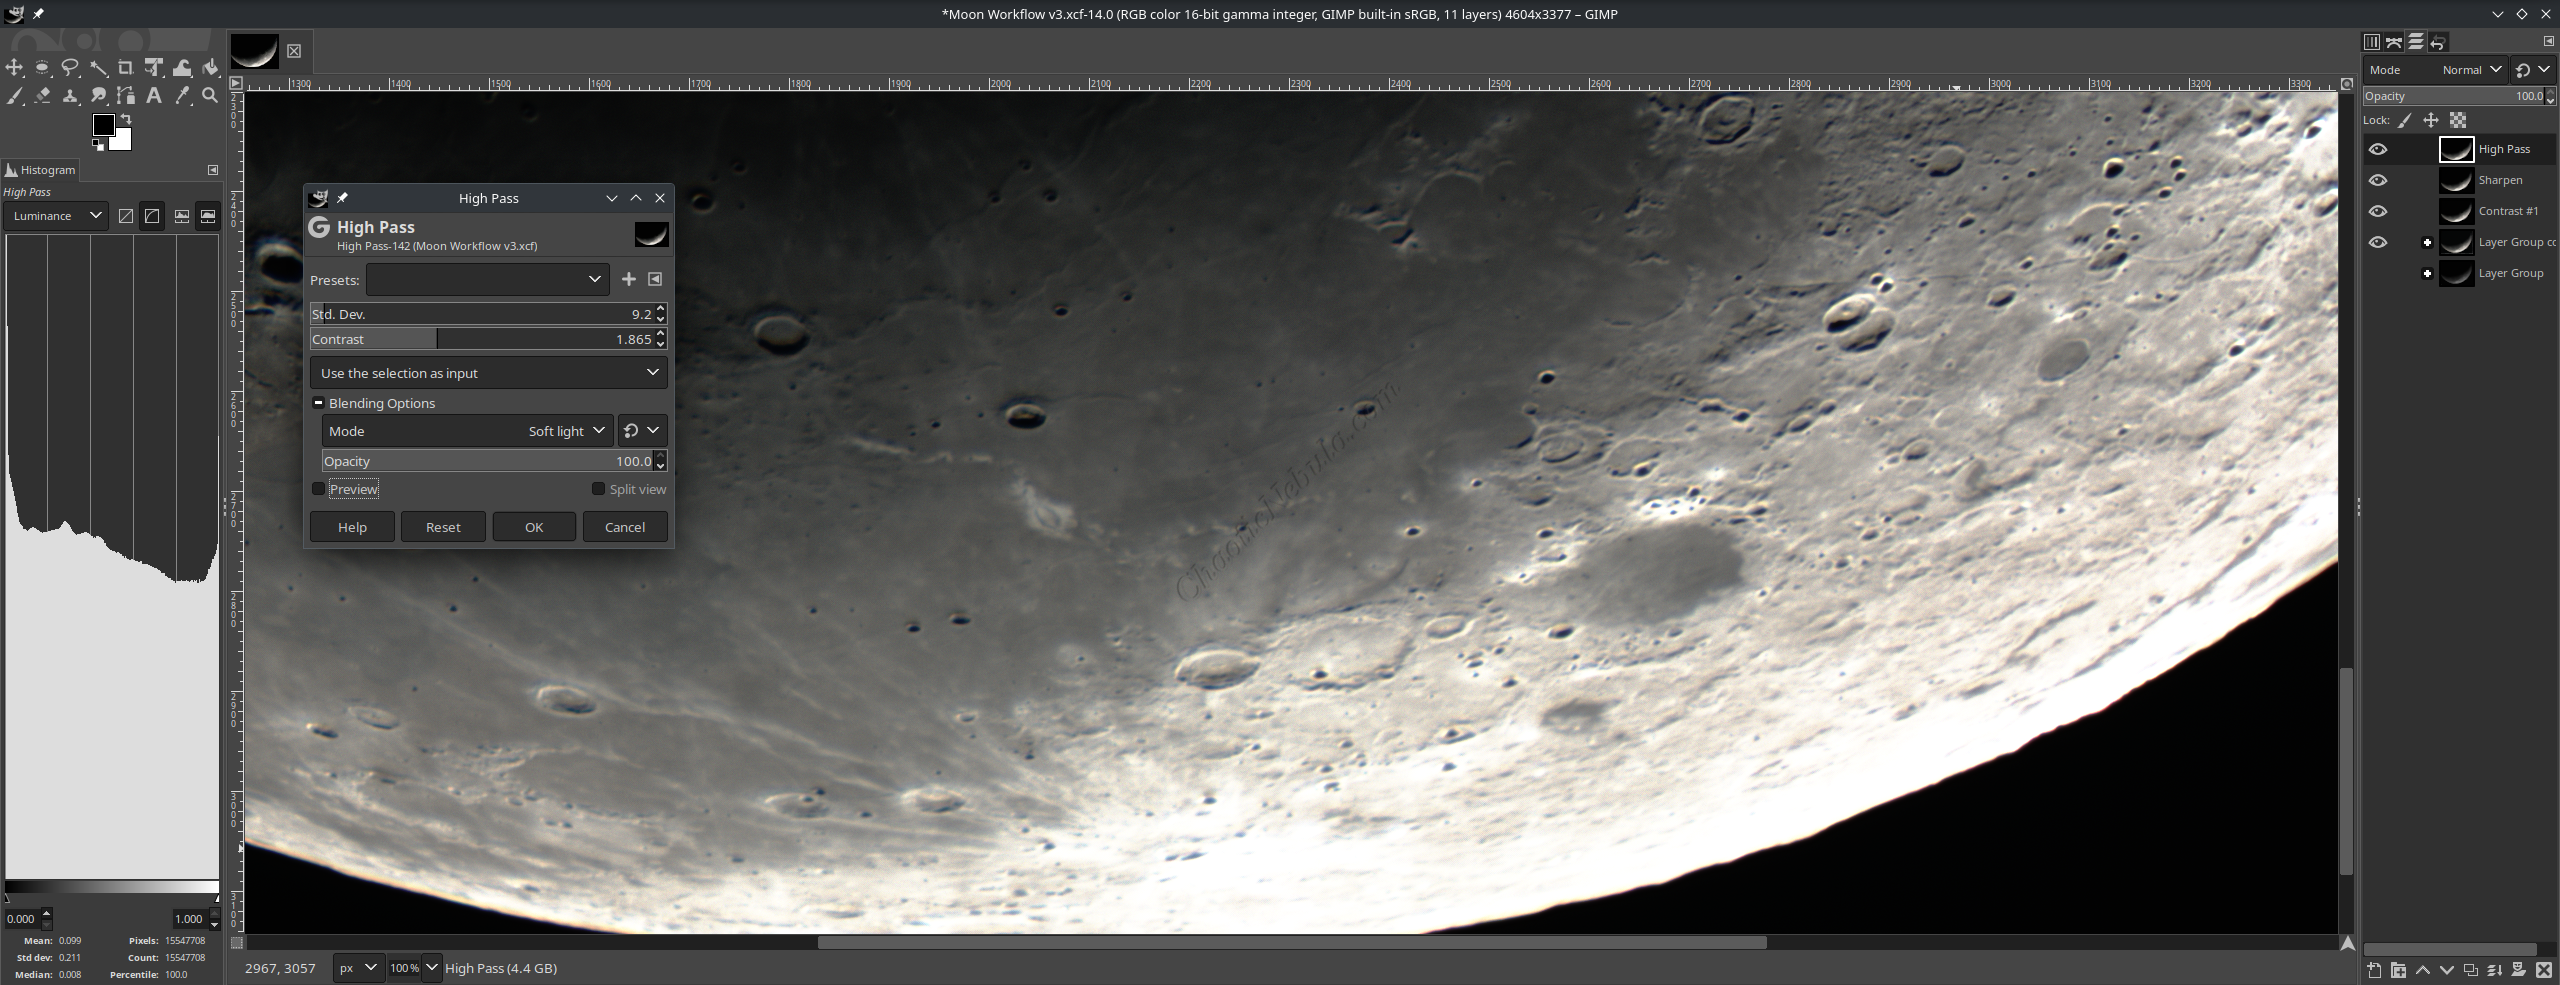
Sharpen with High Pass
Using Unsharp Mask can be quite harsh and aggressive. Another option within GIMP is to use High Pass sharpening as you get more control on the sharpening. It works as follows
- A duplicate layer is created from your original image.
- The High Pass filter is applied to this duplicate layer. This filter essentially removes the low and mid-frequency information (areas with little contrast) from the image, leaving behind a grayscale representation highlighting the edges and high-frequency details.
- The blend mode of the duplicate layer is then changed to a mode that amplifies the effect on the original image. Common choices include “Soft Light,” “Overlay,” or “Hard Light.” These modes effectively add the high-frequency details back into the original image, sharpening edges and making them appear more crisp
In GIMP’s high pass sharpening, there are two main values that control the effect:
- Standard Deviation: This value determines the width of the area around edges that will be affected by the sharpening. It’s represented in pixels (Std. Dev) and works like this:
- Lower Radius: Focuses on sharper, thinner edges but might miss some details.
- Higher Radius: Blurs the sharpening effect over a wider area, potentially creating a halo around edges if overused.
- Contrast: This setting controls the intensity of the sharpening effect on the edges.
- Lower Contrast: Creates a subtler sharpening effect, highlighting only the most prominent edges.
- Higher Contrast: Sharpening becomes more aggressive, affecting a wider range of edges and potentially amplifying noise in the image.
The ideal values for Standard Deviation and Contrast depend on the image and desired outcome. Here are some general guidelines:
- Start with a low Radius (around 2-4 pixels) and low Contrast.
- Gradually increase these values while monitoring the preview to achieve the desired sharpening level without creating halos or excessive noise.
- Remember, you can always adjust the opacity of the sharpened layer later to fine-tune the effect’s strength.

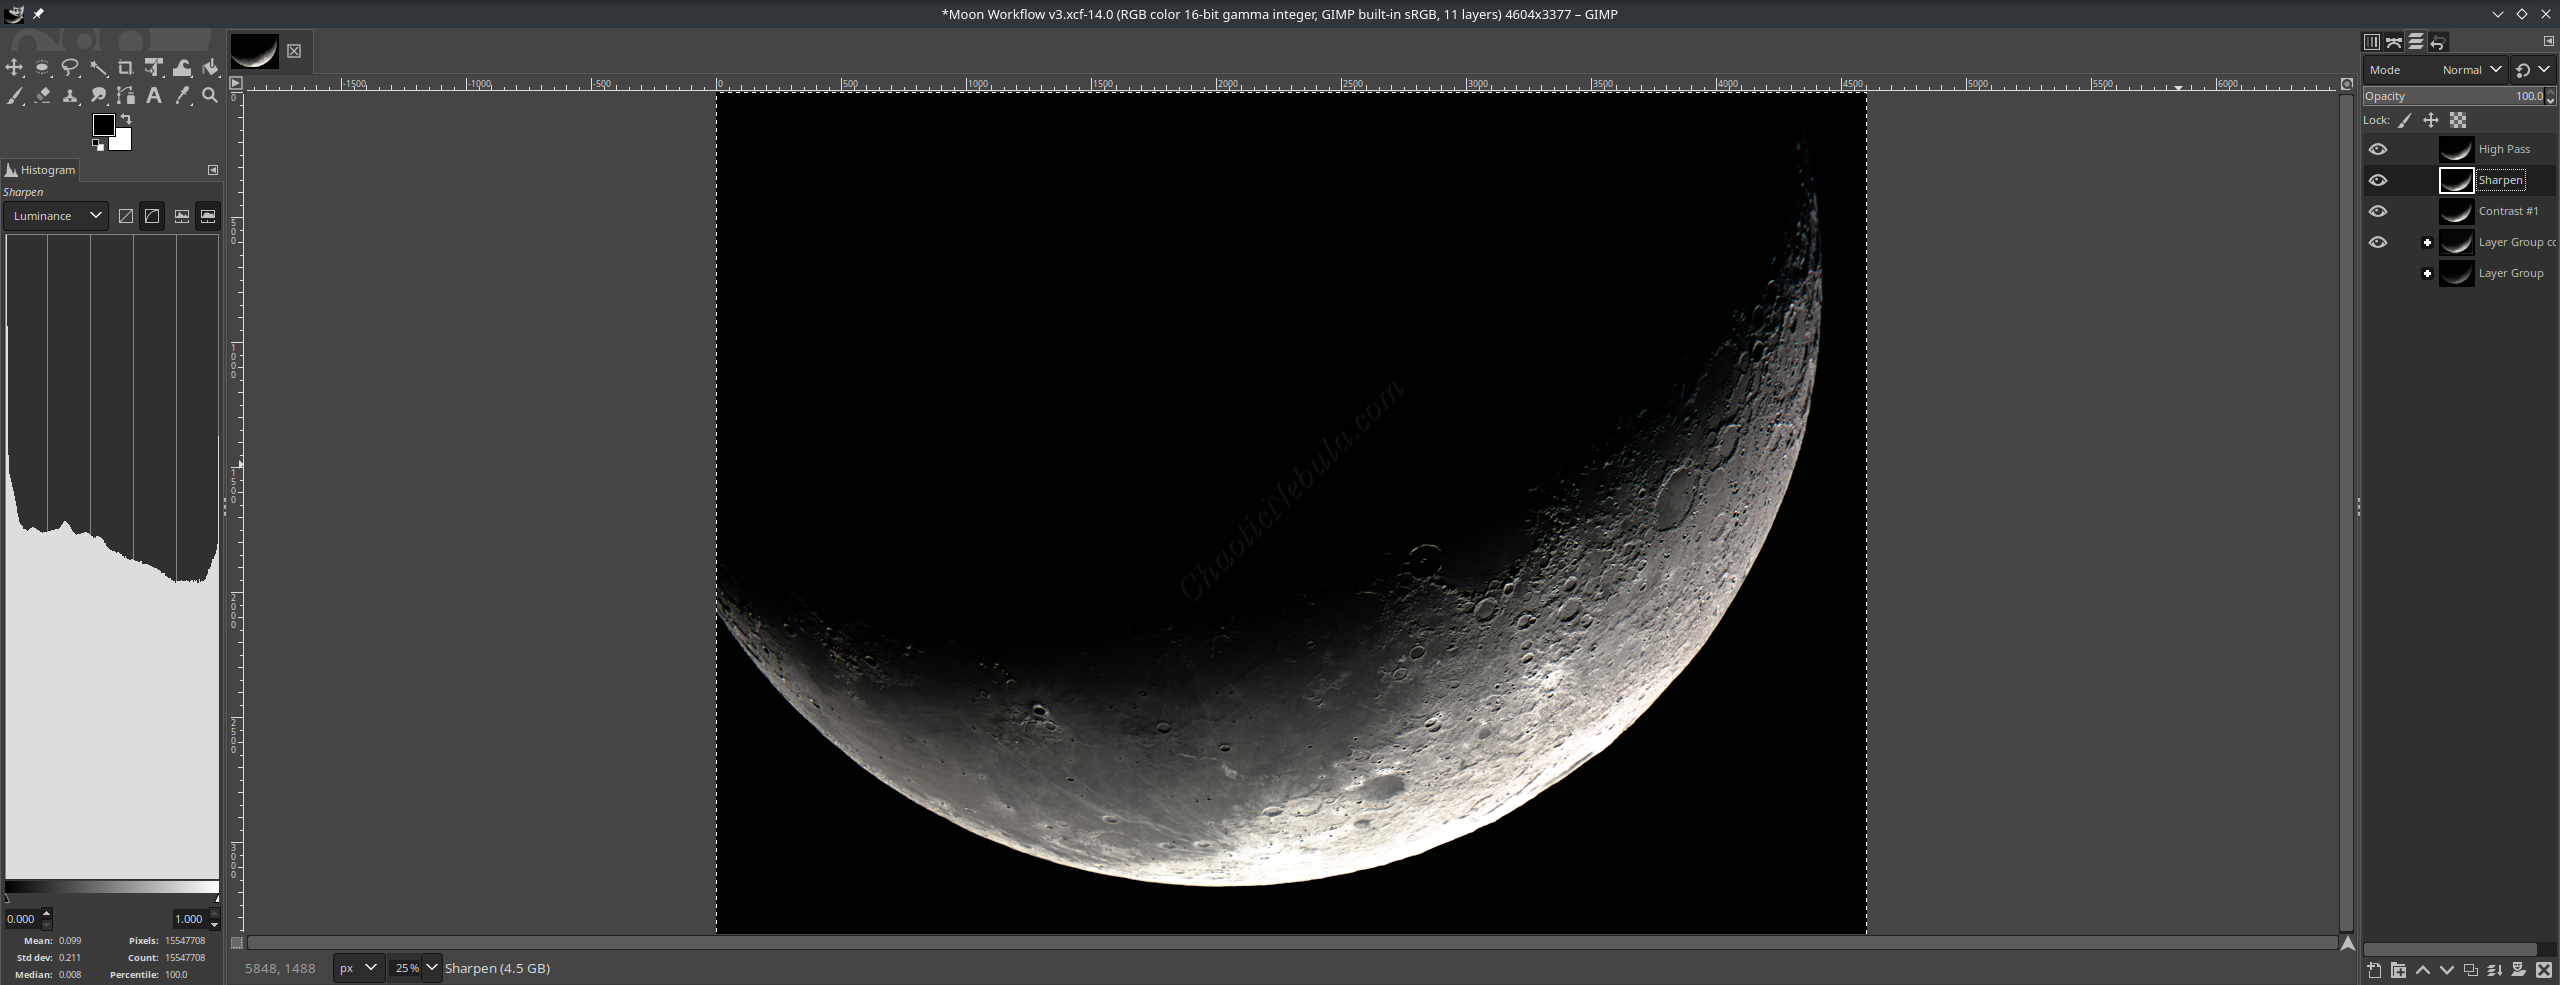

TIP: You can create a stronger sharpening routine with High Pass and then reduce the opacity for the layer so the impact becomes less. This can often allow you to create more dramatic sharpening in the higher signal areas.
Overall, high pass sharpening does a nice job bringing out the details of the lunar surface.
What’s Next
With the sharpening image, the next step is to focus on building the mineral moon look by adjusting the color saturation.