PixInsight Image Integration combines multiple images of the same celestial object into a single, high-quality image. Each individual image contains both the desired astronomical data (signal) and unwanted noise (random variations). By stacking multiple images, PixInsight integration helps to amplify the signal while averaging out the noise. This results in a final image with a significantly improved SNR, revealing fainter details and cleaner data
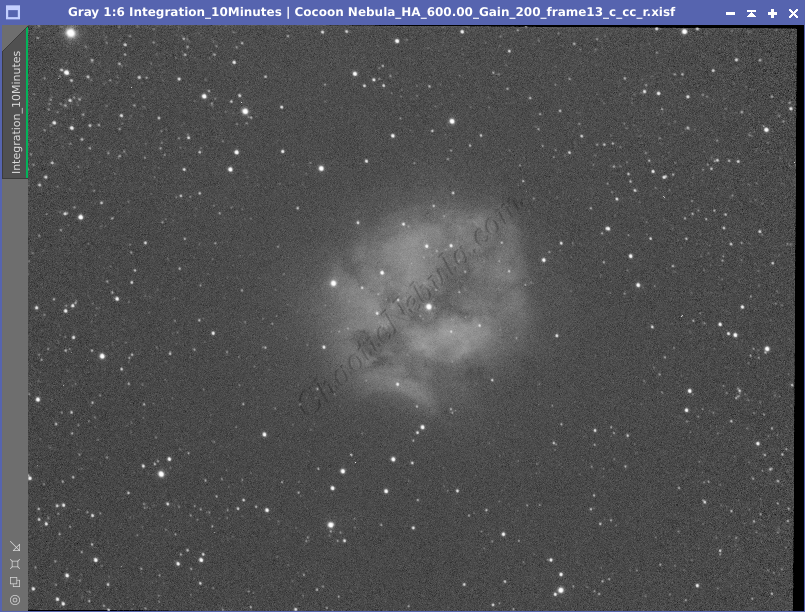

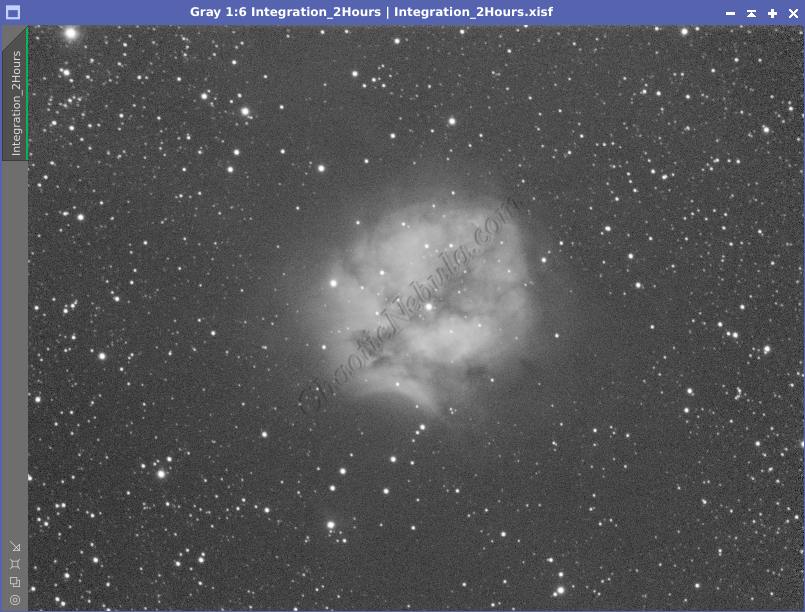
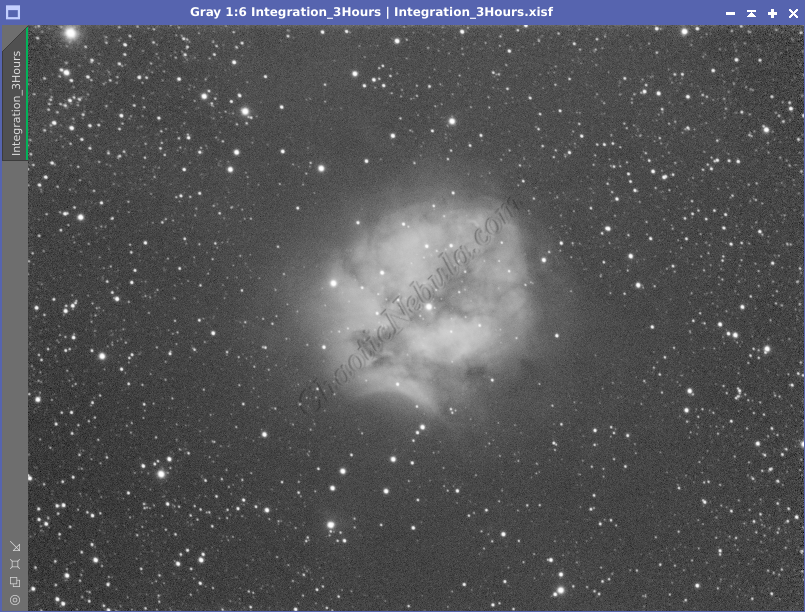


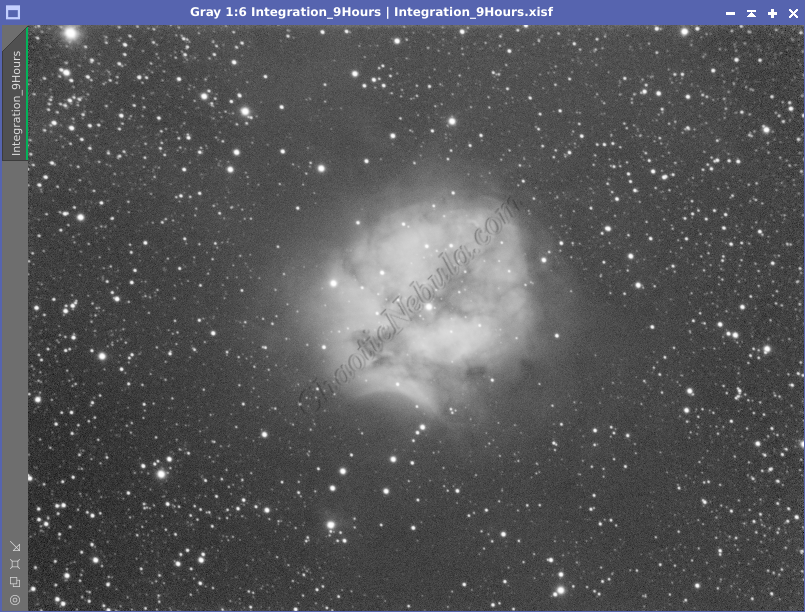

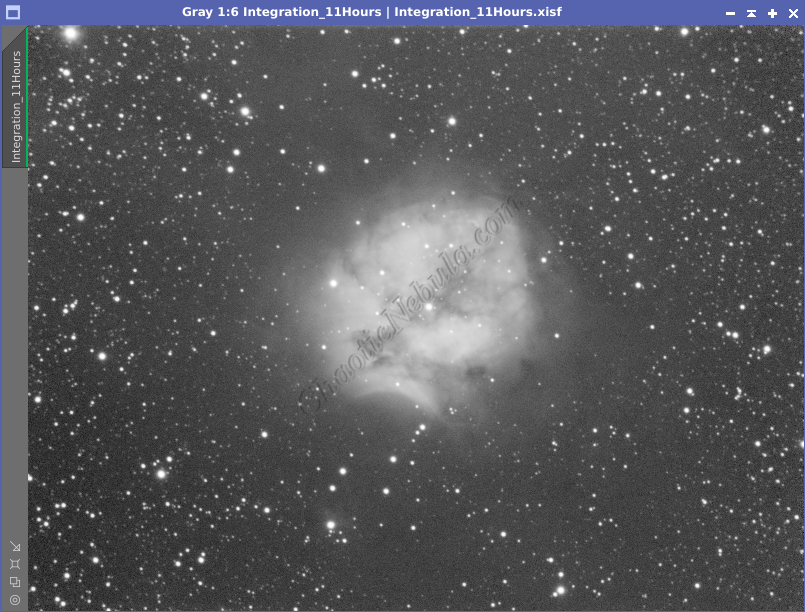
It is obvious, adding more data has drastic improvements on the image quality early on. But after 6+ hours of data, although the signal-to-noise ratio continues to improve, there is diminishing returns between the improvement in the final image vs the amount of telescope time required.
Once the light frames are captured, calibrated (bias, dark, and flat frames), cosmetically corrected, weighted, and normalized, they can now get integrated into a single image. Within PixInsight, this can be automated by using the Weighted Batch Preprocessing Script or manually. Details on the automated approach are found in the following guide.
For manual integration, the PixInsight Image Integration process (Process – Image Integration – Image Integration) is used. The image integration process is broken up into multiple parts
Input Images
Input images are the captured light frames for the astrophotography target. These are the individual image files containing the data to combine and improve.
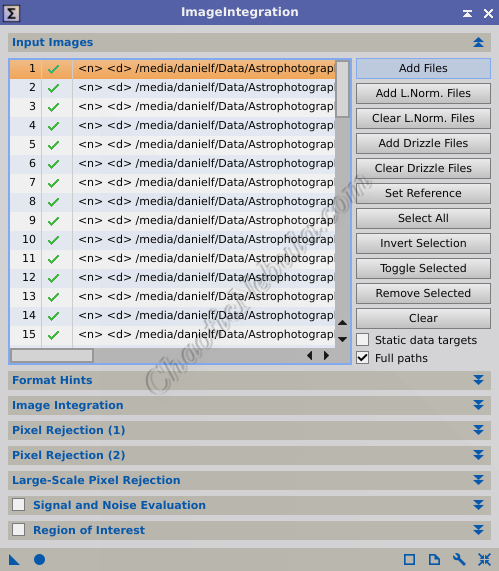
The image integration settings for input images are as follows:
- Add Files: These are the light frames. Select all light frames that share the same filter and exposure settings.
- Add L.Norm. Files: These are the files created by the Local Normalization process to help remove gradients across each individual frame.
- Add Drizzle Files: These are the drizzle files created by the star alignment process. Drizzle integration helps boost the pixel density in another process. In order for Drizzle Integration to work, the files must be added in this step.
Image Integration
The image integration section of the Image Integration process defines how the input images are merged together into a single image.

The image integration options are as follows:
- Combination: Average. Averaging multiple light frames helps to smooth out random noise present in each individual frame. Streaks generated by satellites are often averaged out as the signal is only present within a single subframe.
- Normalization: It helps to create a uniform baseline for the integration process, preventing shorter or longer exposures from dominating the final result due to differences in brightness.
- Local Normalization: If the Local Normalization process was performed, it should be selected. This requires that the Local Normalization configuration files are added into the Input Images section of the Image Integration process.
- Additive with Scaling: If Local normalization was not completed, the images should still be equalized as best as possible with Additive with Scaling. This method adjusts pixel values in each light frame to minimizes differences in background brightness levels across different light frames. It then multiplies by a scaling factor to help preserve the relative brightness of the object.
- Weights: Influence how much each frame contributes to the final integrated image.
- FITS Keyword: If Subframe Selector was used and a custom weighting formula calculated, that information was stored within the FITS Header.
- PSF Signal Weight or PSF SNR: If Subframe Selector used PSF Signal Weight or PSF SNR, select the respective option. If Subframe Selector was skipped, select either PSF Signal Weight or PSF SNR.
- Weight Keyword: If FITS Keyword was used for the Weights value, supply the name of the Keyword that would be contained within the FITS header of the input images.
- Generate integrated image: Enabled
- Generate drizzle data: Enabled. This allows for the implementation of Drizzle Integration later to create higher resolution images. It doesn’t take much disk space or processing time to complete at this stage.
Pixel Rejection (1)
This section deals with identifying and potentially excluding outlier pixel values from the light frames before they are combined into the final image
The pixel rejection (1) options are as follows:
- Rejection Algorithm: The algorithm used to detect pixel outliers that will be removed from the light frame before integration. Although there are more, these are the most common ones.
- Winsorized Sigma Clipping: This is a well-established and effective method for outlier detection in astrophotography image processing. When outliers are identified, instead of discarding the pixels, this algorithm replaces the pixel with the nearest pixel value within the sigma thresholds. This helps minimize the risk of discarding valid data points. This process works well with large input images.
- Percentile Clipping: When working with a few number of input images (less than 10), percentile clipping typically yields the best results. This method analyzes the distribution of pixel values within each light frame and excludes a certain percentage of extreme values (high and low) from each tail of the distribution. By excluding only a specific percentage of pixels from each tail, it can potentially retain more image details compared to aggressive outlier rejection methods
- Normalization: Before the rejection algorithm is applied, normalization for pixel rejection minimize variations in the individual images. This helps to make the rejection criteria consistent across the images
- Scale + Zero Offset: Matches the mean background levels to help improve outlier detection by creating a uniform background. This is recommended if the input images are calibrated and Local Normalization was not used.
- Equalize Fluxes: Matches the histogram peaks of all images. This is recommended if dealing with uncalibrated images (no bias, dark, or flat frames).
- Local Normalization: If the Local Normalization process was performed, it should be selected. This requires that the Local Normalization configuration files are added into the Input Images section of the Image Integration process. This is the preferred method as it creates a smooth background to improve outlier detection.
- Clip low pixels: Enabled. Helps mitigate the influence of extreme values in the darker pixels.
- Clip high pixels: Enabled. Helps mitigate the influence of extreme values in the brighter pixels
Pixel Rejection (2)
The pixel rejection (2) section are specific configuration items based on the selections made within the Pixel Rejection (1) section.
- Percentile Low: If the Rejection Algorithm in the Pixel Rejection (1) is set to Percentile Clipping, this entry becomes available. It defines the percentage of pixels to discard on the low end.
- Percentile High: If the Rejection Algorithm in the Pixel Rejection (1) is set to Percentile Clipping, this entry becomes available. It defines the percentage of pixels to discard on the high end.
- Sigma low: 4.00. If the Clip Low Pixels in the Pixel Rejection (1) is selected, this entry becomes available. Any pixel value more than 4 standard deviations below the mean will be considered outliers and potentially clipped
- Sigma high: 3.00. If the Clip High Pixels in the Pixel Rejection (1) is enabled, this entry becomes available. Any pixel value more than 3 standard deviations above the mean will be considered outliers and potentially clipped
- Range Low: If the Clip Low Range entry is enabled in the Pixel Rejection (1) section, this entry becomes available. All pixels whose values are below this threshold are clipped.
- Winsorized cutoff: 5.00. If the Rejection Algorithm in the Pixel Rejection (1) is set to Winsorized Sigma Clipping, this entry becomes available. Establishes percent limits on how many pixels can be cut at the low and high end. A cutoff of 5% would indicate that the lowest and highest 5% of values in the dataset will be replaced with values at the 5th and 95th percentiles, respectively.
Large-Scale Pixel Rejection
Regular pixel rejection methods focus on individual pixels that deviate significantly from the norm. Large-scale rejection tackles bigger issues like:
- Satellite trails: These appear as bright streaks across your image.
- Airplane trails: Similar to satellite trails, but potentially fainter.
- Meteors: These fleeting streaks of light can leave unwanted marks.
- Large dust motes: These appear as dark or bright spots.
- Layers: The number of layers controls how aggressively the process searches for connected pixels to be rejected.
- More Layers: This can be helpful for complex artifacts with fuzzy or branching structures, like faint satellite trails or dust donuts. However, it can also lead to over-rejection of valid data in intricate astronomical features.
- Fewer Layers: This is suitable for simpler, well-defined artifacts like airplane trails or bright hot pixels. But it might miss some connected pixels in more complex structures.
- Growth: This setting determines how much the rejection “grows” around an initially identified outlier pixel to include neighboring pixels that are likely part of the same artifact.
- Higher Growth: This can be useful for capturing the full extent of large, diffuse artifacts like faint satellite trails or background illumination gradients. However, it can also lead to accidental removal of valid data in nearby areas.
- Lower Growth: This is ideal for well-defined, isolated artifacts to only reject the immediate surrounding pixels.
Adjusting away from the defaults is trial and error. The goal is to balance the removal of artifacts while avoiding the rejection of valid data.
Typically, low and high large-scale structures should be enabled with a 2×2 configuration between layers and growth.
What’s Next
With a light frames aligned, the image processing can continue based on the respective workflow: