While PixInsight Image Integration delivers a significantly improved image, PixInsight Drizzle Integration offers an additional step to increase the resolution of the integrated image. Drizzle integration utilizes advanced techniques to create a higher-resolution image, revealing even finer details within data.
In Image Integration, multiple exposures of the same celestial object are combined into a single image. Pixel values from each exposure are typically averaged together. This helps improve the overall signal-to-noise ratio where noise is reduced and the overall image quality is enhanced. However, the resolution of the integrated image is limited by the original sampling resolution of the imaging rig.
Drizzle Integration also combines multiple exposures, but it employs a more sophisticated technique. Instead of simply averaging pixel values, Drizzle Integration redistributes pixel values to sub-pixel positions, effectively increasing the sampling resolution of the final image. The primary goal of Drizzle Integration is to enhance image resolution and reveal finer details that may be otherwise obscured by the original sampling resolution. The final image produced by Drizzle Integration has higher resolution and finer detail compared to traditional Image Integration. It allows for greater details within the intricate features and nuances in celestial objects.
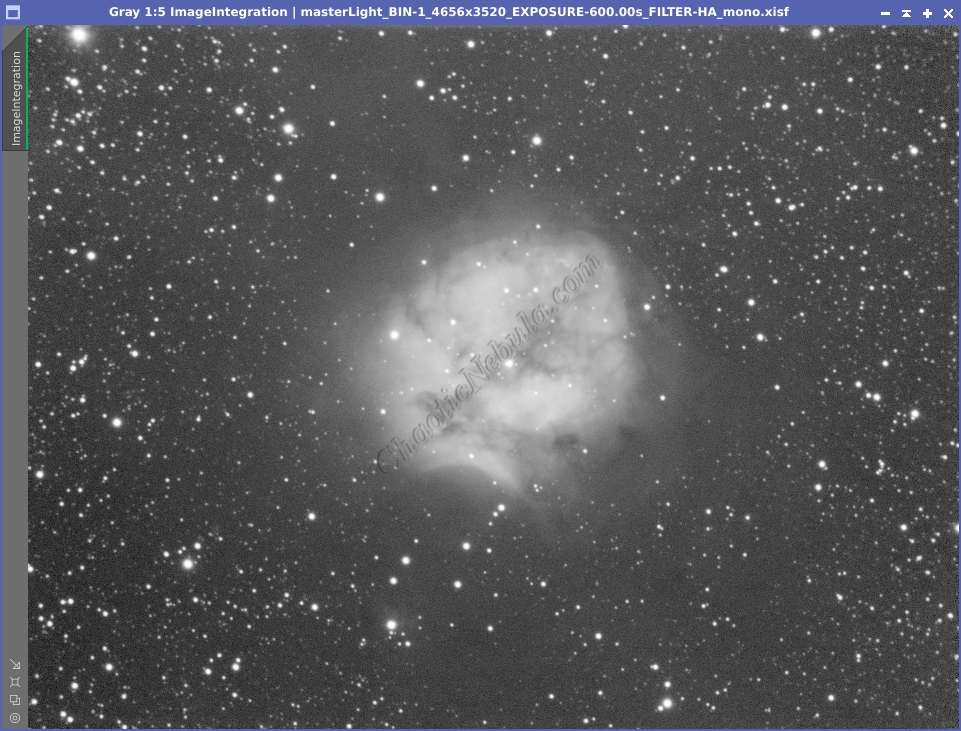
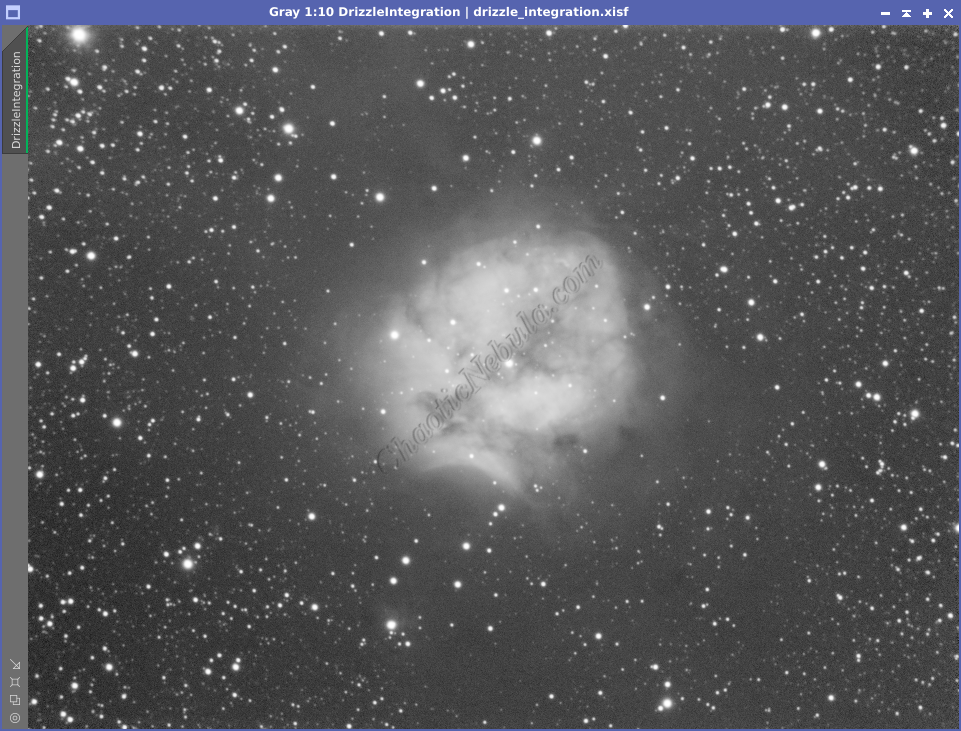
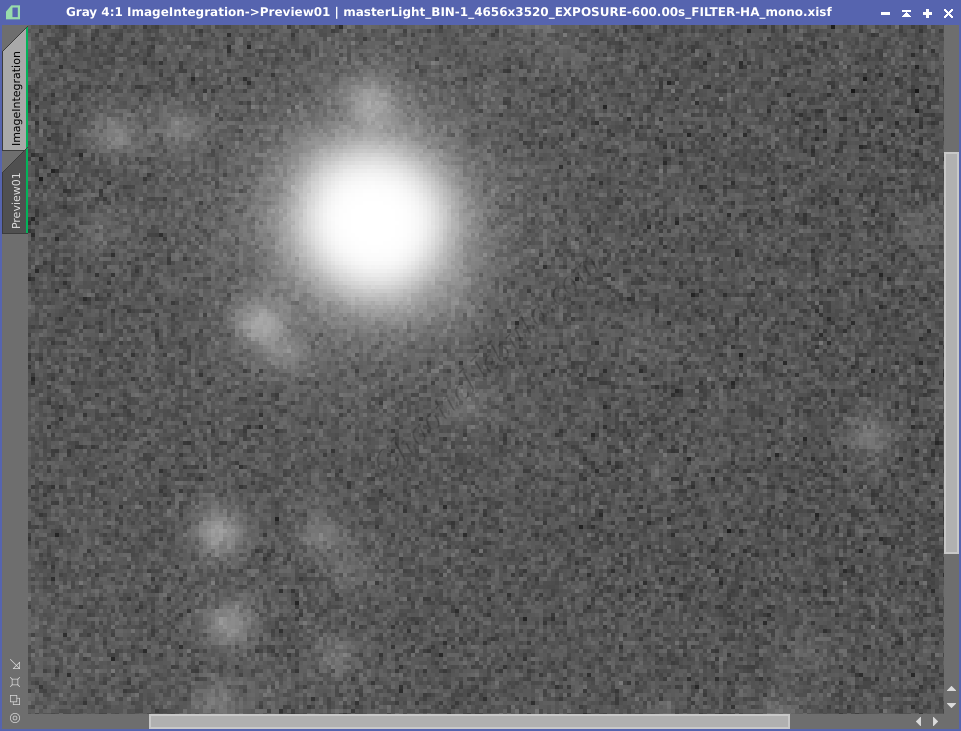
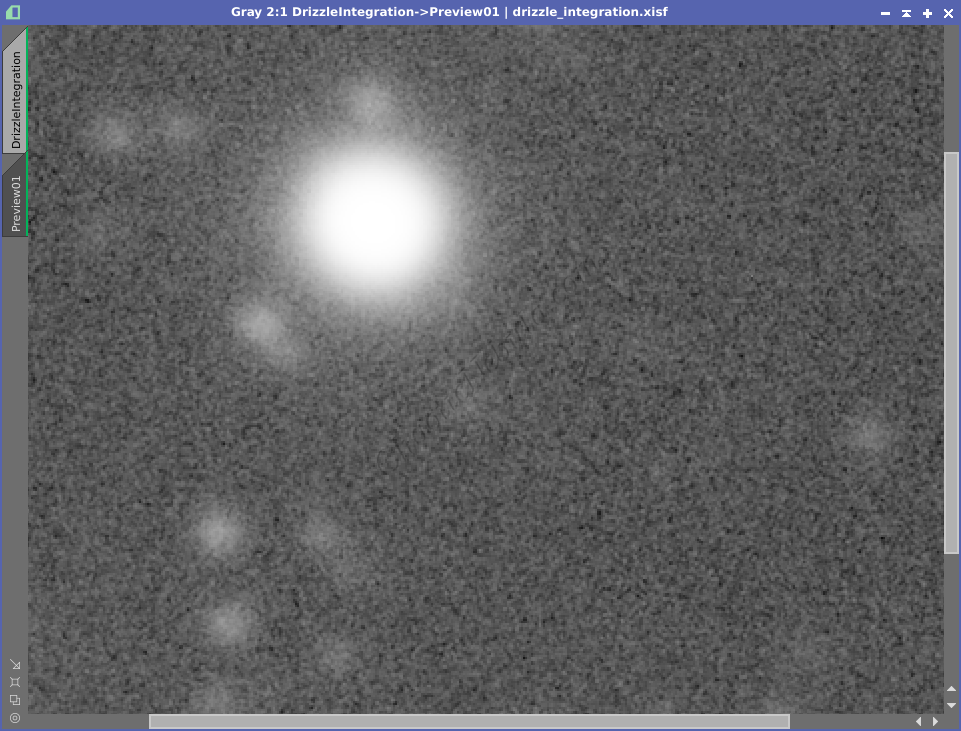
With this example, it is quite easy to see how the background appears more smooth in the image going through Drizzle Integration. Zooming in, the image going through Drizzle Integration also has smooth stars while the baseline images shows individual pixels as blocks
Although drizzle integration does improve the resolution and image details, it does come at a cost:
- Increased Processing Time: The drizzle process is intensive and takes longer than the image integration process.
- Potential for Increased Noise: While aiming for detail, drizzle integration might introduce some additional noise in areas with low signal.
- File Size: Due to the increased resolution, the file size is quadrupled.
- Not Always Necessary: When working with mosaics, drizzle integration is often overkill. Plus, the significantly increased file sizes can cause issues with memory and processing limitations.
Once the light frames are integrated into a single image, they can now get drizzle integrated. Within PixInsight, this can be automated by using the Weighted Batch Preprocessing Script or manually. Details on the automated approach are found in the following guide.
For manual integration, the PixInsight Drizzle Integration process (Process – Image Integration – Drizzle Integration) is used. The image integration process is broken up into multiple parts
Config:
Input Data
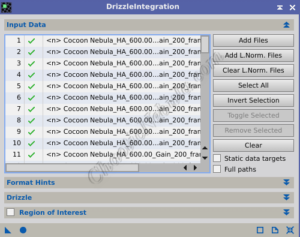
The first step in configuring Drizzle Integration is to add the input images.
- Add Files: The input files for Drizzle Integration are the drizzle files (.XDRZ files) created during the Image Integration process and not the actual image files. The Drizzle Files contain information about the corresponding light subframe, which is why it is important to not change folder paths during the image processing workflow.
- Add L.Norm. Files: These are the files created by the Local Normalization process to help remove gradients across each individual frame.
Config:
Drizzle
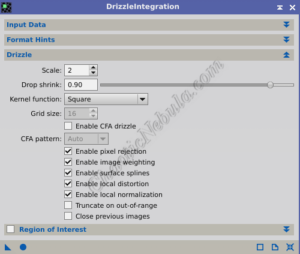
With the files added, the Drizzle settings can be configured.
- Scale: This is the most important configuration option. Scale refers how much the final image resolution is increased.
- Standard Image Integration: When combining multiple images without drizzle integration, each pixel in the final image corresponds to a single pixel in the original images.
- Scale in Drizzle Integration: Drizzle Integration takes advantage of the slight shifts between the multiple exposures (dithering) to extract more information. The “scale” setting controls how much this information is used to increase the resolution. A scale of 2 (most common) doubles the pixels, which also doubles the image size and file size.
- Enable Pixel Rejection: Enabled. Just like in Image Integration, pixel rejection in Drizzle Integration will remove outlier pixels from the image.
- Enable Image Weighting: Enable. Just like in Image Integration, Image Weighting influences how much each frame contributes to the final integrated image
- Enable Surface Splines: Enable. Uses a more flexible algorithm to estimate pixel values between existing data points from the original images. Often creates a smoother image.
- Enable Local Distortion: Enable. By correcting local distortions, which might become more visible after Drizzle Integration, the final image will have a more geometrically accurate representation of the object. This can often lead to sharper stars.
- Enable Local Normalization: Enable. Uses the data generated by the local normalization process to help create a smooth background by reducing small gradients. The local normalization files must be added to the input files for this to work.
Additional, more advanced setting, are as follows. It is rare to modify these
- Drop Shrink: Determines how much the size of each pixel is shrunk before being used in the reconstruction. Without drop shrink, the data points from the original images might overlap in the final, higher-resolution image. This “overlap” can lead to inaccurate results and artifacts. Shrinking the data points helps prevent this overlap.
- A value of 0.9 is a common starting point, providing a balance between preventing oversampling and maintaining some sharpening benefit.
- Values lower than 0.9 can further reduce oversampling but might also introduce artifacts or reduce the effectiveness of drizzle integration.
- Kernel: Defines the algorithm that determines how information from the original images is used to create the final, higher-resolution image. The default often provides a good result.
- Squares (Default): Require less processing power compared to circular kernels. This makes them a good choice for large datasets. Squares treat all directions in the image equally, avoiding unintentional bias towards certain features. Square kernels can cause a slight bloating effect, especially around stars, where the square shape doesn’t match the round point spread function (PSF)
- Circular: Circles are a more natural fit for the round PSF. This can lead to sharper stars and a more accurate representation of point sources in the final image. A circular kernel requires more processing time and can potentially introduce ringing due to the way it handles edges of a circle.
Tips: Drizzle Integration
- Mure Denoise: If drizzle integration is used, the Mure Denoise process cannot be applied. However, there are other ways to handle noise reduction. An analysis between Mure Denoise or Drizzle Integration with Noise Reduction, whether or not to do Drizzle Integration will often be based on the quality and noise level baseline image.
- Input Data: To apply Drizzle Integration effectively, a large sample size is required. Due to the way Drizzle Integration works, at least 30 light subframe should be included, but having more will yield better results.
What’s Next
With Drizzle Integration completed, the pre-processing phase of the image processing workflow is complete!!! The next step is to start linear processing by using on of the following guides.
