To merge mosaic panels together, the stars must align. Navigating the complexities of mosaic alignment can seem daunting at first glance but the PixInsight Star Alignment process helps.
Even though stars are reliable guide points, aligning them in mosaics can present some challenges:
- Distortion: Different optical systems can introduce distortions towards the edges of the frame. Star Alignment might struggle if these distortions are significant.
- Partial Overlap: Ideally, mosaic panels should have a good amount of overlap between them (20% is often a safe guide). This overlap provides more star reference points for Star Alignment to work with. However, if the overlap is minimal, the software might have difficulty finding enough matching stars, leading to alignment issues.
- Faint Stars: Mosaics often target areas with faint stars, especially when capturing deep-sky objects. Star Alignment might struggle to detect and match these faint points of light, impacting the overall accuracy.
PixInsight Star Alignment contains numerous options to help overcome these challenges. So if at first you don’t succeed, try and try again.
Unsure of the mosaic processing order? Use the Mosaic Workflow for Astrophotos
Star Alignment
Before launching the Star Alignment process (Process – Image Registration – Star Alignment), have the following loaded:
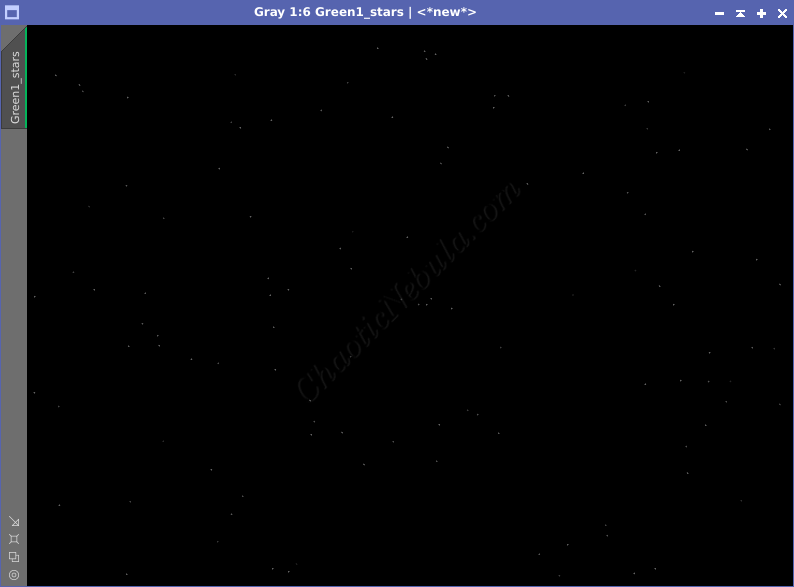
- Simulated Star Field: This image is crated with the PixInsight Catalog Star Generator script.
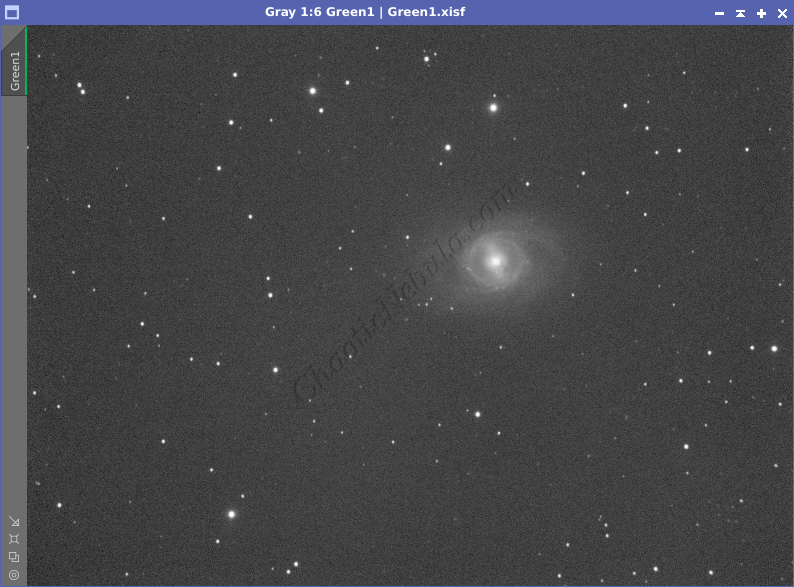
- Mosaic Panel: The process only works with views and not files. The mosaic panels must be loaded within PixInsight.
To run star alignment, we need to have our individual mosaic panels loaded. They should be cropped to remove the dark edges and have the background gradients removed.
To use the Star Alignment process for mosaics, the basic functionality requires some modifications:
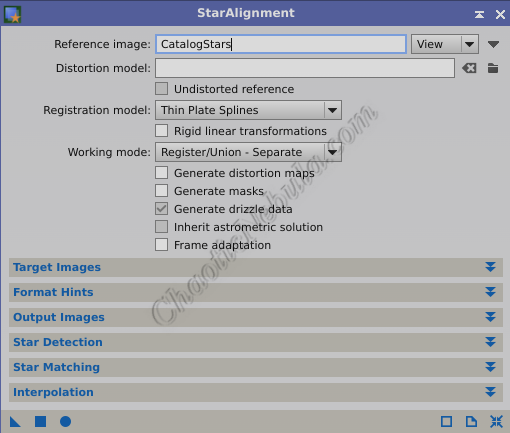
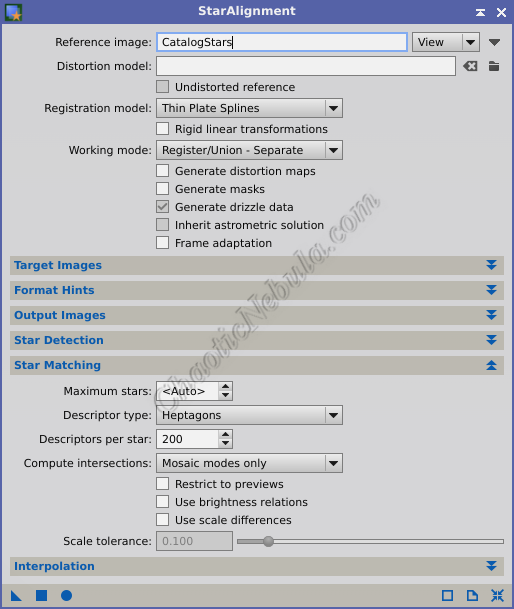
- Reference Image: This is the generated star field image create with the PixInsight Catalog Star Generator script.
- Registration Model: Projective Transformation and Thin Plate Splines are the two most used registration models within PixInsight. For mosaic creation, use thin plate splines.
- Projective Transformation: Corrects for basic misalignments like rotation, scaling, and skew. This registration model expects a significant portion of the image to be part of each image. This is the most common registration model for single frame images (non-mosaic)
- Thin Plate Splines: More flexible model that can handle various distortions, including those caused by coma, astigmatism, and field curvature. This works well when subframes have a minimal overlap. This is appropriate for mosaic images.
- Working Mode: Register/Union – Separate. This mode takes each individual mosaic panel (target) and aligns it with a reference image (star catalog). The output is a new, independent image for each mosaic panel that has the following characteristics:
- Has the same size as the reference image (usually the final mosaic canvas size).
- The stars from the target panel are positioned accurately within the reference image canvas.
- The background of the target panel is replaced with a black background
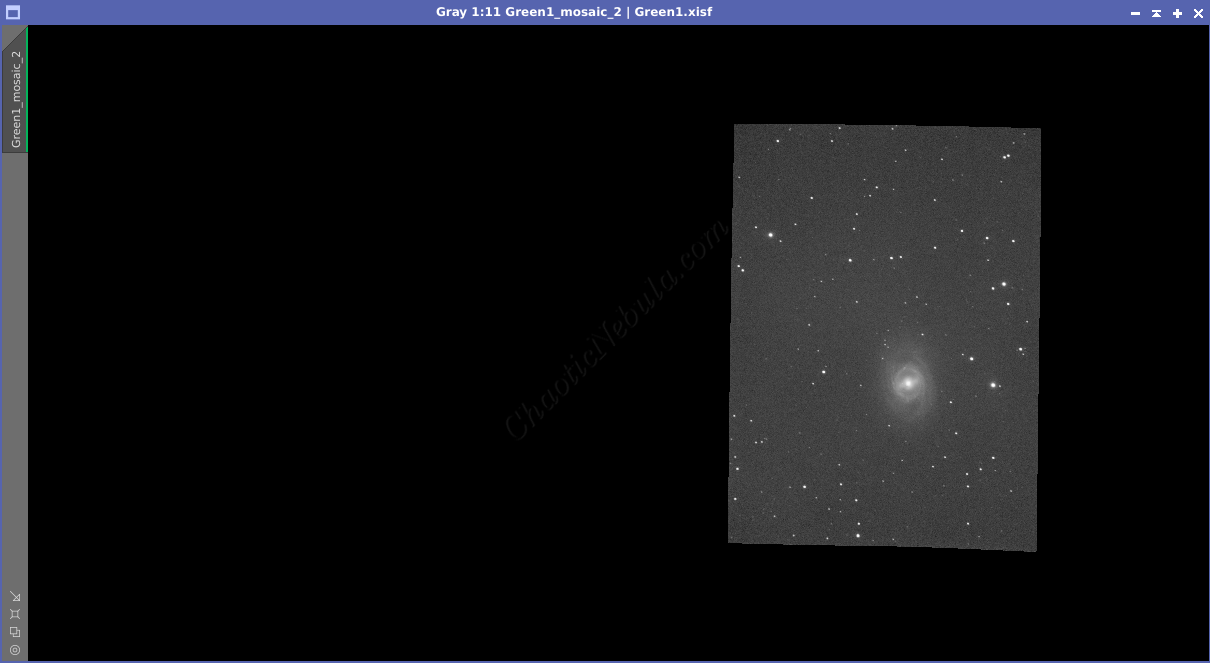
Apply this process to the target image (mosaic panel) by dragging the triangle icon to the image. This process takes time, but when complete, you will have two images. One includes the mosaic frame properly placed in a canvas (save this file) and the second is a new star catalog image (delete this file).
Troubleshooting: Issues with Star Detection
To troubleshoot the reason for the failed alignment, you need to look at the output from the process console to first determine if there are issues with star detection.
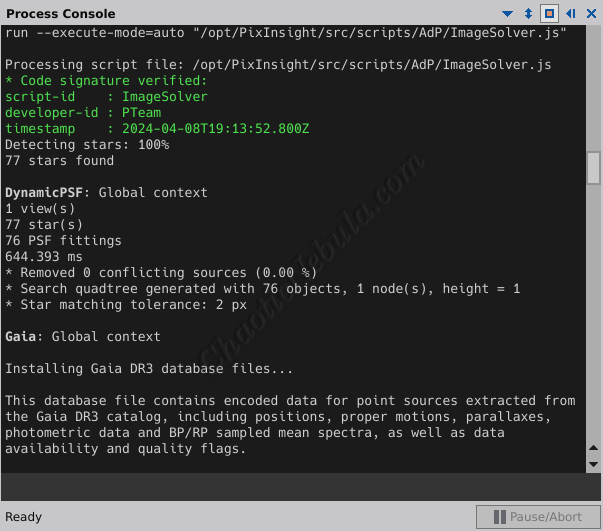
One of the first tasks the script performs is to detect stars in the star catalog and the mosaic panel. How many stars were detected in the mosaic panel? Does the number seem right based on the image? Or does the number seem too high or too low? For these difficult images, the Star Alignment Parameters will require adjustments.
There are a lot of settings you can adjust to try and improve the star detection algorithm. A good place to start is to determine what stars the process currently detects. By changing the Working Mode: Detected Stars, a new image gets created containing points for the stars currently detected in the target mosaic panel. Note: It is a good idea to invert the detected stars to make them easier to see.
This will hopefully make it easier try and understand the root cause of the issue. Use the following as a guide to for what parameters to focus your attention on:
- Is the image noisy? Focus on the Noise Reduction and Peak Response settings.
- Are most of the stars dim? Focus on the Detection Scales, Sensitivity settings, and Peak Response settings.
- Are most of the stars very large? Focus on the Detection Scales setting
- Are most of the stars small? Focus on the Detection Scales setting
- Are the stars distorted (not circular)? Focus on the Maximum Distortion setting.
- Are too many stars being detected? Focus on the Sensitivity and Hot Pixel Removal settings
You now need to understand how each of these parameters work, so you can modify them correctly.
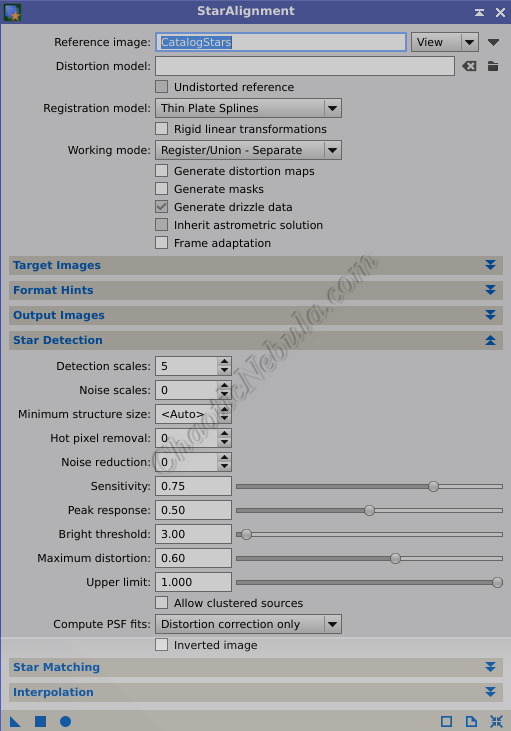
- Detection Scales: Determines the size of the stars that the script should search for. Increase the scale to find larger stars, which might overlook smaller stars. If you decrease the scale, the script will focus on the smaller, dimmer stars. If the image contains mostly big, bright stars (common in open clusters), increase the scale. For images containing many dim stars, lower the threshold.
- Hot Pixel Removal: If the camera is generating a lot of hot pixels, the script could consider these as stars, which will not match with the reference catalog. A hot pixel consistently outputs a higher value, appearing as a bright speck in the image. The Star Alignment process can remove ignore detected hot pixels from the star detection process by modifying the Hot Pixel Removal option. Setting this value to “1” looks for hot pixels that are 1 pixel in size, which is typical. A better option is to use Cosmetic Correction to handle hot pixels before solving.
- Noise Reduction: If the image is noisy, false stars could be detected while true stars (faint and small) are missed. The Noise Reduction parameters applies a temporary noise reduction to the image. Increase the value to apply a greater noise reduction filter on the image. However, this will reduce the star position accuracy. Unless the image is extremely noisy, this parameter can often be left at 0 (disabled).
- Sensitivity: Adjustments to the sensitivity slider below .50 will limit the script to focus on brighter stars, helping to reduce the number of detected stars. Adjusting above .50 will allow the script to focus on fainter stars, helping to increase the number of detected stars. This is useful when the image only has a few bright stars and many faint stars.
- Peak Response: Determines how bright a pixel needs to be for it to be considered part of a star. A higher value is more selective, only focusing on brighter pixels as potential stars. This is useful for noisy images. However, increasing this parameter will often miss fainter stars within the image. If the image is dim or contains many faint stars with low noise, lower the value.
- Bright Threshold: This parameter is a rejection threshold. It excludes pixels that are completely saturated in the image. This is useful if there is a bright foreground object (like an airplane or satellite). Unless the image is overexposed or contains bright foreground objects, this parameter can often be left at the default value.
- Maximum Distortion: Most stars will not be perfectly round. The maximum distortion parameter allows you to set how far from a circle a star can be for it to be considered a star. A perfect circle has a value of 0.8 and the default value is 0.6, which shouldn’t require modifications.
Troubleshooting: Issues with Star Matching
If the Star Alignment process appears to be detecting the right number of stars, the next area of focus is to investigate the Star Matching parameters.
- Distortion Model: Stars on the edges of the panels are often distorted and warped, causing challenges for the star alignment process. If a distortion model was created during with the PixInsight Image Solver script, select the file.
- Undistorted Reference: If a distortion model is provided, select this option because the reference image (generated star field) is not distorted.
- Maximum Stars: Simply determines how many stars to use for matching. More stars takes more time to process. Leaving the default of “Auto” is often the best case as the process will determine the optimal number of stars.
- Descriptor Type: Defines the way the process characterizes stars for the purpose of finding matches between the reference image and target panels (individual mosaic images). By using a more detailed descriptor, Star Alignment can achieve more accurate matching, especially when dealing with challenging scenarios like distortion or faint stars. Descriptors are defined by geometric shape. The more sides of the shape equates to more information about a star, which is helpful when working with distorted stars. More complex geometric shapes requires more processing time, but can help identify more matches.
- Descriptors per Star: Defines the number of data points used to describe a star.
- Computer Intersections: This setting optimizes the star matching for mosaics. Normally, Star Alignment would search for matching stars across the entire reference image and each target panel (individual mosaic image). This can take a lot of time and CPU power, especially for large images with many stars. This function pre-computes the intersection area between the reference image and the target panel. Essentially creating a smaller zone where Star Alignment will focus its search for matching stars
- Restrict to Previews: Enabling this option, the star matching will be limited to the preview window created on the target image. This can help reduce the scope of the matching to the best part of the image that is defined by the preview.
- Scale Tolerance: Determines how the process handles variations in star sizes during the alignment process. This parameter allows Star Alignment to consider stars within a certain range of sizes around the expected size for a match. This flexibility helps account for slight variations in star size due to imperfect optics. If Star Alignment struggles to find enough matches, consider increasing the scale tolerance cautiously to allow for more flexibility in size matching. However, be mindful of potentially including outliers with significantly different sizes.
Troubleshooting: Miscellaneous
If the star alignment process continues to fail after working through the star detection and star matching adjustments, other suggestions include:
- Restart: Close PixInsight and restart. Sometimes, there is a setting or something stored in cache that is causing the star alignment process to fail. The best course of action is to simply close PixInsight and restart it.
Tips
The star alignment process for mosaics can take a lot of time to complete, especially when it must be completed for each panel. To make the process smoother, try the following:
- If star detection and star matching doesn’t work on the first try, use Integer Resample (Process – Geometry – Integer Resample) to reduce the size of the reference image (star catalog) and mosaic panel. Reducing these by 2x or 4x will allow the alignment process to finish extremely fast. Once the right detection and matching parameters are discovered, undo the Integer Resample and apply star alignment to the full resolution image.
- Use an Image Container: If the same Star Alignment settings are applicable for all frames, create an image container (Process – Image Container) and add all target views. To star the process, drag the star alignment process triangle onto the image container.
What’s Next
Please refer back to the mosaic workflow for more information on the overall mosaic creation process.
When working through the creation of mosaic images, the next step is often align brightness intensities between the mosaic panels. However, the standard linear fit process does not work. Instead, a 3rd party add-on works much better. It is called DNA Linear Fit.