The sun, a fiery ball of plasma dominating our sky, inspires awe and beckons photographers to capture its brilliance. But unlike snapping a landscape at sunset, solar photography demands meticulous attention to camera settings. Without proper safety precautions, you risk frying your camera sensor; or worse, damaging your eyesight.
Before continuing, make sure you read the following guides
Remember: NEVER point your camera directly at the sun without a certified solar filter! These specialized filters block harmful radiation, allowing safe viewing and photography. Before continuing, make sure you understand the dangers of photographing the sun.
Shooting Mode
Cameras have many modes like portrait, landscape, night, fireworks, sports, etc. I’ve not seen solar. Because this is such a unique project, you want to do manual mode. You want to have full control of the settings.
What about Lucky Imaging?
Lucky imaging, also known as lucky exposures, is a technique used in astrophotography to capture sharper images of celestial objects by overcoming the blurring effects of Earth’s atmosphere. It’s particularly useful for observing small objects like planets, the Moon, and even some deep-sky objects.
Here’s how it works:
- Capture many short exposures: Instead of taking one long exposure, lucky imaging captures hundreds or even thousands of very short exposures (typically milliseconds long). This freezes the atmospheric turbulence that distorts the light from the object.
- Select the best frames: Not all the short exposures will be equally good. Some will be captured during moments of better atmospheric seeing, resulting in sharper images. Lucky imaging software analyzes all the frames and identifies the sharpest ones, typically around 10-20% of the total.
- Align and stack the best frames: The selected sharp frames are then aligned and stacked (added together) to create a final image with much higher resolution and detail than would be possible with a single long exposure.
So why not use Lucky Imaging for solar photography? Well, you can if you are using an astrophotography camera. They often create video files in the .SER format. This format is lossless, meaning that it doesn’t compress the frames at the expense of losing data.
Most likely, your DSLR will capture video in .MOV, .MP4, or some other format. These formats are lossless. They will discard data to save storage space. With DSLR, you are better off capturing still frames and not doing lucky imaging via video.
ISO
Keep your ISO as low as possible, ideally at its base value, to minimize noise and preserve image clarity. The sun’s inherent brightness allows you to achieve optimal exposure without boosting ISO, which can degrade image quality. It is the brightest thing in the sky, so use 100 ISO.
Metering Modes
Don’t rely on your camera’s automatic metering when dealing with such intense brightness. Instead, switch to spot metering and target a specific area of the sun, like a sunspot, to ensure proper exposure. Remember, the sun is much brighter than its surroundings, so adjust your exposure compensation accordingly.
But if you are using manual exposure, why adjust the metering mode? Depending on your camera, it might tell you if your exposure setting is too high, so you can adjust before taking an image.
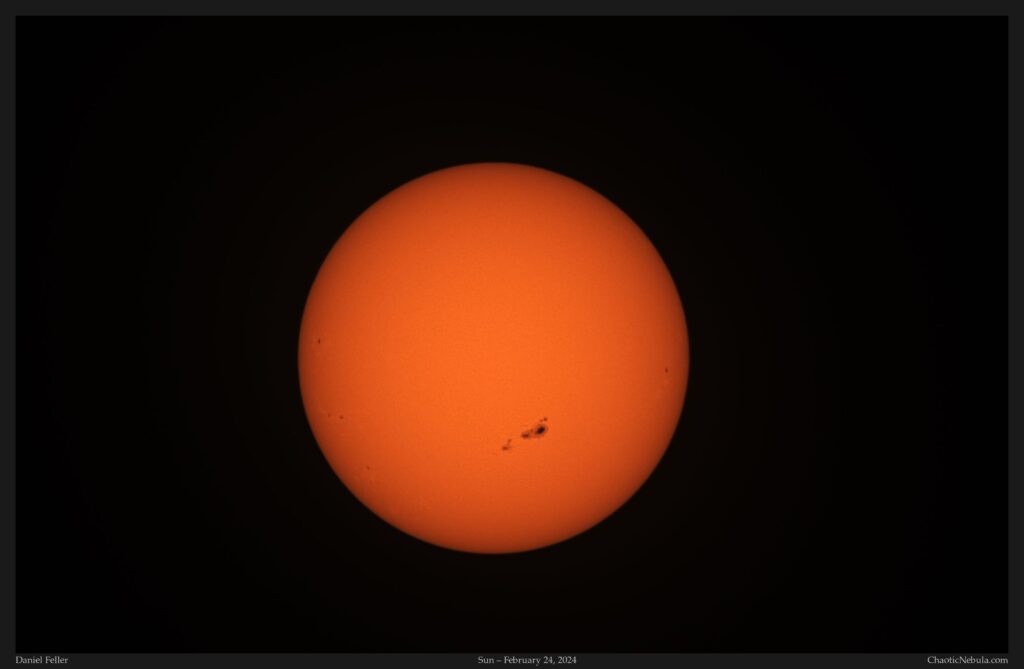
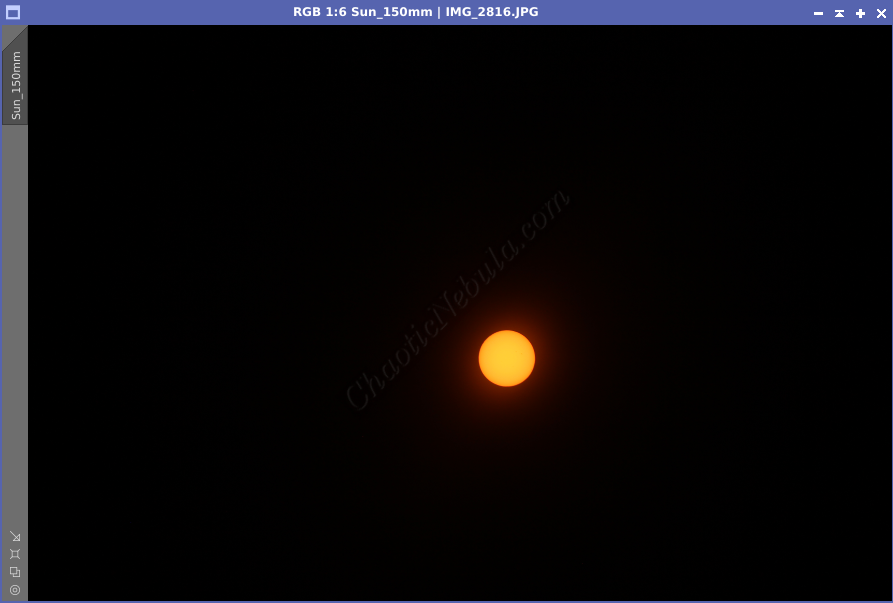
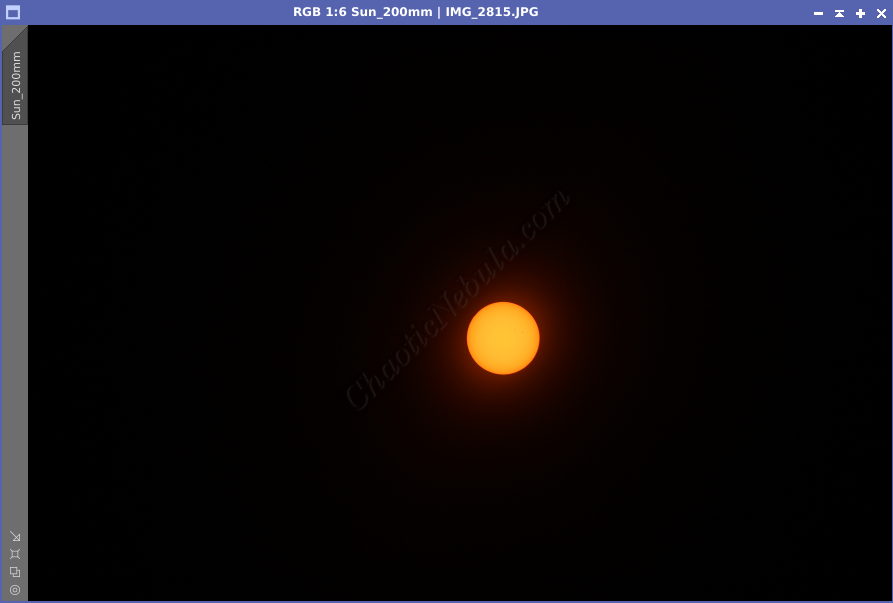
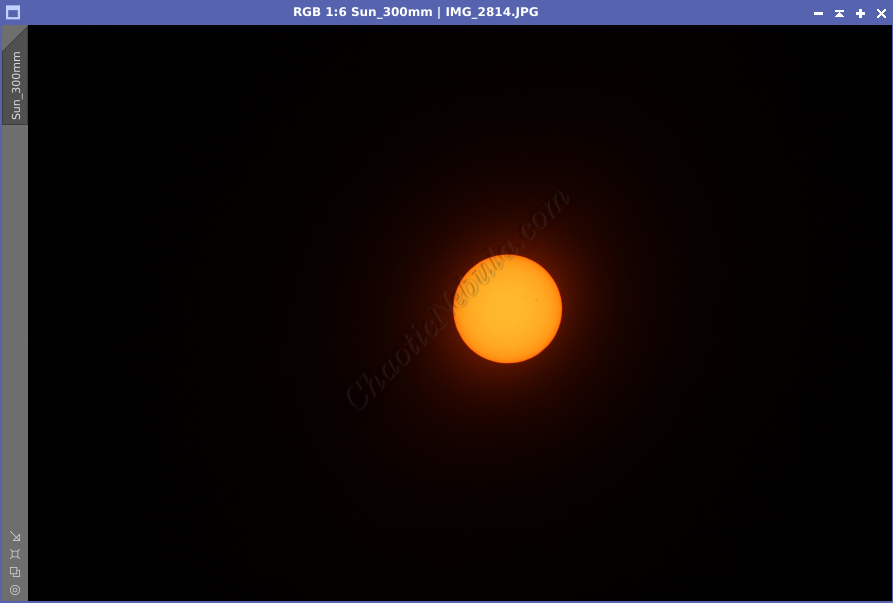
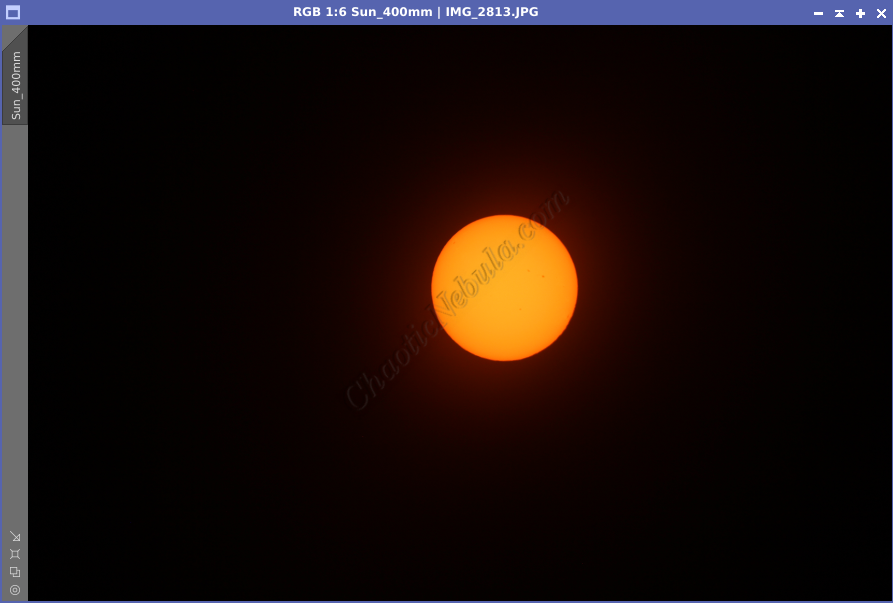
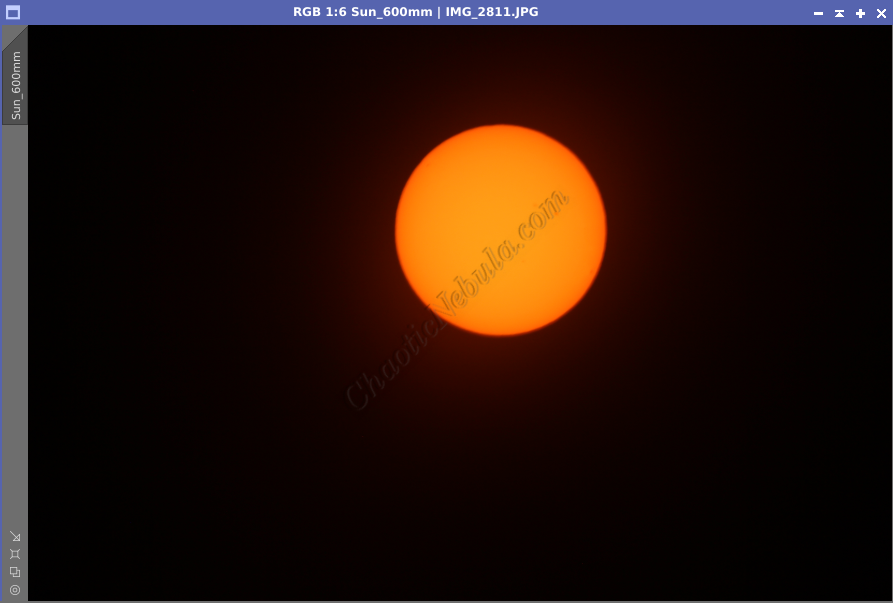
Focal Length
If you have the option, what focal length will you choose? It will be dependent on the type of sensor you have in your camera. For an APS-C sensor, the sun will look like the following at different focal lengths

But if you are using manual exposure, why adjust the metering mode? Depending on your camera, it might tell you if your exposure setting is too high, so you can adjust before taking an image.
Focusing
Making sure the sun is in focus is not easy because you can’t rely on the camera’s auto focus. And trying to do it manually is a challenge as sunspots are extremely small when compared to the sun.
So how do you make sure your image is in focus?
First, when using auto focus, move the focus box so that it covers the edge of the sun. This will try to provide the cleanest line separating the sun from space.
Once the camera has achieved focus, disable auto focus. You don’t want the camera to modify this rough setting.
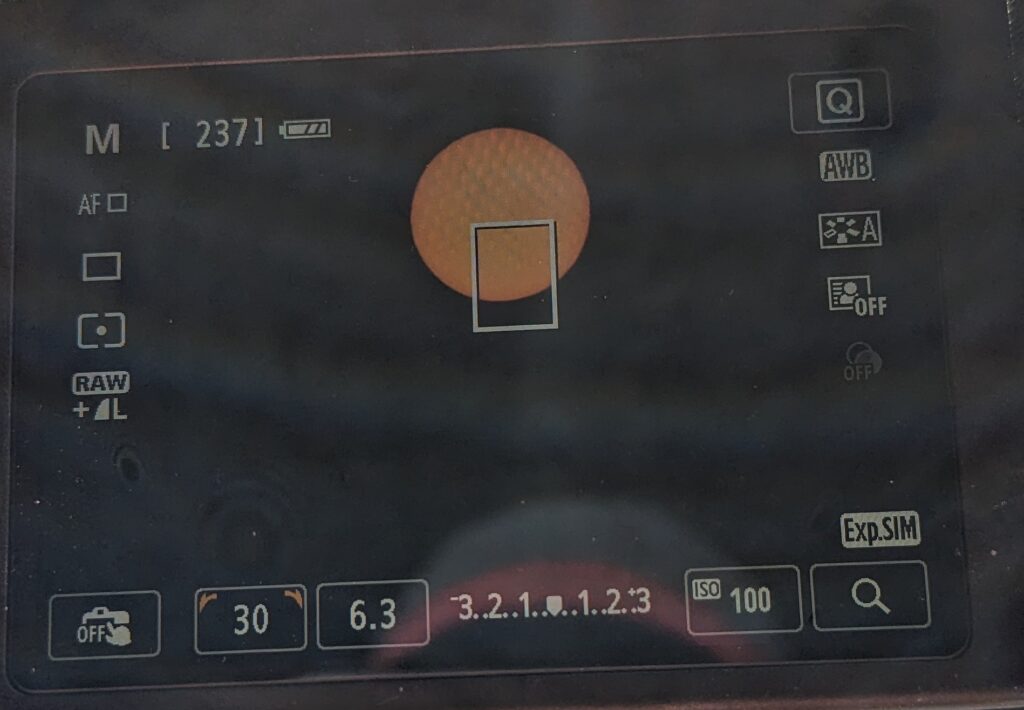
The second step for focus is to zoom in on a live view of the sun. Hopefully, there is a sunspot you can find. Adjust the manual focus knob slightly until you find the best focus point. Once you have this set, you won’t need to change this setting.
White Balance
Probably best to avoid automatic white balance (AWB) because photographing the sun is not your typical landscape photo.
Experiment with different white balance settings, like Daylight or Shade, to achieve the desired color accuracy. Once you figure out the best option, you can leave it be. You can further modify the white balance in post-processing for finer control.
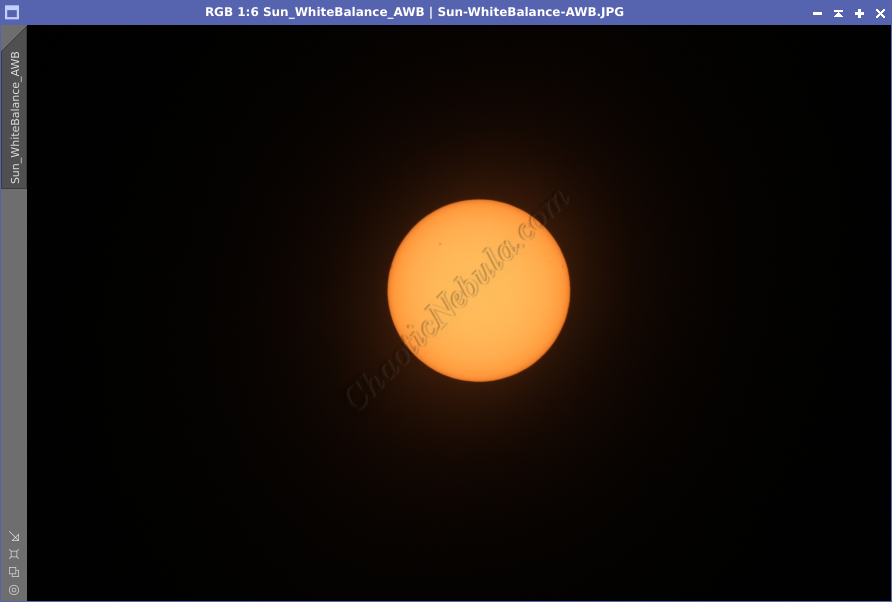
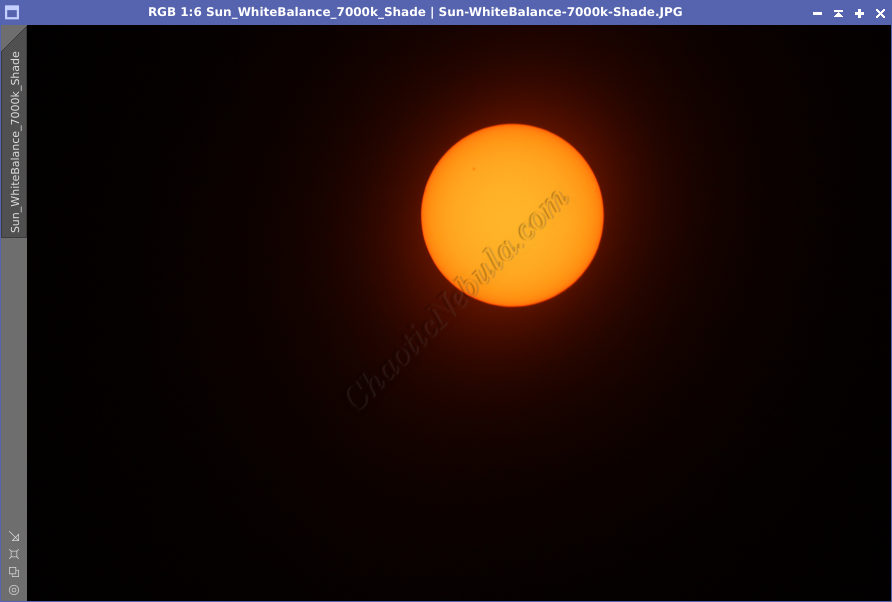
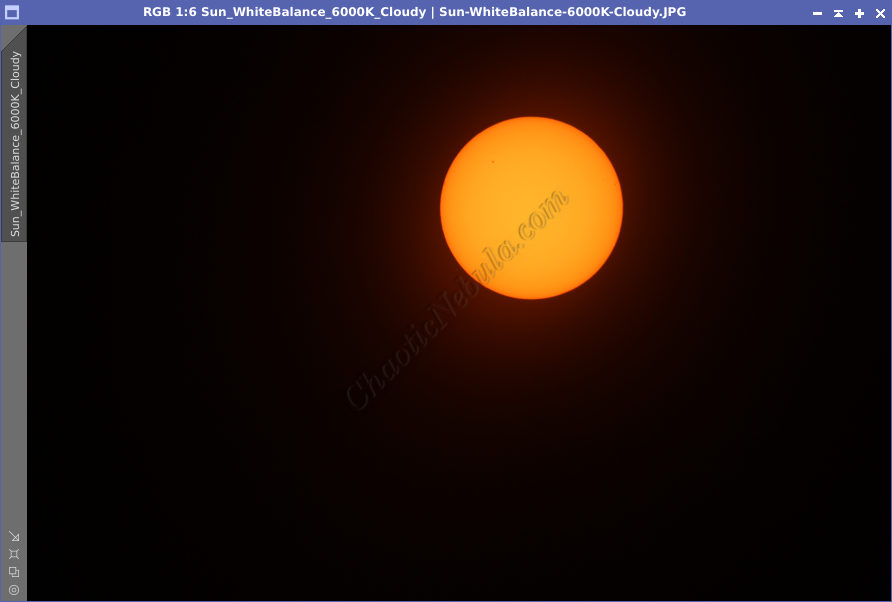
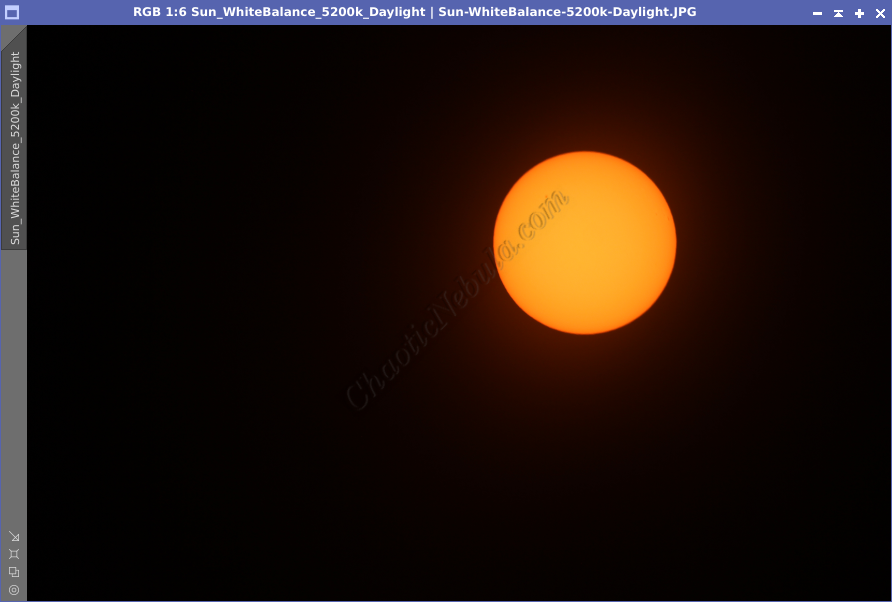
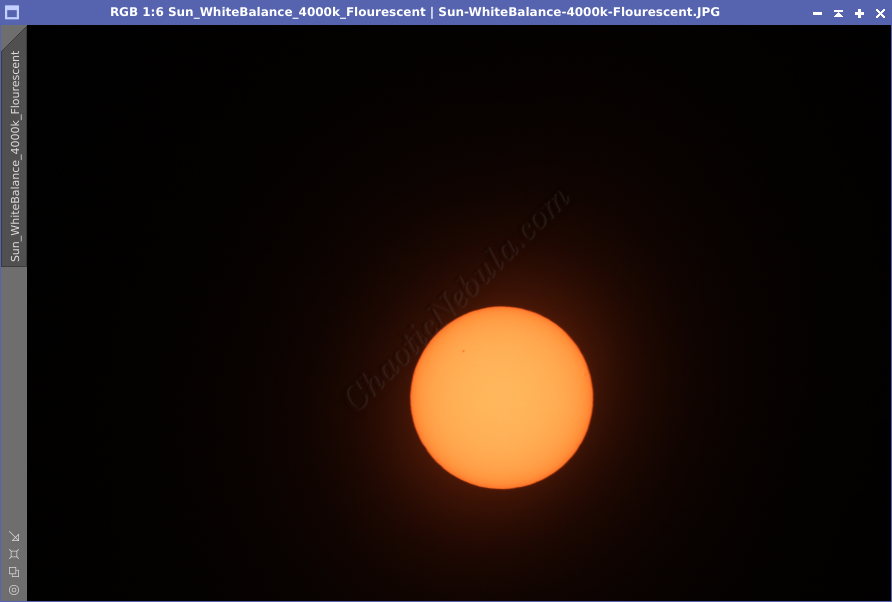
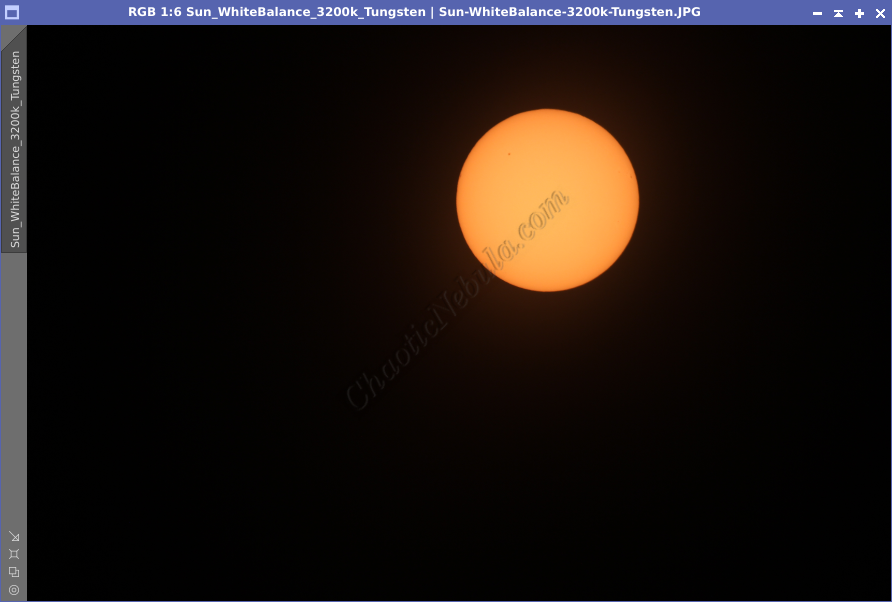
Overall, the white balance setting of cloudy or shade looks best.
Aperture
For most of us, we won’t have much control on the aperture. But if you do, higher equates to a sharper image. Lower number handles lower light situations. We are dealing with the sun. Plenty of light.
For solar photography, shoot for a mid-rand aperture, like f/8 to f/11 (if possible). This will provide a sharp image across the entire frame. But for most of us, we will be limited on what lens we are working with.
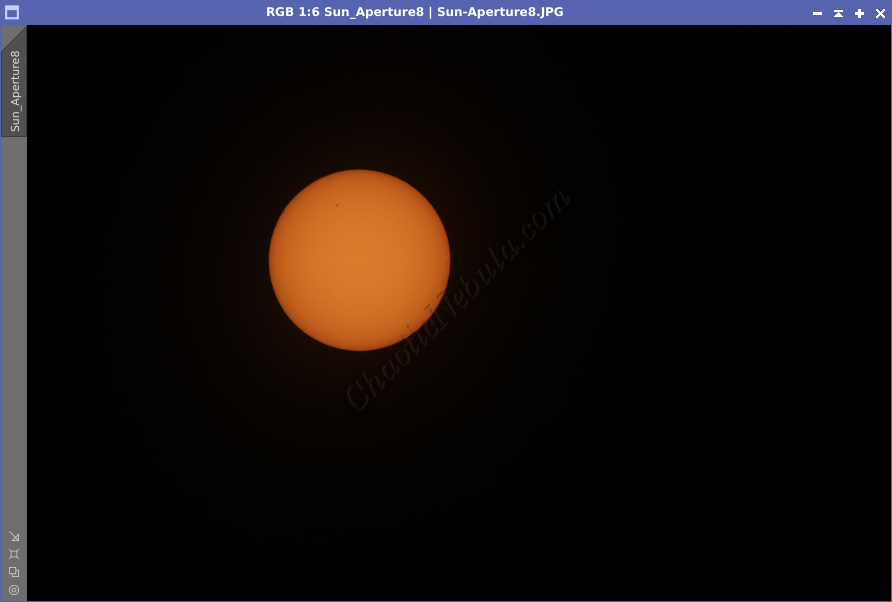
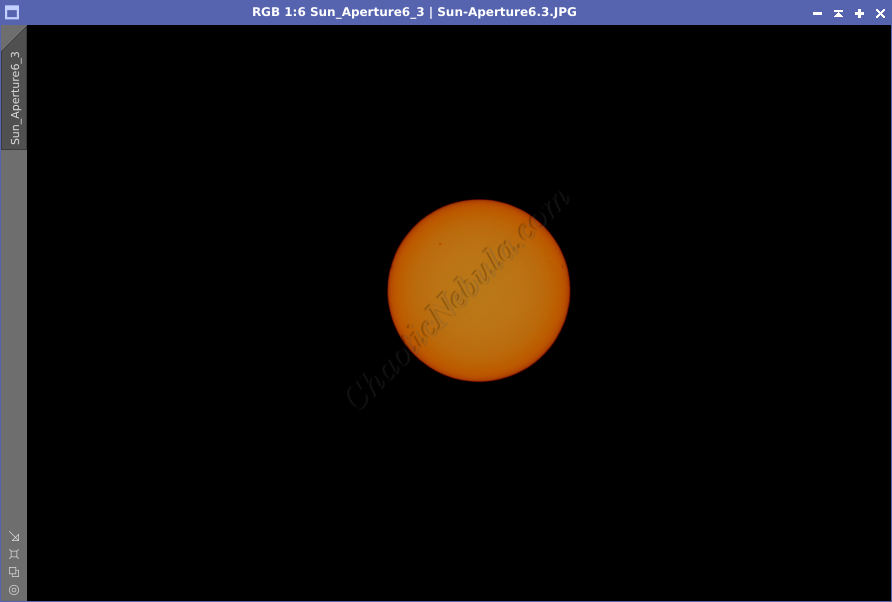
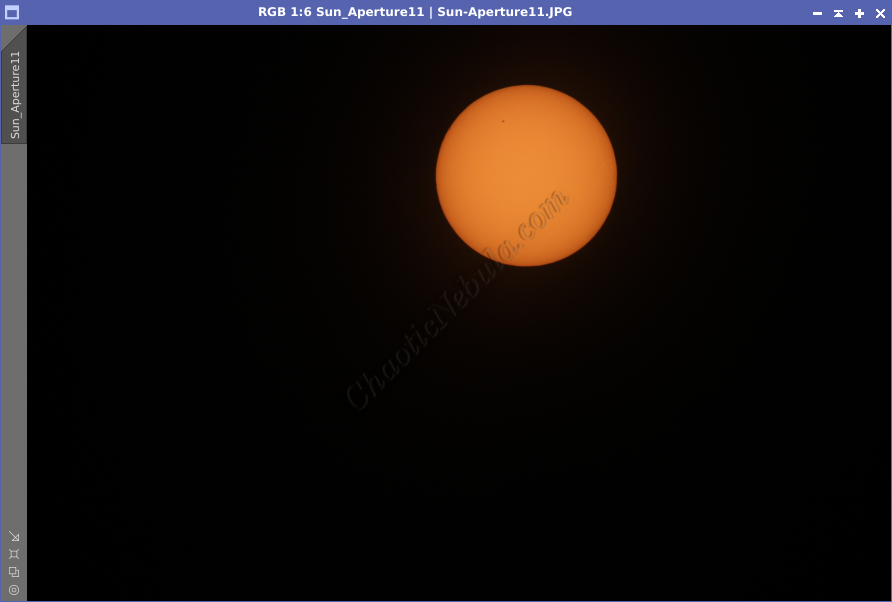
Comparing these aperture settings (shutter settings adjusted to achieve similar brightness levels), an aperture of F/8 appears slightly better than F/11.
Shutter Speed
Controlling the amount of light hitting your sensor is crucial. Determining the shutter speed should be done after you configured your white balance and aperture.
- Use live view on the camera and turn on the histogram. This will allow you to see the light levels across the red, green, and blue channels.
- Start with a fast shutter speed, like 1/30th of a second. Because of your solar filter, less light is hitting your sensor.
- Adjust the shutter speed until the red channel is near the peak (right edge), without going over. If you set the value too high, you risk clipping the bright signal.
- Capture multiple images (at least 5) to make sure you get one good shot.
- Bracket your exposures by increase and decreasing the shutter speed by 1. Take 5 more images for each shutter speed. This will allow you to have more options when reviewing later.
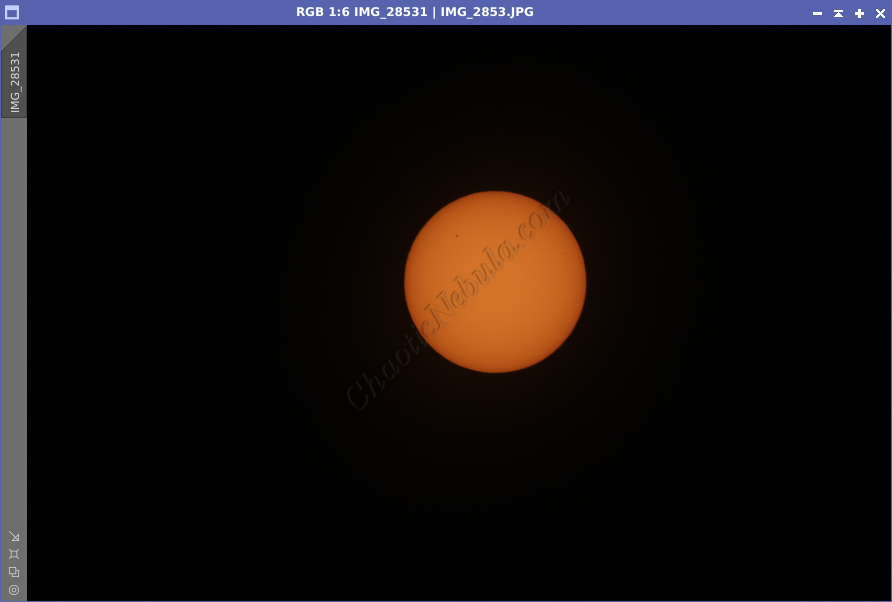
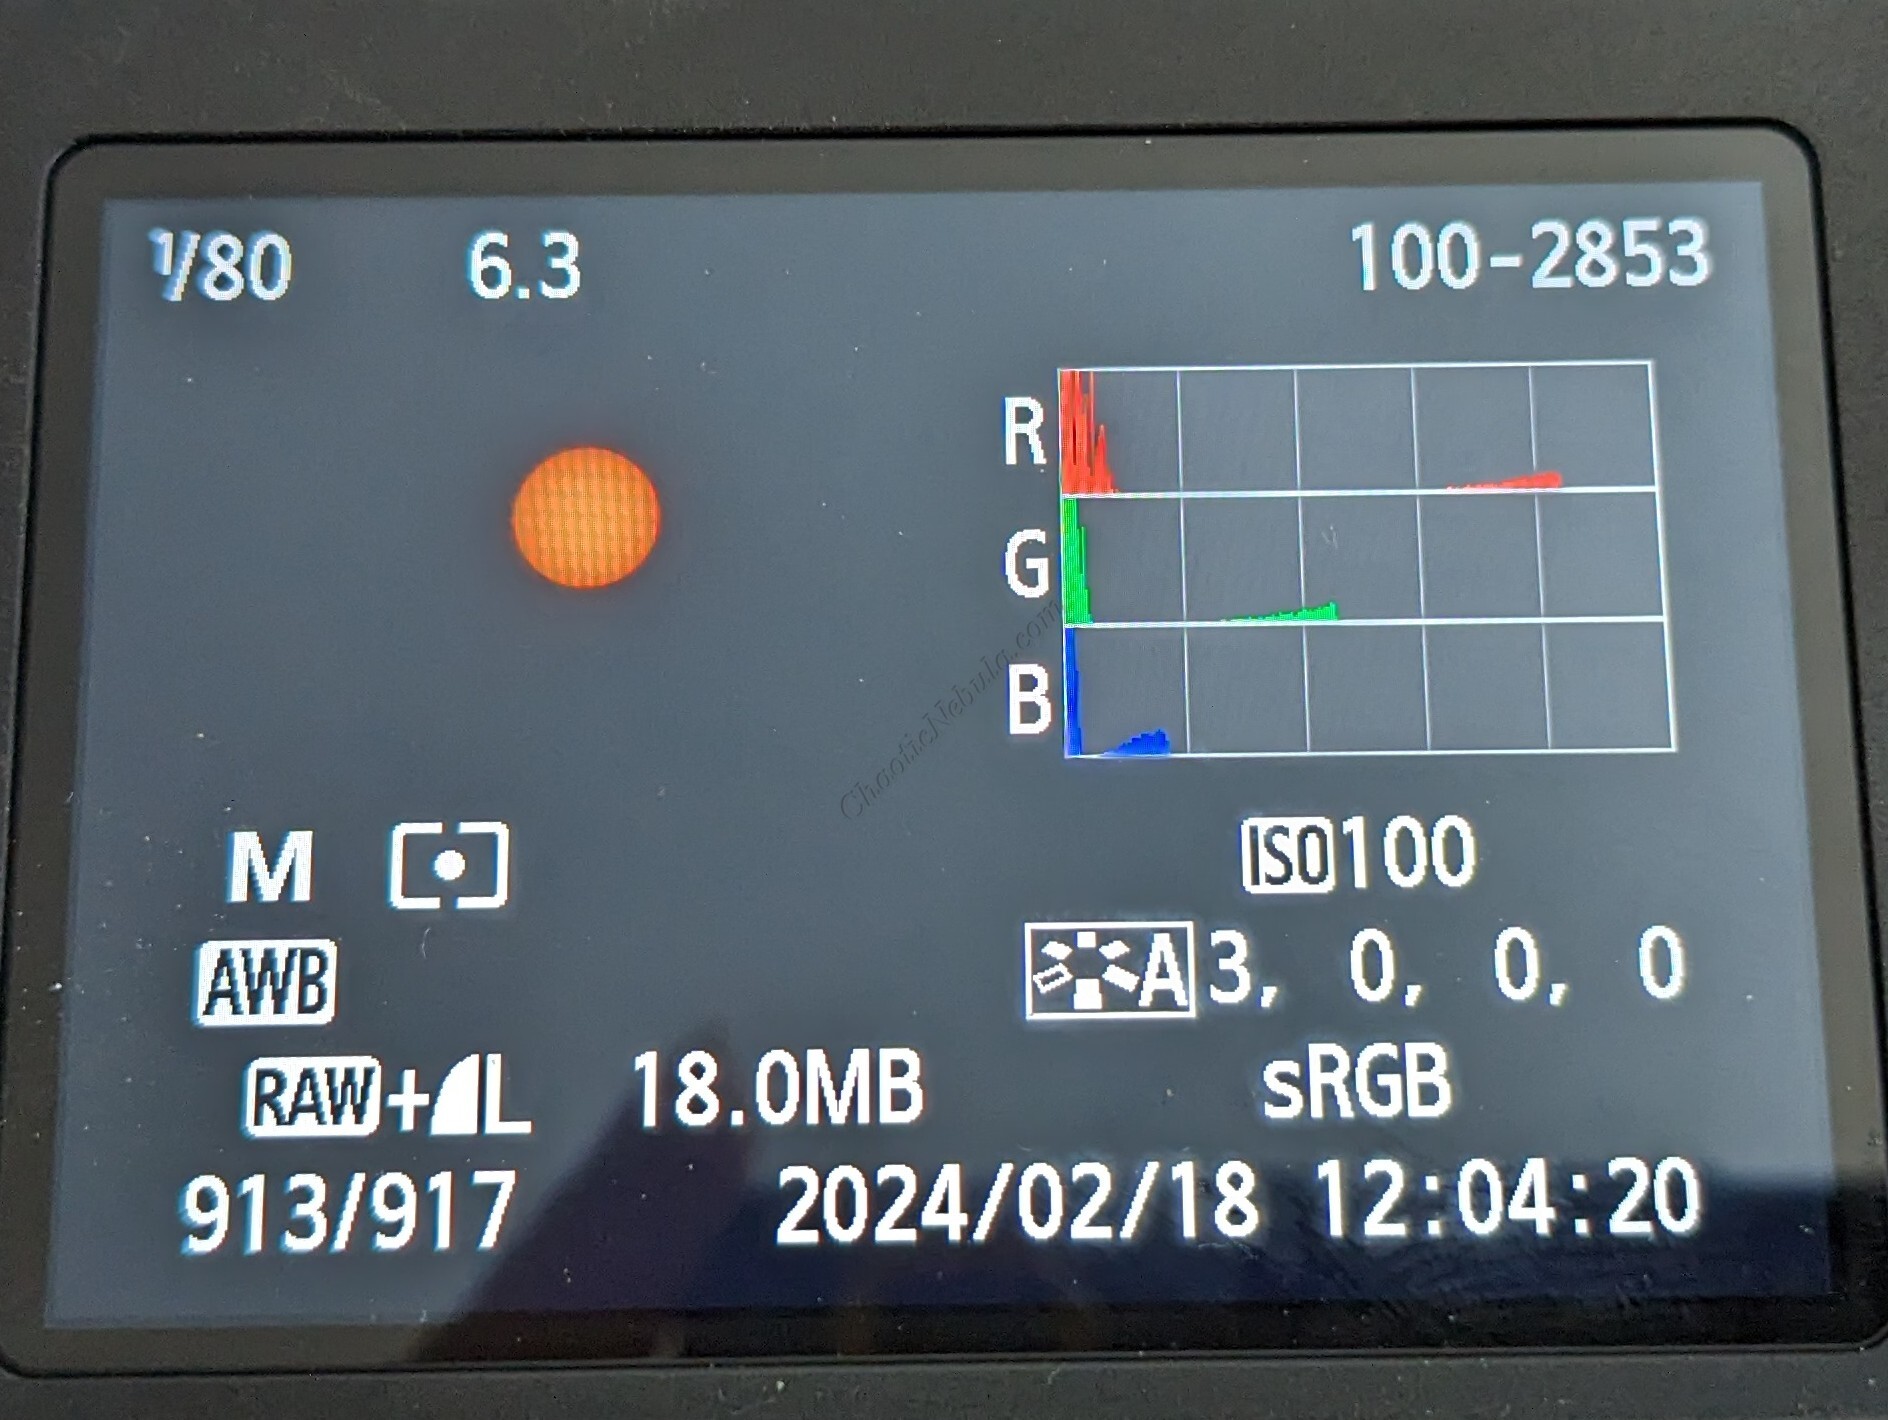
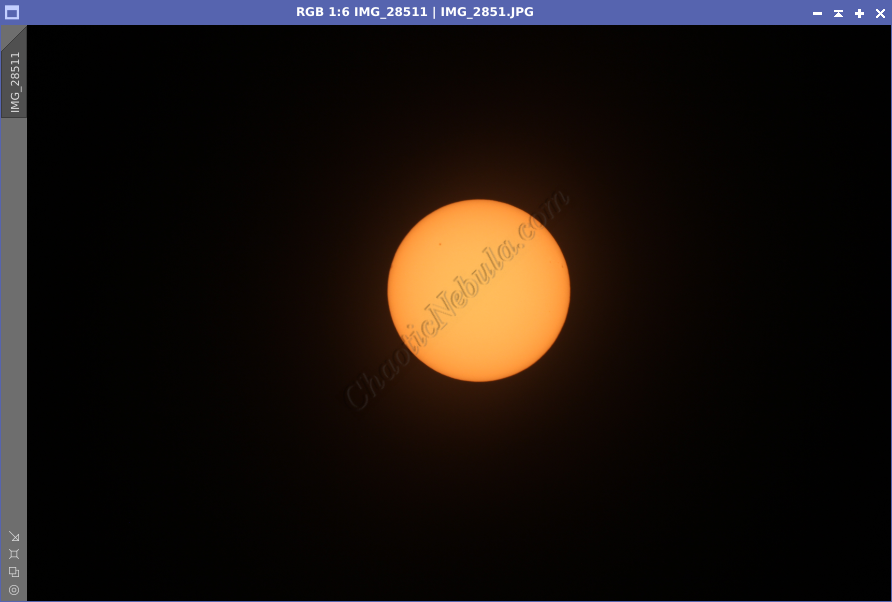
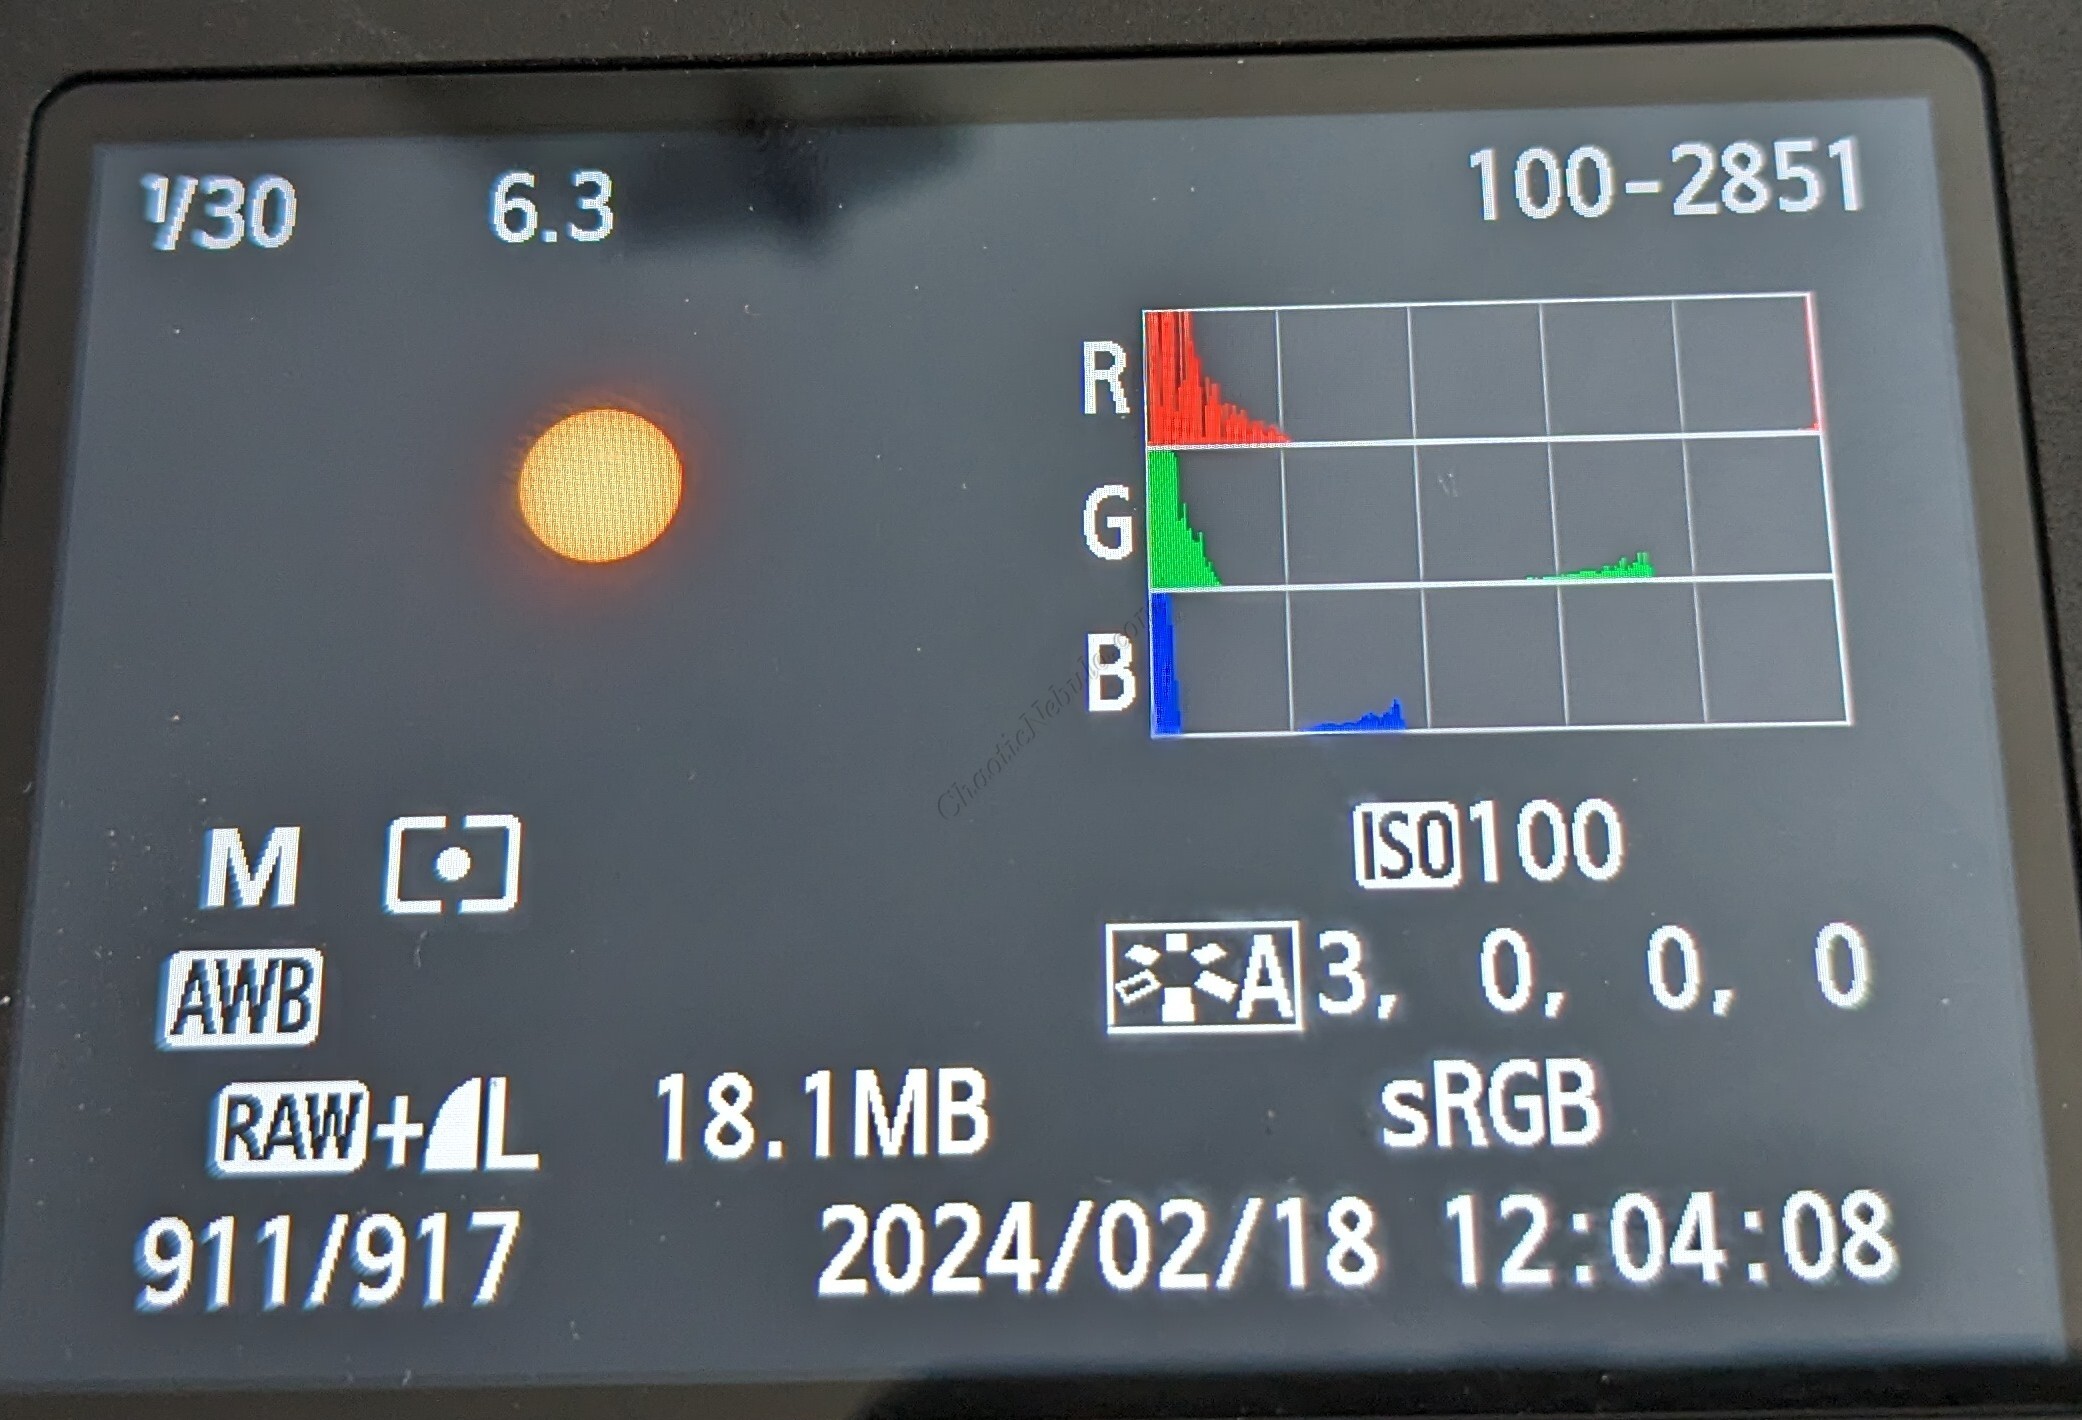

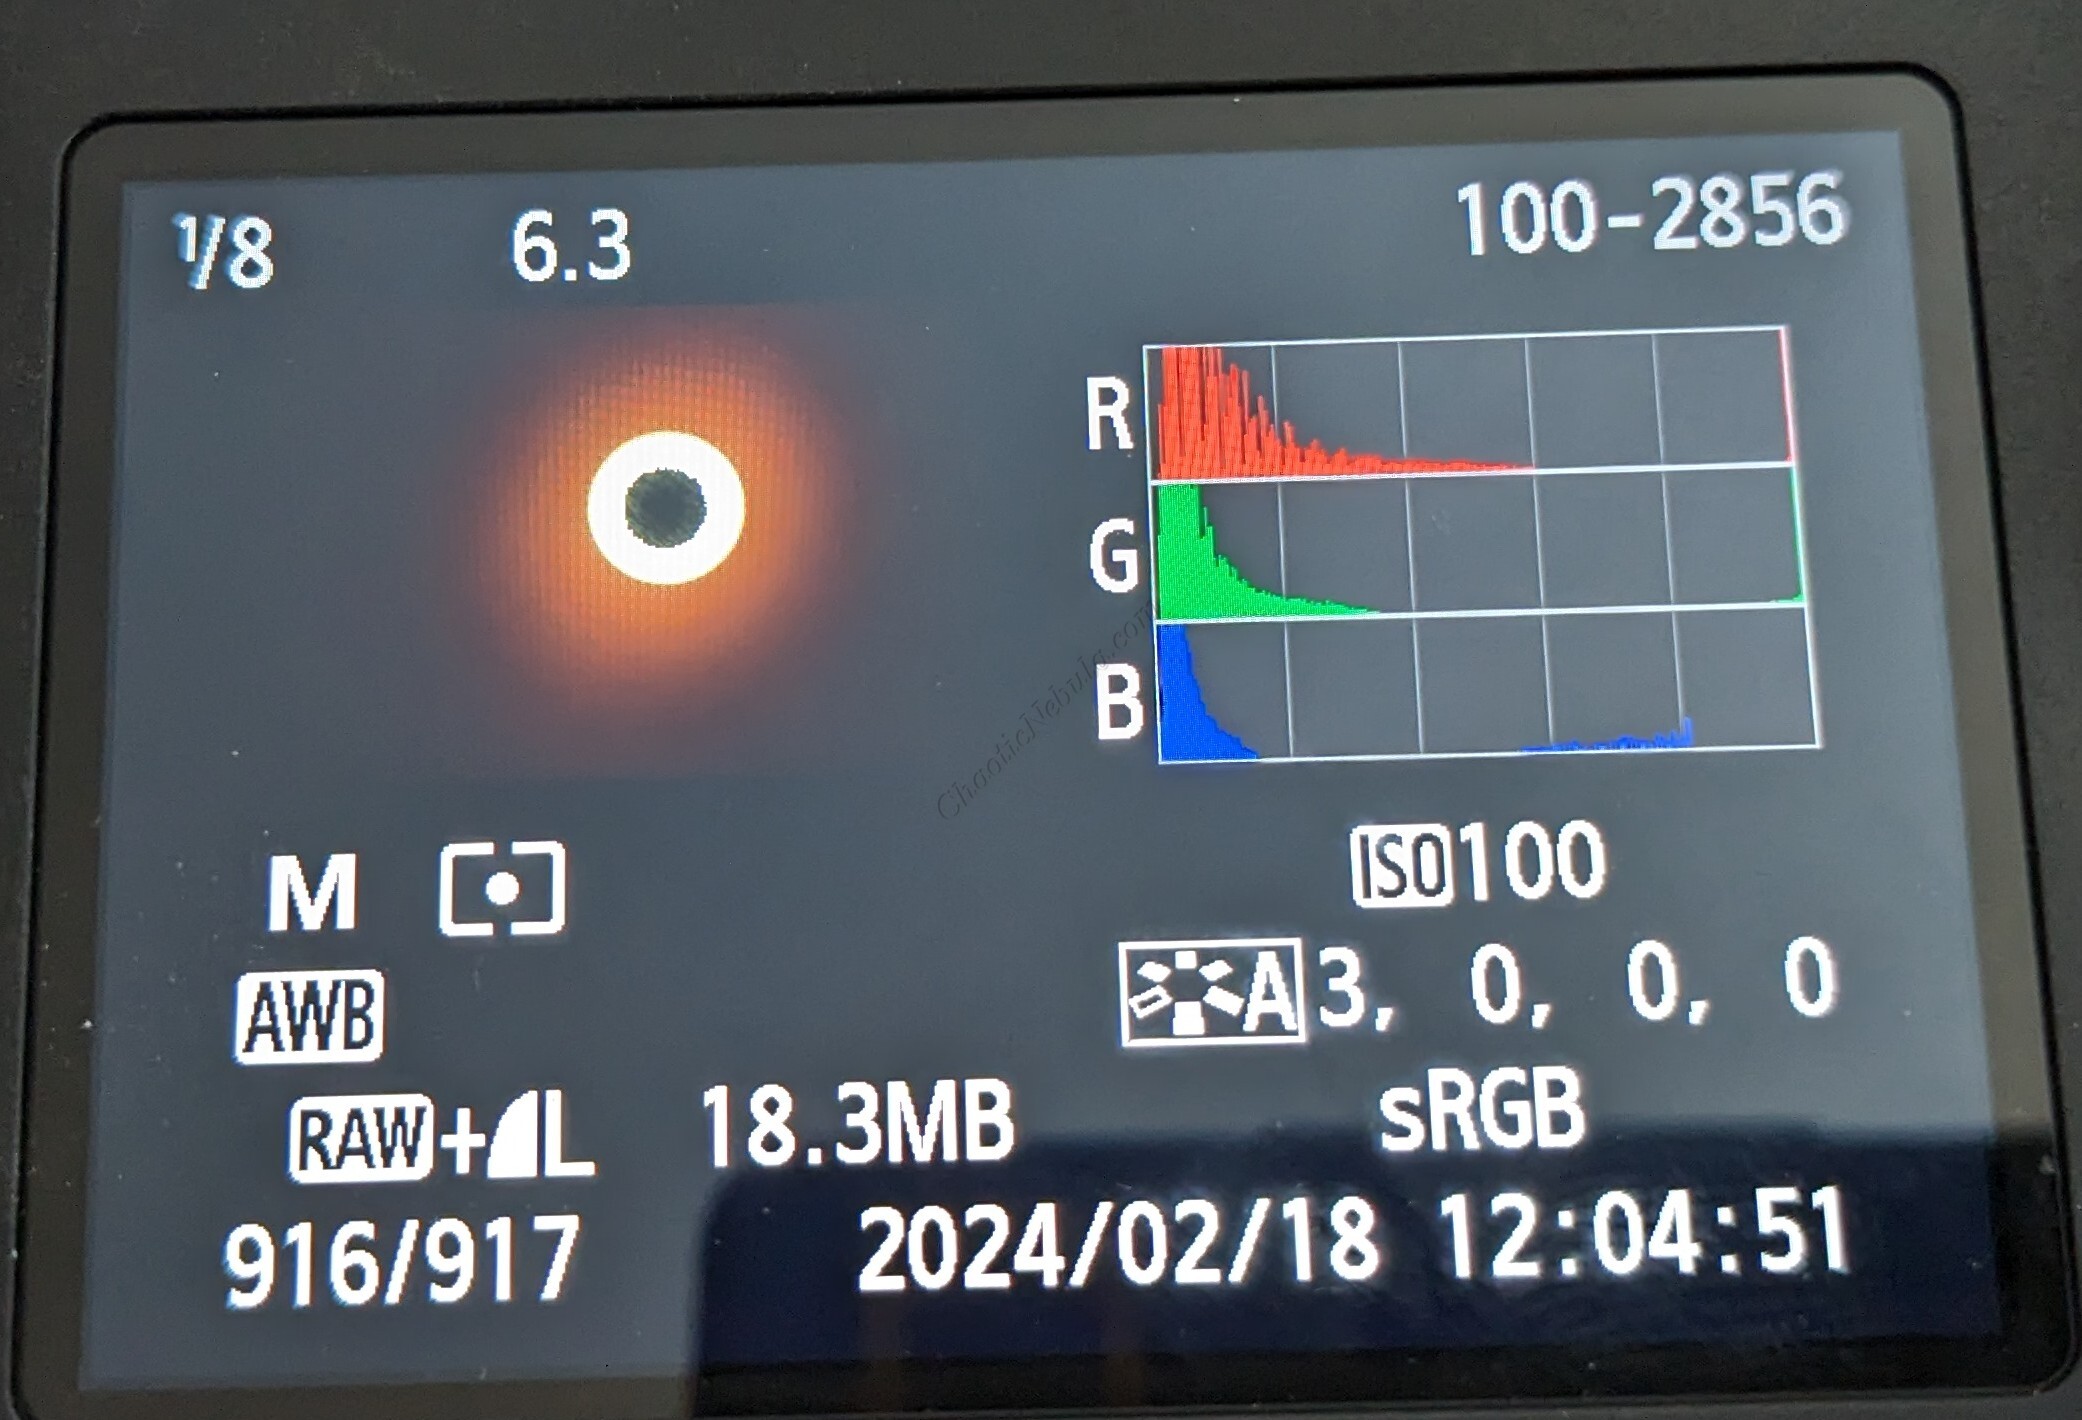
As you can easily see, 1/8th of a second is clipping the center of the sun (seen by the black highlight in the histogram). At 1/80th of a second, the histogram is away from the right side. At 1/30th, Red is right at the peak.
For the full sun, the following is a rough guideline
- Aperture F/6.3: 1/80th of a second exposure
- Aperture F/8: 1/50th of a second exposure
- Aperture F/11: 1/20th of a second exposure
Additional Settings
In addition, set the following options for your camera (if available)
- Mirror Lockup: When you take a picture, the mirror must move up and out of the way. This happens quickly and can cause vibrations. By enabling the mirror lockup feature, the mirror stays in the up position, removing this vibration.
- Image Quality: To get the greatest amount of data, verify you are using your camera’s RAW format. You can also record in the compressed format (.jpg) as well.
Finally
Remember, safety first! With the right camera settings, knowledge, and certified solar filters, you can embark on your solar photography journey, capturing the sun’s magnificence safely and responsibly.
Once you have the images, you can bring out greater detail by stacking the images together with AutoStakkert. This begins the image processing workflow for solar photography.