Long-exposure astrophotography, while necessary to capture faint celestial objects, introduces unwanted noise in images. This noise can manifest as random specks or brightening at the corners. This noise degrades the final image quality. This noise can be removed by using dark frames.
Dark frames are special images taken with the camera’s lens blocked (by the lens cap or telescope cover) to capture only the sensor’s internal noise. This noise arises from factors like heat buildup during long exposures and electronic processes within the camera.
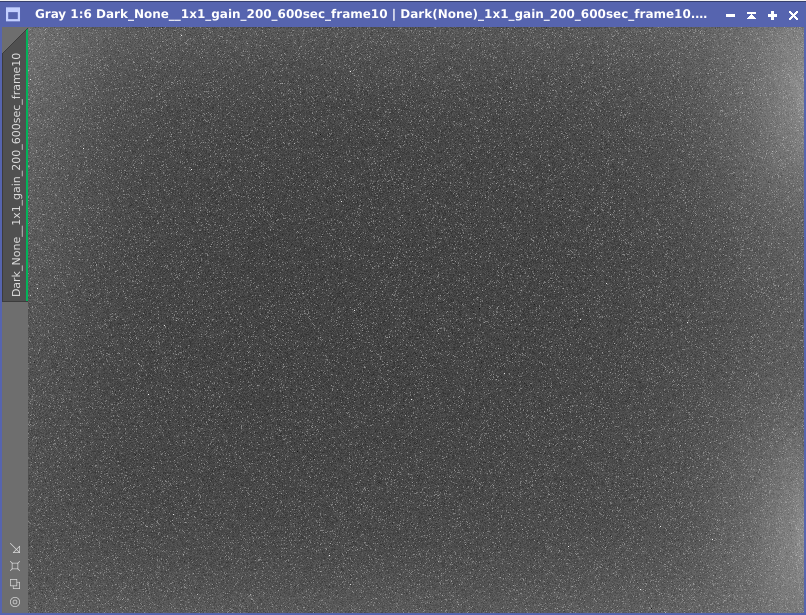
This one dark frame image shows 3 things:
- There is a general brightness in the four corners. This is amp glow. The longer duration of an exposure, the greater impact amp glow has
- The random noise in the rest of the image is electronic noise from the camera.
- Abnormally bright pixels throughout the image (only a few) are hot pixels. These are pixels on the camera that are always on, regardless if they capture light.
This noise can easily be subtracted (removed) from images during the preprocessing phase of astrophotography. Astrophotography image processing software subtracts the dark frame’s captured noise pattern from each light frame (light frames are the images taken of celestial objects). This process effectively removes the unwanted noise, revealing a cleaner and sharper image of the object.
Dark Frames are one of the most critical types of calibration frames (Bias, Dark, Flat, Dark Flat) to use for astrophotography because:
- Enhanced Detail: Reduced noise allows the faint details of the astrophotography object to become more visible
- Smoother Backgrounds: By eliminating noise, dark frames lead to smoother and cleaner backgrounds, making the object stand better
- Accurate Colors: Noise can introduce unwanted color casts to images. Subtracting dark frames helps maintain the true colors of the object
Capturing
Dark Frames
Many cameras built specifically for astrophotography have integrated cooling capabilities to reduce heat buildup during exposures. To reap the benefits of dark frames, capture several (typically 25-50) dark frame images with the same exposure time, gain, offset, binning, and camera temperate (if possible).
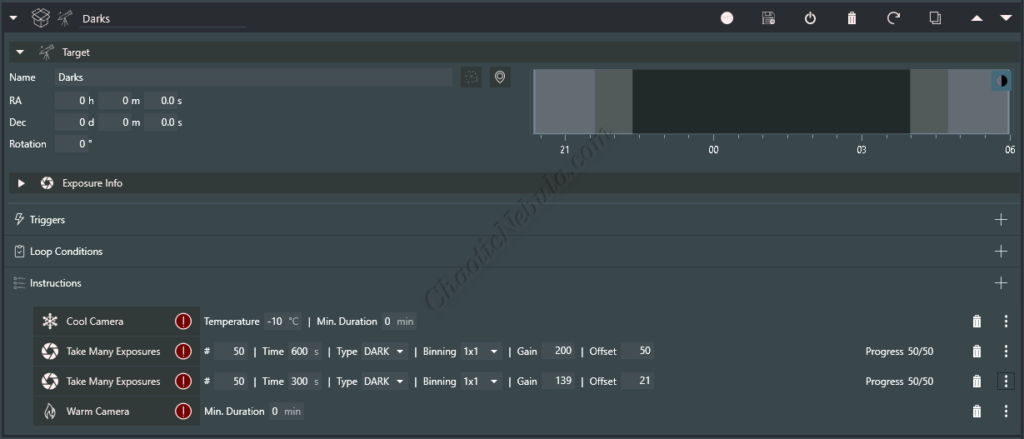
For example, when capturing narrowband images (hydrogen-alpha, oxygen-III, and sulfur-II), two sets of dark frames are captured. And when capturing broadband images (red, green, and blue), two additional sets of dark frames are captured
| Type | Duration | Binning | Gain | Offset | Temp |
| Narrowband | 600 seconds | 1×1 | 200 | 139 | -10C |
| Narrowband | 600 seconds | 1×1 | 200 | 139 | -30C |
| Broadband | 300 seconds | 1×1 | 139 | 21 | -10C |
| Broadband | 300 seconds | 1×1 | 139 | 21 | -30C |
Two different temperatures are used, which equate to summer and winter astrophotography.
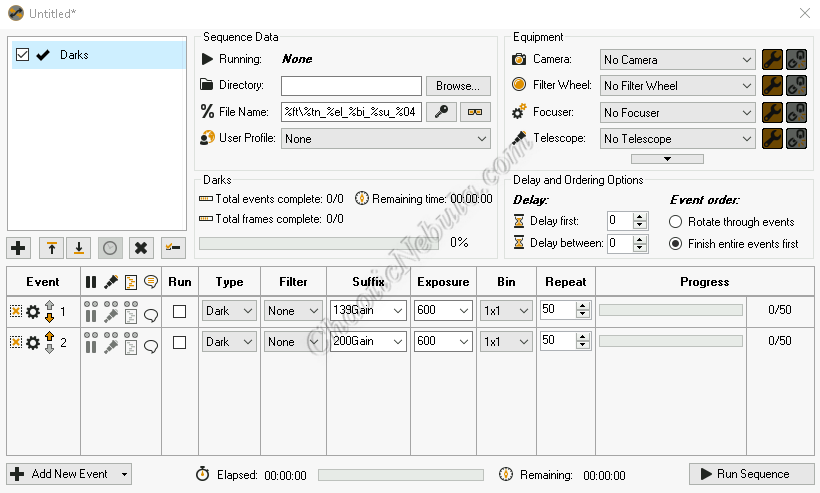
All of these parameters can easily be setup in astrophotography image capturing tools like N.I.N.A. and Sequence Generator Pro.
Processing
Dark Frames
Once the 25-50 dark frames are captured, they need to get integrated into a single master dark frame image. Within PixInsight, this can be automated by using the Weighted Batch Preprocessing Script or manually. Details on the automated approach are found in the following guide.
For manual integration, the PixInsight Image Integration process (Process – Image Integration – Image Integration) is used.
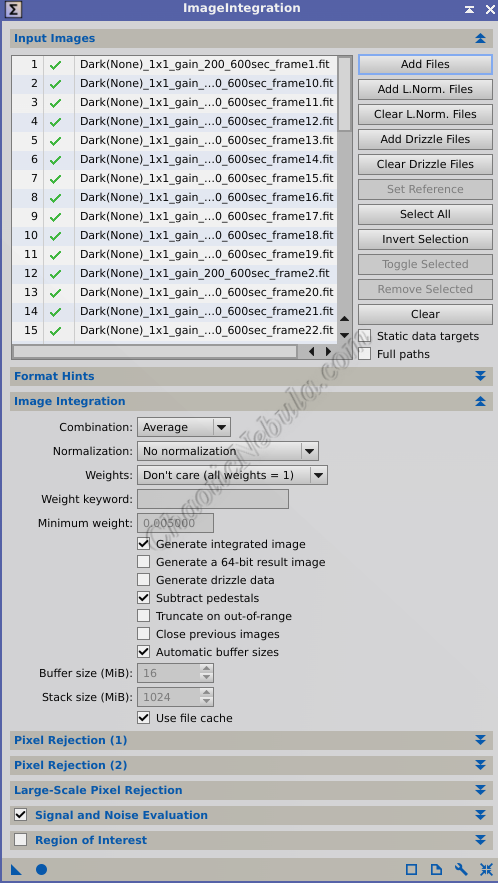
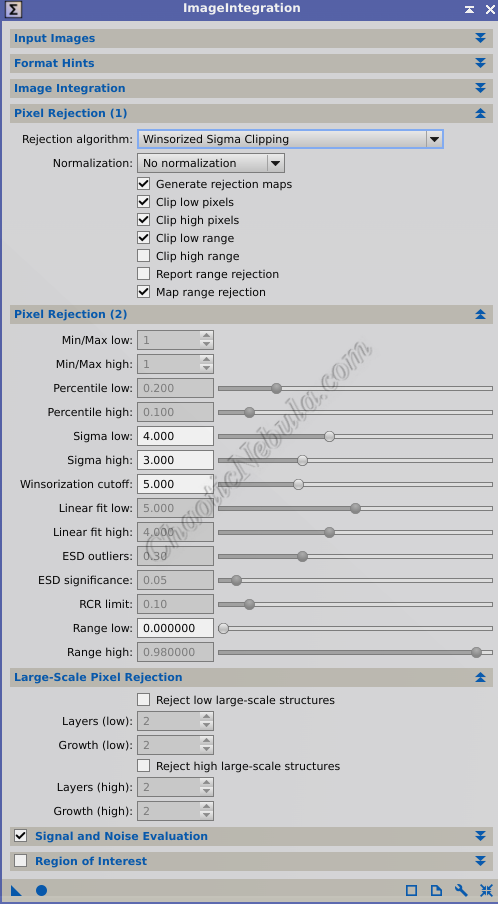
The settings to use to create a master dark frame are as follows:
- Image Integration
- Combination: Average. Averaging multiple dark frames helps to smooth out random noise present in each individual frame.
- Normalization: No normalization. Normalizing the data would alter the noise characteristics dark frames are trying to capture.
- Weights: Don’t care (all weights = 1). By treating each frame equally, the final master dark frame is less susceptible to the influence of outliers or anomalies present in individual frames
- Generate integrated image: Enabled
- Pixel Rejection (1)
- Rejection Algorithm: Winsorized Sigma Clipping. It is the optimal rejection algorithm for large sets of images.
- Normalization: No normalization
- Clip low pixels: Enabled. Helps mitigate the influence of extreme values in the darker pixels.
- Clip high pixels: Enabled. Helps mitigate the influence of extreme values in the brighter pixels.
- Sigma low: 4.00. Any pixel value more than 4 standard deviations below the mean will be considered outliers and potentially clipped
- Sigma high: 3.00. Any pixel value more than 3 standard deviations above the mean will be considered outliers and potentially clipped
- Winsorized cutoff: 5.00. Establishes percent limits on how many pixels can be cut at the low and high end. A cutoff of 5% would indicate that the lowest and highest 5% of values in the dataset will be replaced with values at the 5th and 95th percentiles, respectively.
This process creates a master dark frame.
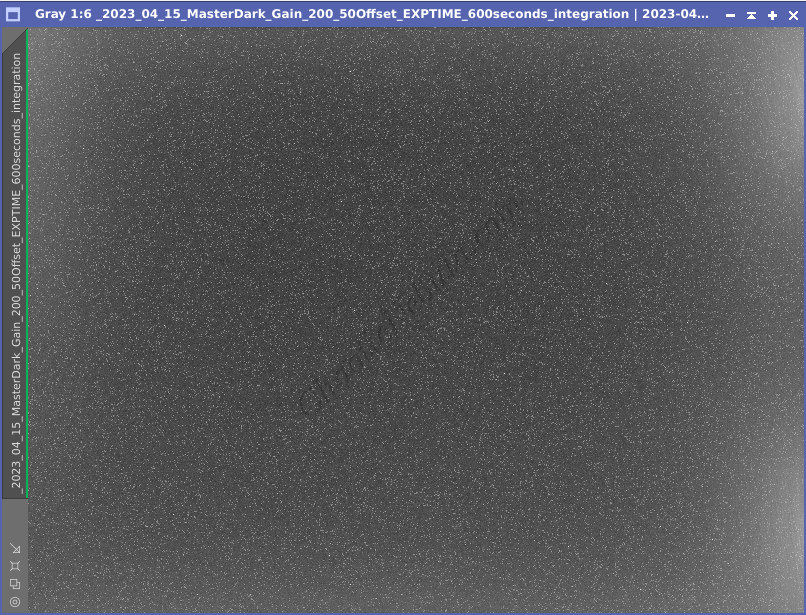
When this gets applied, each light frame has the dark frame subtracted.
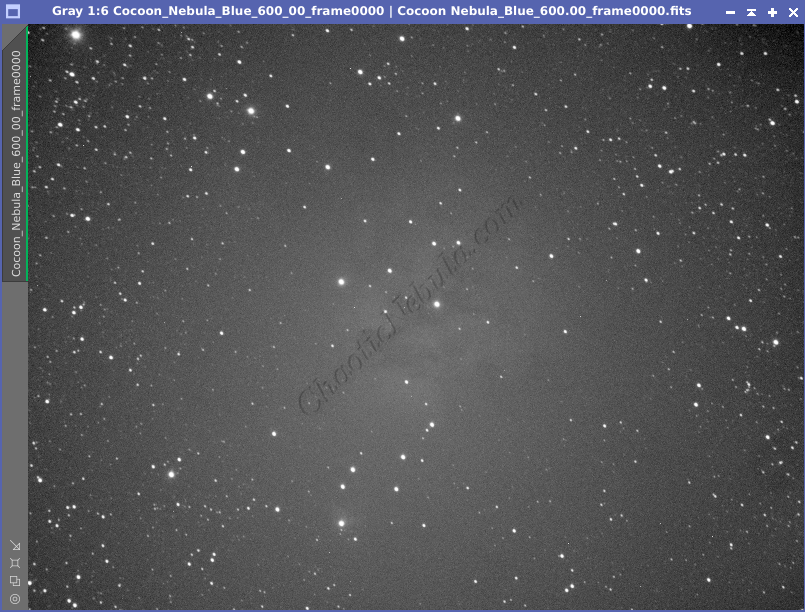
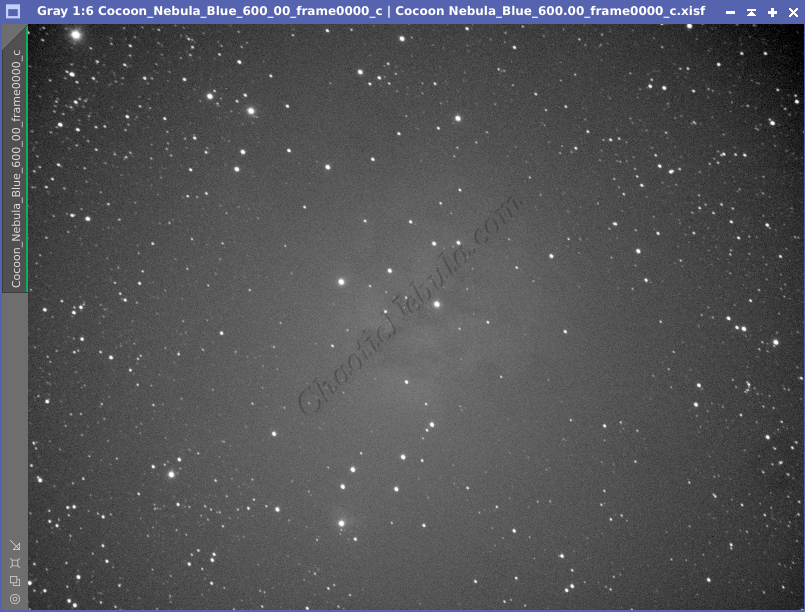
From the example, the edges are adjusted slightly and the hot pixels within the field are also removed (bright pixels).
Tips
Capturing dark frames is crucial in astrophotography to help remove sensor noise and hot pixels from the final image. Here are some tips to ensure effective dark frame captures:
- Make sure no light is reaching the camera.
- Run the dark frame capture sequence during cloudy nights when the telescope is not being used.
- Rebuild the dark frame library every few years (2-3) because the camera’s sensor can change as it ages.
What’s Next
With a master dark calibration frame created, image processing can continue based on the respective workflow: