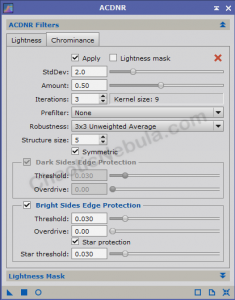
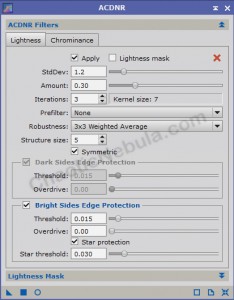
Towards the end of the image processing workflow, there is one more application of noise reduction. All of the previous image processing steps might have introduced additional noise into the color portion of the image (chrominance). Using PixInsight ACDNR process will help reduce color noise. But at this point, the final round of noise reduction will be minimal. In fact, you might not be able to tell the difference unless you zoom in significantly.
Note: The remainder of the adjustments are minimal.
ACDNR Chrominance
This round of noise reduction uses ACDNR and we want to focus our efforts on small scale noise in chrominance. This will help correct color noise where pixels that are side-by-side won’t have drastic color variations.
Mask: You will want to create a range mask to protect the very brightest areas of the image.
Create a few preview windows on your image focusing on
- Transitions: Create a preview on areas where there is a transition from the brightest areas
- Background: Create a preview on areas where this is mostly background data
A good starting point for the settings are (verify Lightness is not enabled):
First try using the default settings in place an turn on real-time preview mode. You are looking for small improvements in color noise reduction.
- Amount: Adjust the amount higher if you are unable to see any improvement in color noise
- StdDev: If color noise is still present, increase the standard deviation until the color noise improves.
Once you find the right level, apply to the entire image.
Comparing the results shows a minimal improvement, which is what you need at the final stage of processing.


At this scale, chances are slim you will be able to see a difference. But if you zoom in, you can just slightly see a smoother background

