While the urge to stretch an image to showcase the faint details around the object can be strong, resist the temptation. Doing so often leads to an undesirable outcome: an overexposed background. Overexposing drowns out the delicate wisps you were trying to emphasize, creating an image with a flat and unrealistic look. The background details become obscured by a wash of bright white or an unnatural color cast. Instead, focus on a selective stretch of the luminance channel.
Creating a selective mask localizes the enhancements to the faint details within the image. The faint areas also lack a strong color hue, requiring the use of a luminance channel. This approach preserves the intricate details while maintaining a dark background.
The goal of the selective stretch in this example was to maintain the background while brightening the faint limbs around the galaxies.
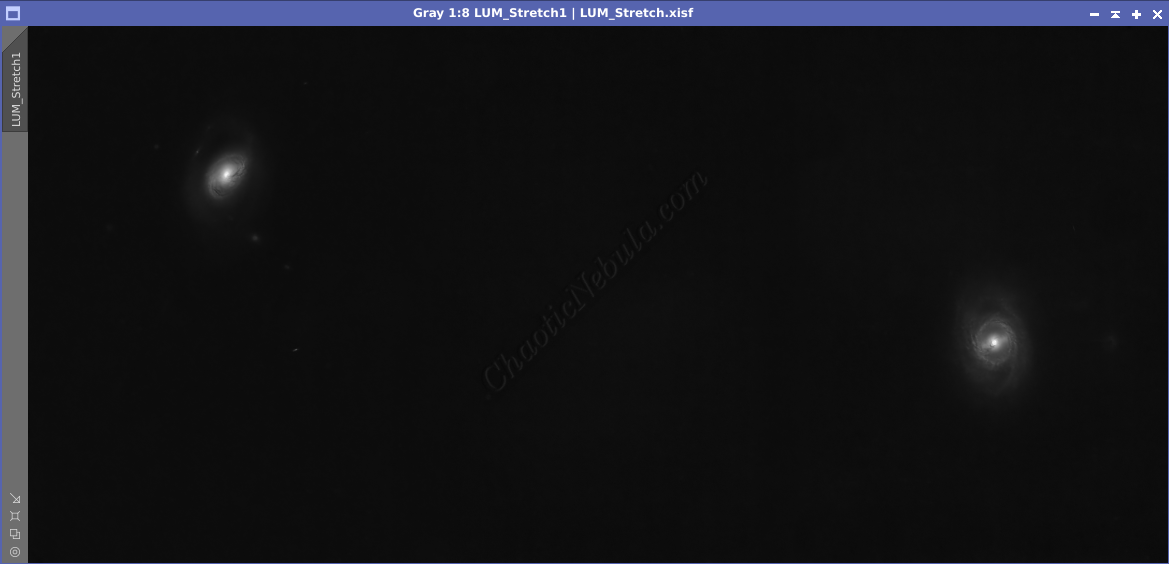
Note: Before applying a selective stretch, the luminance image must have already undergone a normal stretch.
Selective Mask
To make the selective stretch work correctly, a range mask is required. Creating a range mask for the selective stretch is a two-step process.
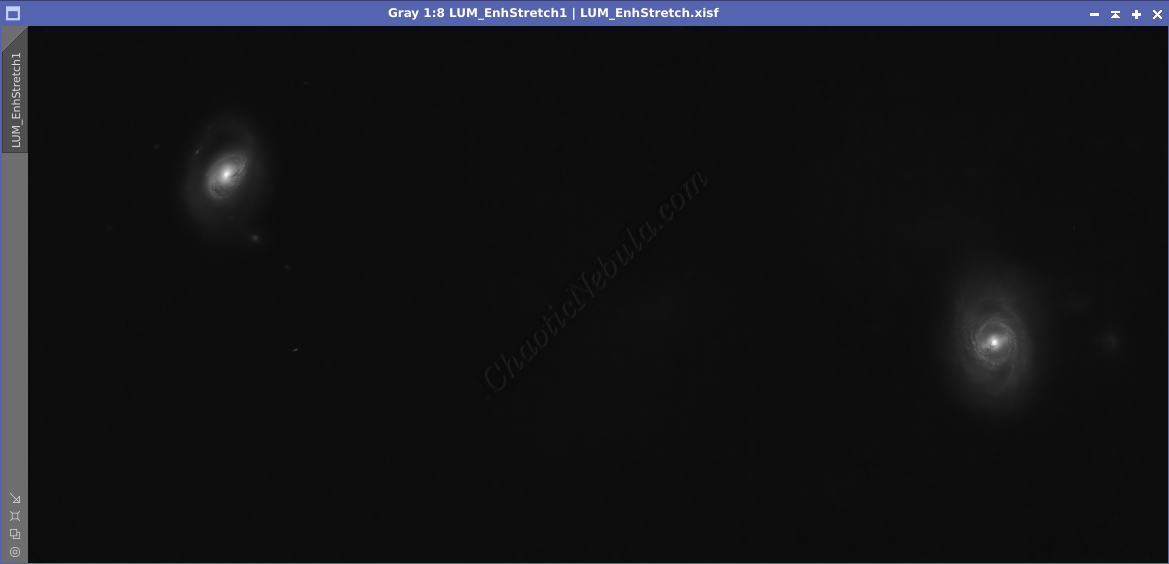
First, the luminance channel’s dynamic range is too narrow making it extremely difficult for the range mask process to select the faint details without also incorporating the background.
To overcome this, a clone of the luminance channel gets stretch further with Histogram Transformation (Process – Intensity Transformation – Histogram Transformation) to expand the dynamic range.
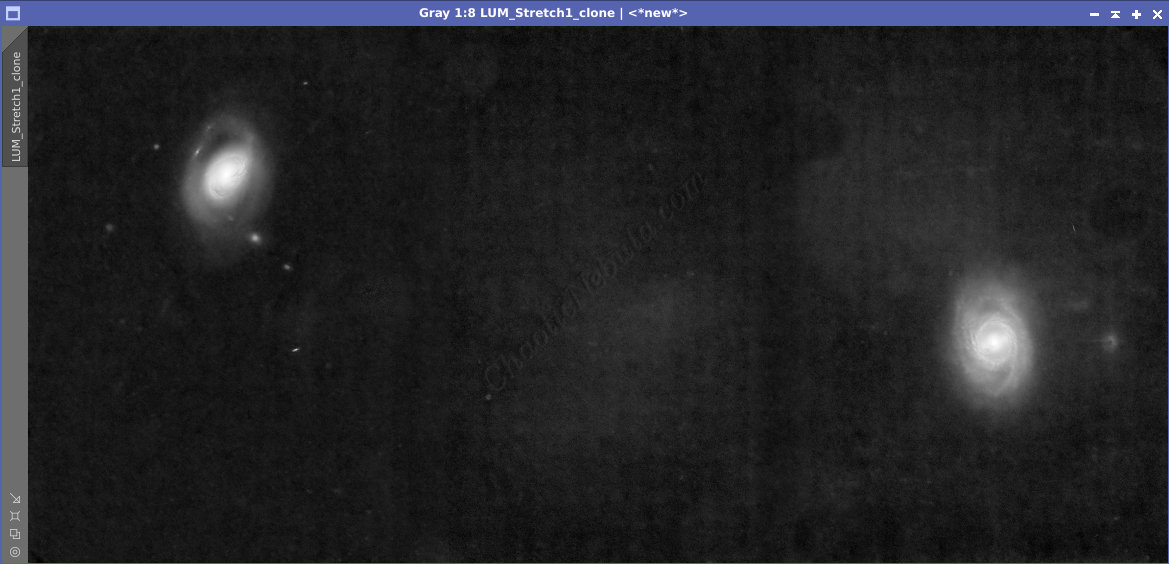
By expanding the dynamic range, the faint structure on the outer edges of the galaxies is now more clearly visible.
This makes it easier for the Range Selection process (Process – Mask Generation – Range Selection) to select.
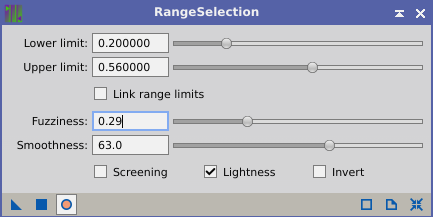
To create the selective mask, use the following guidelines for the Range Selection process (adjust the settings in the following order with live preview enabled):
- Screening: Disabled. To create a smoother transition, all selective areas need to receive the same increase in intensity levels
- Disabled: The pixels values in a range mask are either on/off.
- Enabled: The pixel values in the range mask reflect the pixel’s intensity levels.
- Fuzziness: By increasing the fuzziness, the mask creates a smoother transition items inside and outside of the mask area. A range between 0.2 and 0.3 often works.
- Smoothness: Due to the low signal strength of the area, there is little detail to protect. Selecting a high smoothness level creates a smoother stretch. A value over 0.6 is desirable.
- Lower Limit: Sets the limit for incorporating shadows into the mask. Adjust this up to remove the background while maintaining the faint details of the object.
- Upper Limit: Lower the limit to remove the highlights (bright areas) from the mask. This prevents overstretching the bright areas and clipping pixels. As the upper limit decreases, the lower limit requires readjustments.
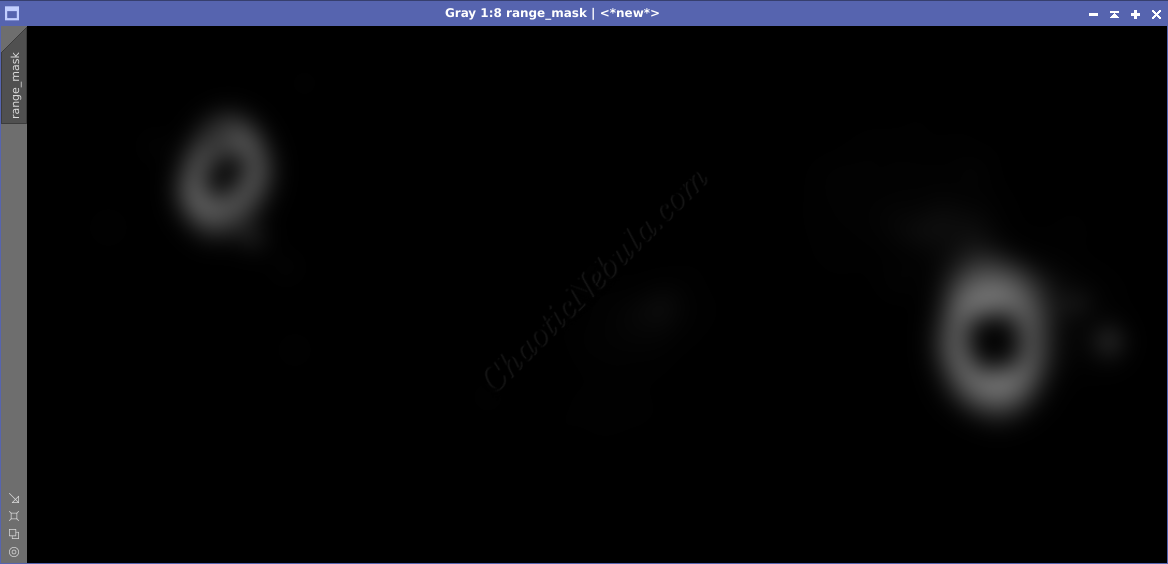
The range selection mask for the selective stretch focuses on the structure surrounding the galaxies. However, a few brighter patches also appear outside of the main focus areas. The Clone Stamp process (Process – Painting – Clone Stamp) can easily remove those if desired.
Selective Stretch
Once the selective range mask is created and applied to the luminance channel, Histogram Transformation is used to selectively brighten (stretch) the faint structure of the object.
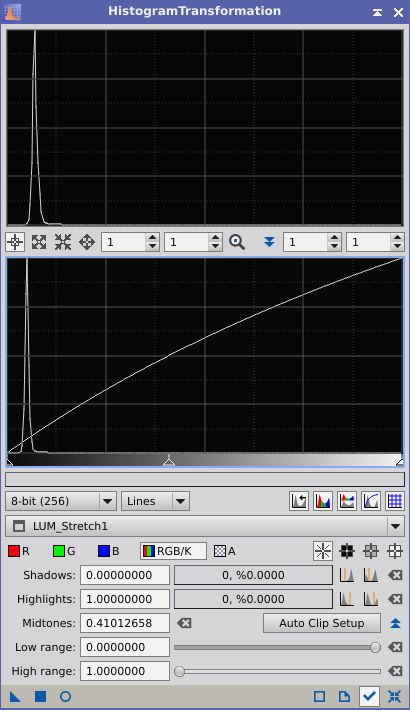
The selective stretch is very subtle or else it will look artificial. The faint structure needs to blend smoothly with the bright area of the object and the dark background. In Histogram Transformation, simply move the mid-tone slider (middle triangle) to the left until the desired brightness is achieved.
Next Steps
Save this file as the new Luminance image and continue on with the luminance workflow.